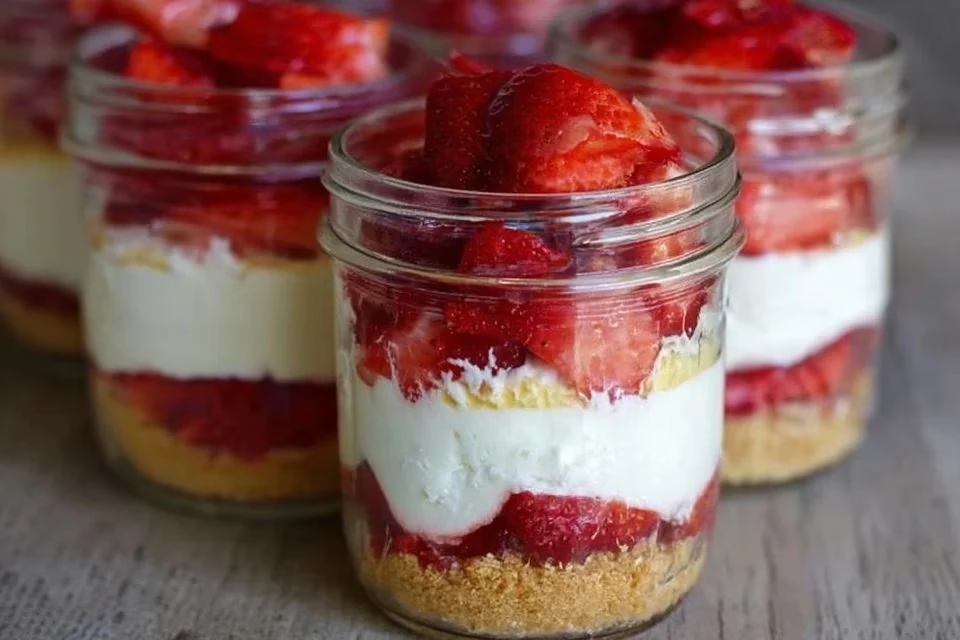
There’s something comforting about a dessert that comes together effortlessly, especially after a long day. This no-bake cheesecake offers a delightful combination of fresh strawberries and zesty lemon, layered in a jar for an appealing presentation. It’s perfect for weeknights when you crave something light yet satisfying or during weekends when you want to treat yourself and others. Whether it’s a gathering with friends or a quiet moment at home, these jars bring a refreshing sweetness that’s sure to please. Let’s dive into making this simple indulgence.
Why You’ll Love This Recipe Healthy No-Bake Strawberry Lemon Cheesecake Jars
This recipe shines for its ease and reliability, transforming simple ingredients into a soothing dessert. The balanced flavors of strawberries, lemon, and creamy cheese offer comfort while still being light enough for any occasion. Healthy No-Bake Strawberry Lemon Cheesecake Jars are practical for everyday life, requiring minimal effort for a satisfying treat that can be enjoyed anytime.
Kitchen Tools You’ll Need
- Mixing bowl
- Electric mixer or whisk
- Measuring cups
- Scraper or spatula
- Jars or serving cups
Ingredients
- 2 cups fresh strawberries, chopped (for sweetness and moisture)
- 1 cup cream cheese, softened (provides creaminess and structure)
- 1/2 cup Greek yogurt (adds tanginess and smooth texture)
- 1/4 cup honey or maple syrup (natural sweetness)
- 1 tablespoon lemon juice (brightens flavors)
- 1 teaspoon vanilla extract (enhances overall flavor)
- 1 cup crushed graham crackers (adds crunch and base)
- 2 tablespoons melted butter (binds graham cracker mixture)

How to Make Healthy No-Bake Strawberry Lemon Cheesecake Jars
Step 1. Start by preparing your strawberries. Wash and chop them into small pieces, aiming for a consistency that will incorporate well into your cheesecake layers. Set the chopped strawberries aside, allowing some moisture to develop, which will enhance their flavor.
Step 2. In a mixing bowl, combine the softened cream cheese and Greek yogurt. Using an electric mixer or a whisk, blend them together until the mixture is smooth. You want to achieve a creamy texture that will form the base of your cheesecake filling.
Step 3. Add the honey or maple syrup to the cream cheese mixture, along with the lemon juice and vanilla extract. Continue to mix until everything is thoroughly combined, ensuring that the sweet and tangy flavors blend well with the creamy base. The mixture should be smooth and pourable.
Step 4. In a separate bowl, mix the crushed graham crackers with the melted butter. Stir until all the crumbs are evenly coated and have a slight dampness. This mixture will create the crust layer that adds both texture and flavor to your jars.
Step 5. To build your cheesecake jars, start by adding a layer of the graham cracker mixture to the bottom of each jar. Use a spoon or your fingers to gently press it down, creating a solid base for the rest of the ingredients.
Step 6. Next, spoon a generous layer of the cream cheese mixture on top of the graham cracker crust. Spread it evenly, filling the jars about halfway, as there will be more layers to add. Watch for a smooth surface that indicates an even distribution.
Step 7. Follow with a layer of chopped strawberries, distributing them evenly across the cream cheese layer in each jar. This layer not only adds flavor but also visual appeal, as the bright red strawberries contrast beautifully with the creamy filling.
Step 8. Repeat the layering process by adding another layer of the cream cheese mixture over the strawberries, ensuring it covers them completely. You can smooth the top with a spatula for a neat finish, aiming for a balanced look.
Step 9. Finally, Repeat the graham cracker base and cream cheese layers, finishing off with the remaining strawberries at the top. The last layer of strawberries will be for garnish, adding a fresh touch to the presentation.
Step 10. Once assembled, cover the jars with lids or plastic wrap and place them in the refrigerator. Allow them to chill for at least two hours to firm up, which helps the flavors meld beautifully.

Serving Suggestions
These jars can serve as a delightful breakfast option, with their creamy layers and fresh fruit providing a satisfying start to the day. They also work well for snacks, whether enjoyed alone or shared with family. If you have leftovers, they keep well in the fridge, making them a convenient dessert for unexpected guests or a sweet treat for yourself later on.
Pro Tips for Best Results
- Soften the cream cheese properly for easier mixing to avoid lumps.
- Use fresh strawberries for the best flavor; frozen ones may be too watery.
- Allowing the jars to chill longer enhances the texture and flavor melding.
- Adjust sweetness based on your preference for honey or maple syrup.
- Ensure the graham crackers are finely crushed for a better crust.
- Layer gently to maintain a clean presentation in the jars.
Common Mistakes to Avoid
- Not Softening Cream Cheese: Using cold cream cheese can result in a lumpy filling. Make sure it’s at room temperature for a smooth blend.
- Overmixing the Cream Cheese Mixture: Mixing too vigorously can incorporate too much air, leading to an undesirable texture. Blend until just combined for optimal creaminess.
- Skipping the Chilling Step: If you serve the jars prematurely, the consistency won’t hold together. Allow ample chilling time for the best experience.
- Using Wet Strawberries: Using strawberries that are too ripe can lead to excess moisture. Pat them dry before chopping to maintain balance in the jars.
- Making Big Chunks of Grahams: Large pieces of graham crackers won’t bind well and could create an unmanageable texture. Make sure to crush them finely.
- Not Covering the Jars: Leaving them uncovered in the fridge can result in dryness or a hard top layer. Always keep them covered to maintain freshness.
Variations & Substitutions
For a different flavor twist, consider using different fruits like blueberries or raspberries. You can also experiment with flavored yogurts or alternative sweeteners to suit your taste. Using a cookie base instead of graham crackers can add variety and create a fun crunch.
Storage & Reheating
Store the prepared jars in the refrigerator for up to four days for optimal freshness. If you want to keep them longer, consider tightly covering and placing them in the freezer; however, the texture may change upon thawing. When ready to enjoy, simply pull them from the fridge or freezer, letting them sit for a few minutes at room temperature if needed.
Nutrition Information
- Calories: 250
- Total Fat: 12g
- Saturated Fat: 7g
- Carbohydrates: 28g
- Fiber: 1g
- Sugar: 15g
- Protein: 4g
- Sodium: 150mg
Frequently Asked Questions
Can I make this recipe ahead of time?
Yes, these jars can be made a day in advance. They actually benefit from a little time in the refrigerator as it allows the flavors to meld together. Just be sure to keep them covered to maintain freshness.
How long does it last in the fridge?
Stored properly, these cheesecake jars will last in the refrigerator for up to four days. Always check for any changes in the appearance or smell before consuming.
Can I freeze this recipe?
While you can freeze them, the texture may change once thawed. If you choose to freeze, wrap them tightly to avoid freezer burn and consume them within a month for best quality.
What can I substitute for one ingredient?
If you lack Greek yogurt, regular yogurt can work in a pinch. The texture will be slightly different, but it will still provide creaminess. Just ensure it’s not flavored or sweetened for the best results.
Why didn’t my recipe turn out as expected?
Common issues stem from incorrect proportions or not chilling the jars properly. Make sure to follow the measurements closely and allow enough time for the cheesecake to firm up in the refrigerator.
Final Thoughts
Making Healthy No-Bake Strawberry Lemon Cheesecake Jars is a straightforward process that provides a satisfying dessert experience. The combination of flavors and textures creates a delightful treat that can easily fit into any part of your day. It’s all about enjoying the little moments over a tasty dessert—no fuss, just simple, comforting flavors waiting to be shared or savored alone.

Healthy No-Bake Strawberry Lemon Cheesecake Jars
Ingredients
For the cheesecake filling
- 1 cup cream cheese, softened Provides creaminess and structure
- 1/2 cup Greek yogurt Adds tanginess and smooth texture
- 1/4 cup honey or maple syrup Natural sweetness
- 1 tablespoon lemon juice Brightens flavors
- 1 teaspoon vanilla extract Enhances overall flavor
- 2 cups fresh strawberries, chopped For sweetness and moisture
For the crust
- 1 cup crushed graham crackers Adds crunch and base
- 2 tablespoons melted butter Binds graham cracker mixture
Instructions
Preparation
- Wash and chop the strawberries into small pieces and set aside.
- In a mixing bowl, combine the softened cream cheese and Greek yogurt. Blend until smooth.
- Add honey or maple syrup, lemon juice, and vanilla extract to the cream cheese mixture and mix until well-combined.
- In a separate bowl, mix crushed graham crackers with melted butter until evenly coated.
Assembly
- Layer the graham cracker mixture at the bottom of each jar, pressing it down lightly.
- Add a layer of the cream cheese mixture on top of the graham cracker crust, filling the jars halfway.
- Distribute the chopped strawberries evenly over the cream cheese layer.
- Repeat the layering process with more cream cheese mixture, then the remaining strawberries on top as garnish.
Chilling
- Cover the jars and refrigerate for at least 2 hours to firm up before serving.


