Creating delicious mini cheesecakes can feel like a special occasion, even when indulging during the week. These treats are perfect for cozy weeknight desserts, weekend gatherings, or even for quiet moments spent savoring a sweet bite. Their simplicity makes them accessible for any home cook, while their comforting flavors wrap you in warmth. As you immerse yourself in this recipe, you’ll find there’s something wonderfully grounding about crafting such delightful desserts. Let’s dive into this comforting experience together.
Why You’ll Love This Gluten-Free Mini Cheesecakes
These gluten-free mini cheesecakes offer ease and reliability, making them a great addition to your dessert repertoire. With their creamy texture and balanced flavors, they provide a comforting treat that everyone can enjoy. They’re practical for everyday situations, whether shared with family or enjoyed as a personal indulgence. You’ll find that these mini cheesecakes are as satisfying to make as they are to eat.
Kitchen Tools You’ll Need
- Muffin tin
- Mixing bowls
- Electric mixer
- Rubber spatula
- Measuring cups and spoons
Ingredients
- 1.25 cups gluten-free graham cracker crumbs (adds structure and crunch)
- 2 tablespoons light brown sugar (enhances sweetness and flavor)
- 5 tablespoons butter, melted (provides moisture and richness)
- 16 oz cream cheese, room temperature (gives creamy texture)
- 0.5 cups sour cream, room temperature (adds tanginess and creaminess)
- 2 large eggs, room temperature (binds ingredients for structure)
- 0.5 cups granulated sugar (sweetens and balances flavors)
- 2 teaspoons pure vanilla extract (imparts fragrance and depth)
- 1 teaspoon lemon juice (adds brightness and balances richness)

How to Make Gluten-Free Mini Cheesecakes
Step 1. Preheat your oven to 325°F. Preparing your oven ensures it reaches the right temperature for baking, which is crucial for achieving the ideal texture. This temperature allows the cheesecakes to set properly without overcooking them, creating a creamy center.
Step 2. In a mixing bowl, combine the gluten-free graham cracker crumbs and light brown sugar. Mix them until well blended. This step helps to ensure that the sweetness of the sugar is evenly distributed throughout the crumbs, which will form the crunchy base of the cheesecake.
Step 3. Pour the melted butter into the crumb mixture. Using a fork, mix until the crumbs are well coated and have a slightly wet texture. This binding agent will hold your crust together as it bakes, providing a solid structure that complements the creamy filling.
Step 4. Line a muffin tin with cupcake liners. This helps in easily removing the mini cheesecakes once they are baked and cooled. It’s also a great way to ensure a neat presentation, making your cheesecakes look professional and tidy.
Step 5. Divide the crumb mixture evenly among the cupcake liners, pressing down firmly to form a solid crust. Pressing down creates a stable base, so the crust doesn’t crumble when serving. Aim for an even layer across all liners for uniformity.
Step 6. In a separate mixing bowl, beat the room temperature cream cheese with an electric mixer until it’s smooth and free of lumps. A smooth consistency here will make for a creamier filling. Pay attention to the texture; it should feel light and airy after mixing.
Step 7. Add the sour cream, granulated sugar, vanilla extract, lemon juice, and eggs to the beaten cream cheese. Beat until the mixture is well combined. This combination of ingredients contributes to a balanced flavor, with the tanginess of sour cream cutting through the richness of the cream cheese.
Step 8. Once everything is blended, pour the cream cheese mixture over the crusts in the muffin tin, filling each liner almost to the top. Watch for an even distribution to ensure even baking. This layer will create the lovely, creamy body of your mini cheesecakes.
Step 9. Bake in the preheated oven for approximately 18 to 20 minutes, or until the edges are set and the centers are slightly jiggly. The slight jiggle indicates that they’re still creamy in the middle. Keep an eye on them to prevent overbaking.
Step 10. Once done, remove from the oven and let the cheesecakes cool in the muffin tin for about 10 minutes. This cooling period allows the cheesecakes to firm up slightly. You want to avoid transferring them to the refrigerator while they are still steaming, as this can create condensation.
Step 11. After cooling, transfer the cheesecakes to a wire rack to cool completely. This step is important for setting the right texture and allowing any residual heat to dissipate. Keeping them at room temperature initially ensures they set up properly without excess moisture.
Step 12. Finally, chill the mini cheesecakes in the refrigerator for at least 2 hours before serving. Chilling enhances their flavor and texture, allowing the flavors to meld together beautifully. It’s a good idea to let them chill overnight for the best results.
Serving Suggestions
These mini cheesecakes are wonderfully versatile. They make a lovely addition to breakfast alongside fresh fruit or a warm drink. They can also serve as refreshing snacks or desserts after family meals, providing a sweet end to any day. Leftovers can be enjoyed individually or shared at gatherings, making them a practical treat that’s easy to serve.
Pro Tips for Best Results
- Ensure all ingredients are at room temperature to mix smoothly and prevent lumps.
- Press the crust firmly to maintain structure and prevent crumbling during serving.
- Store any leftovers in an airtight container to keep them fresh longer.
- Consider adding a hint of cocoa powder to the crust for a chocolatey twist.
- Use fresh lemon juice for a brighter flavor instead of bottled.
Common Mistakes to Avoid
- Using cold cream cheese: This can lead to a lumpy texture. Always bring your cream cheese to room temperature for a smooth filling.
- Skipping the cooling step: Not allowing the cheesecakes to cool properly can affect the texture. Always let them set in the muffin tin before transferring them.
- Overfilling the liners: This can cause overflow during baking. Fill the liners to about 3/4 full for the best-shaped mini cheesecakes.
- Not chilling long enough: A shorter chilling time may result in a softer texture. Aim for at least 2 hours in the refrigerator to fully set.
- Not evenly mixing the filling: This can result in an uneven flavor and texture. Blend the ingredients thoroughly for a consistent result.
- Baking at the wrong temperature: Baking too hot can cause cracks. Always preheat your oven to ensure the right baking conditions.
Variations & Substitutions
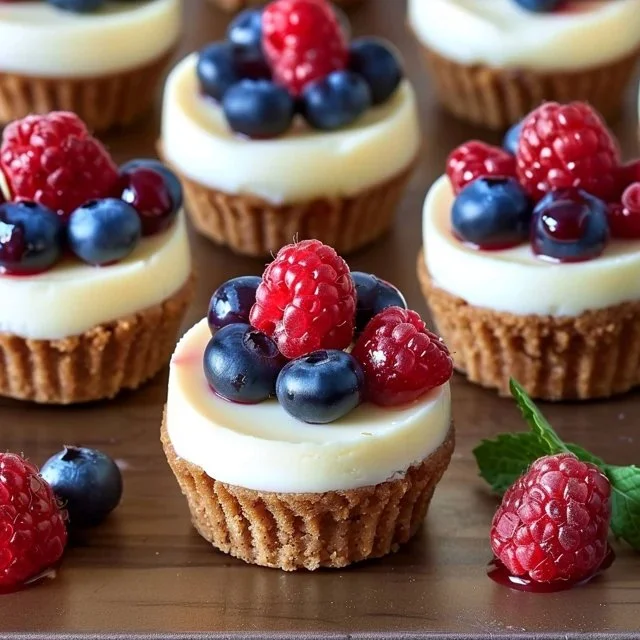
You might consider adding toppings like fresh fruit, chocolate sauce, or even a drizzle of caramel for variety. If you’re looking for a different flavor, try mixing in a bit of cocoa powder for a chocolate version. Alternatively, use flavored extracts for a unique twist on the vanilla.
Storage & Reheating
You can store mini cheesecakes at room temperature for a few hours; however, they should be kept in the refrigerator for longer periods. They can last for up to a week when properly stored in an airtight container. If freezing, wrap each one in plastic wrap before placing them in a freezer-safe container. For best results, allow them to thaw in the refrigerator overnight before enjoying.
Frequently Asked Questions
Can I make this recipe ahead of time?
Yes, these mini cheesecakes can be made a day or two in advance. Just be sure to store them in the refrigerator, and they’ll be ready to serve when you are.
How long does it last in the fridge?
When stored properly in an airtight container, these cheesecakes can last for about a week.
Can I freeze this recipe?
Absolutely, you can freeze them. Just wrap each mini cheesecake individually and place them in a freezer-safe container. They’ll keep well for a couple of months.
What can I substitute for one ingredient?
While this recipe is specific, if you need to adjust for dietary preferences, consider swapping sour cream for Greek yogurt for a similar tangy flavor.
Why didn’t my recipe turn out as expected?
There could be several factors, like not using room temperature ingredients or improperly mixing the filling. Make sure to follow each step carefully for the best results.
Final Thoughts
Making gluten-free mini cheesecakes can be an enjoyable and rewarding experience. The process blends simplicity and comfort, allowing you to create delightful treats for any occasion. With their rich and balanced flavors, these mini desserts offer a satisfying way to end the day. As you savor each bite, you’ll find reassurance in the familiar, comforting nature of this recipe.

Gluten-Free Mini Cheesecakes
Ingredients
Crust Ingredients
- 1.25 cups gluten-free graham cracker crumbs adds structure and crunch
- 2 tablespoons light brown sugar enhances sweetness and flavor
- 5 tablespoons butter, melted provides moisture and richness
Filling Ingredients
- 16 oz cream cheese, room temperature gives creamy texture
- 0.5 cups sour cream, room temperature adds tanginess and creaminess
- 2 large eggs, room temperature binds ingredients for structure
- 0.5 cups granulated sugar sweetens and balances flavors
- 2 teaspoons pure vanilla extract imparts fragrance and depth
- 1 teaspoon lemon juice adds brightness and balances richness
Instructions
Preparation
- Preheat your oven to 325°F.
- In a mixing bowl, combine the gluten-free graham cracker crumbs and light brown sugar. Mix until well blended.
- Pour the melted butter into the crumb mixture. Mix until the crumbs are well coated and have a slightly wet texture.
- Line a muffin tin with cupcake liners.
- Divide the crumb mixture evenly among the cupcake liners, pressing down firmly to form a solid crust.
- In a separate mixing bowl, beat the room temperature cream cheese with an electric mixer until smooth.
- Add the sour cream, granulated sugar, vanilla extract, lemon juice, and eggs to the cream cheese. Beat until well combined.
- Pour the cream cheese mixture over the crusts in the muffin tin, filling each liner almost to the top.
Baking
- Bake in the preheated oven for approximately 18 to 20 minutes, or until the edges are set and the centers are slightly jiggly.
Cooling
- Once done, remove from the oven and let the cheesecakes cool in the muffin tin for about 10 minutes.
- Transfer the cheesecakes to a wire rack to cool completely.
- Chill the mini cheesecakes in the refrigerator for at least 2 hours before serving.


