The gentle comfort of a smooth, creamy cheesecake is something many of us cherish. These mini cheesecakes offer that delightful experience in bite-sized portions. Perfect for weeknight treats, weekend gatherings, or simply to enjoy during quiet moments, they come together with basic ingredients, making them both easy and satisfying. Their versatility allows them to fit seamlessly into any occasion, inviting you to indulge a little without fuss. Let’s dive into this straightforward recipe that will fill your kitchen with inviting aromas.
Why You’ll Love This Recipe Gluten-Free Mini Cheesecakes
These gluten-free mini cheesecakes are straightforward to prepare and reliable for satisfying everyone’s sweet tooth. Their rich, balanced flavors offer a comforting dessert experience, making them an ideal choice for any occasion. You’ll appreciate how these treats can easily be incorporated into your everyday routine while still feeling special.
Kitchen Tools You’ll Need
- Muffin tin
- Mixing bowls
- Electric mixer
- Rubber spatula
Ingredients
- 1¼ cup gluten-free graham cracker crumbs (provides the crust with texture)
- 2 tbsp light brown sugar, packed (adds sweetness and moisture)
- 5 tbsp butter, melted (binds the crust ingredients and adds richness)
- 16 oz. cream cheese, room temperature (creates a creamy filling)
- ½ cup sour cream, room temperature (adds tanginess and moisture)
- 2 large eggs, room temperature (gives structure and stability)
- ½ cup granulated sugar (sweetens the filling)
- 2 tsp pure vanilla extract (enhances the overall flavor)
- 1 tsp lemon juice (adds brightness and balances richness)

How to Make Gluten-Free Mini Cheesecakes
Step 1. Start by preheating your oven to 325°F. This prepares the environment for the cheesecakes to bake evenly. A consistent temperature is crucial for achieving the right texture in the final product.
Step 2. In a bowl, combine the gluten-free graham cracker crumbs and brown sugar. Stir until well mixed. The mixture should resemble wet sand, which indicates the sugar has integrated properly with the crumbs, setting the foundation for a solid crust.
Step 3. Pour in the melted butter and mix until the crumbs are evenly coated. The butter helps bind the crumbs together. When the mixture clumps together when pressed, it’s ready to be formed into crusts.
Step 4. Next, spoon the crumb mixture into a muffin tin, pressing it firmly into the bottom of each cup to create an even layer across the base. The crust should feel compact and hold its shape, providing a sturdy foundation for the creamy filling.
Step 5. Bake the crusts in the preheated oven for about 10 minutes. Watch for a slightly golden color on the edges, which indicates they are set. This step helps develop flavor and ensures a crispy texture.
Step 6. While the crusts bake, beat together the cream cheese and granulated sugar until the mixture is smooth and creamy. This can take a few minutes. Aim for a homogenous consistency without lumps, which will greatly improve the overall texture of the cheesecake.
Step 7. Add in the sour cream, eggs, vanilla extract, and lemon juice. Mix until well incorporated and smooth. This step creates a silky batter that is flavorful and rich. It should be uniform, with a creamy consistency that’s slightly thicker than pancake batter.
Step 8. Once the crusts have cooled slightly, carefully fill each cup with the cream cheese mixture. Fill them just to the top to ensure they rise without overflowing. The filling should be smooth and evenly distributed, providing a beautiful surface when baked.
Step 9. Bake the cheesecakes for around 20 to 25 minutes. Keep an eye on them; they are done when the edges are set, and the centers have a slight jiggle. This is an important sign as overbaking can lead to a dry texture.
Step 10. After baking, allow the mini cheesecakes to cool in the pan for about 10 minutes. This step helps prevent cracks from forming as they cool down. Once cool, you can gently run a knife around the edges to help release them from the pan.
Step 11. Finally, remove the cheesecakes from the muffin tin and place them in the refrigerator to chill completely. Chilling will help them firm up and enhance their flavors, ideally for at least 2 hours before serving.

Serving Suggestions
These mini cheesecakes can be enjoyed in various ways. They make for a delightful breakfast option when paired with fruit or enjoyed as a snack with coffee. They also shine at family meals as an easy-to-serve dessert that appeals to both kids and adults. Any leftovers can be tucked away in the fridge for a sweet treat later in the week—if they last that long!
Pro Tips for Best Results
- Ensure all ingredients are at room temperature for a smoother batter.
- Don’t overbeat the mixture once the eggs are added to avoid incorporation of excess air, which can lead to cracks.
- Use a fine gluten-free graham cracker crumb for better texture in the crust.
- Let the cheesecakes cool gradually to reduce the chance of cracking.
- Serve these chilled for the best flavor and texture.
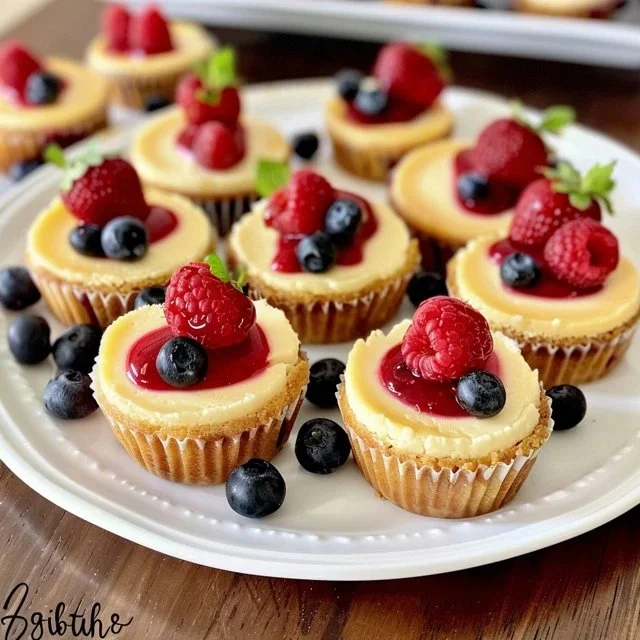
- Consider topping them with fresh fruit or a simple drizzle of chocolate for a little extra flair.
Common Mistakes to Avoid
- Using cold ingredients: Cold ingredients can lead to a lumpy batter. Let the cream cheese, sour cream, and eggs reach room temperature before mixing for a smoother texture.
- Overbaking: When baked too long, cheesecakes can become dry and dense. Monitor closely; they should look slightly jiggly in the center when done.
- Uneven crusts: If the crust isn’t pressed firmly into the muffin tin, it can crumble when serving. Press down hard enough to bind the crumbs together.
- Skipping the cooling step: Removing cheesecakes from the pan while still warm can cause them to crack. Allowing them to cool slightly in the pan helps maintain their shape.
- Not refrigerating before serving: Cheesecakes often taste best chilled. Refrigerating allows flavors to meld and improves overall texture before serving.
- Filling tins too much: Overfilling can lead to the batter overflowing. Keep an eye on the fill level to ensure they bake properly without making a mess.
Variations & Substitutions
If you want to play with flavors, consider adding orange zest for a citrus twist or replacing the vanilla extract with almond extract for a different aroma. You can also lighten the filling by using reduced-fat cream cheese, but it may slightly alter the texture and flavor.
Storage & Reheating
Keep the mini cheesecakes covered in the refrigerator if you plan to enjoy them within a few days. They can be stored at room temperature for a short period but are best kept cool. If you need to freeze them, place them in an airtight container to preserve their texture. To reheat, allow them to come to room temperature, which helps maintain their creaminess without overcooking.
Frequently Asked Questions
Can I make this recipe ahead of time?
Absolutely! These mini cheesecakes are a great make-ahead dessert. You can prepare them a day or two in advance and store them in the fridge until you’re ready to serve.
How long does it last in the fridge?
If stored properly in an airtight container, these mini cheesecakes can last for about 3 to 5 days in the fridge, allowing you to savor them over several days.
Can I freeze this recipe?
Yes, you can freeze these mini cheesecakes. Just make sure they are well-wrapped and stored in an airtight container. They should be eaten within 2 to 3 months for the best quality.
What can I substitute for one ingredient?
If you need to substitute the sour cream, Greek yogurt works well and will provide a similar flavor and texture, while maintaining the cheesecake’s creaminess.
Why didn’t my recipe turn out as expected?
There can be several reasons, such as using cold ingredients, overbaking, or not allowing the cheesecakes to cool properly. Each of these factors can impact texture and flavor, so be mindful of the steps.
Final Thoughts
Making gluten-free mini cheesecakes can be a wonderfully satisfying experience. From mixing the ingredients to indulging in their creamy goodness, each step feels approachable. These little bites of comfort offer a delightful way to end your meal or simply enjoy on their own. The straightforward nature of the recipe makes it easy to return to time and again, creating your own special moments in the kitchen.

Gluten-Free Mini Cheesecakes
Ingredients
For the crust
- 1 1/4 cup gluten-free graham cracker crumbs provides the crust with texture
- 2 tbsp light brown sugar, packed adds sweetness and moisture
- 5 tbsp butter, melted binds the crust ingredients and adds richness
For the filling
- 16 oz cream cheese, room temperature creates a creamy filling
- 1/2 cup sour cream, room temperature adds tanginess and moisture
- 2 large eggs, room temperature gives structure and stability
- 1/2 cup granulated sugar sweetens the filling
- 2 tsp pure vanilla extract enhances the overall flavor
- 1 tsp lemon juice adds brightness and balances richness
Instructions
Preparation
- Preheat your oven to 325°F.
- In a bowl, combine the gluten-free graham cracker crumbs and brown sugar. Stir until well mixed.
- Pour in the melted butter and mix until the crumbs are evenly coated.
- Spoon the crumb mixture into a muffin tin, pressing it firmly into the bottom of each cup.
- Bake the crusts in the preheated oven for about 10 minutes.
Filling Preparation
- While the crusts bake, beat together the cream cheese and granulated sugar until smooth and creamy.
- Add in the sour cream, eggs, vanilla extract, and lemon juice. Mix until well incorporated and smooth.
Baking
- Once the crusts have cooled slightly, carefully fill each cup with the cream cheese mixture.
- Bake the cheesecakes for around 20 to 25 minutes.
- After baking, allow the mini cheesecakes to cool in the pan for about 10 minutes.
- Remove the cheesecakes from the muffin tin and place them in the refrigerator to chill completely for at least 2 hours.


