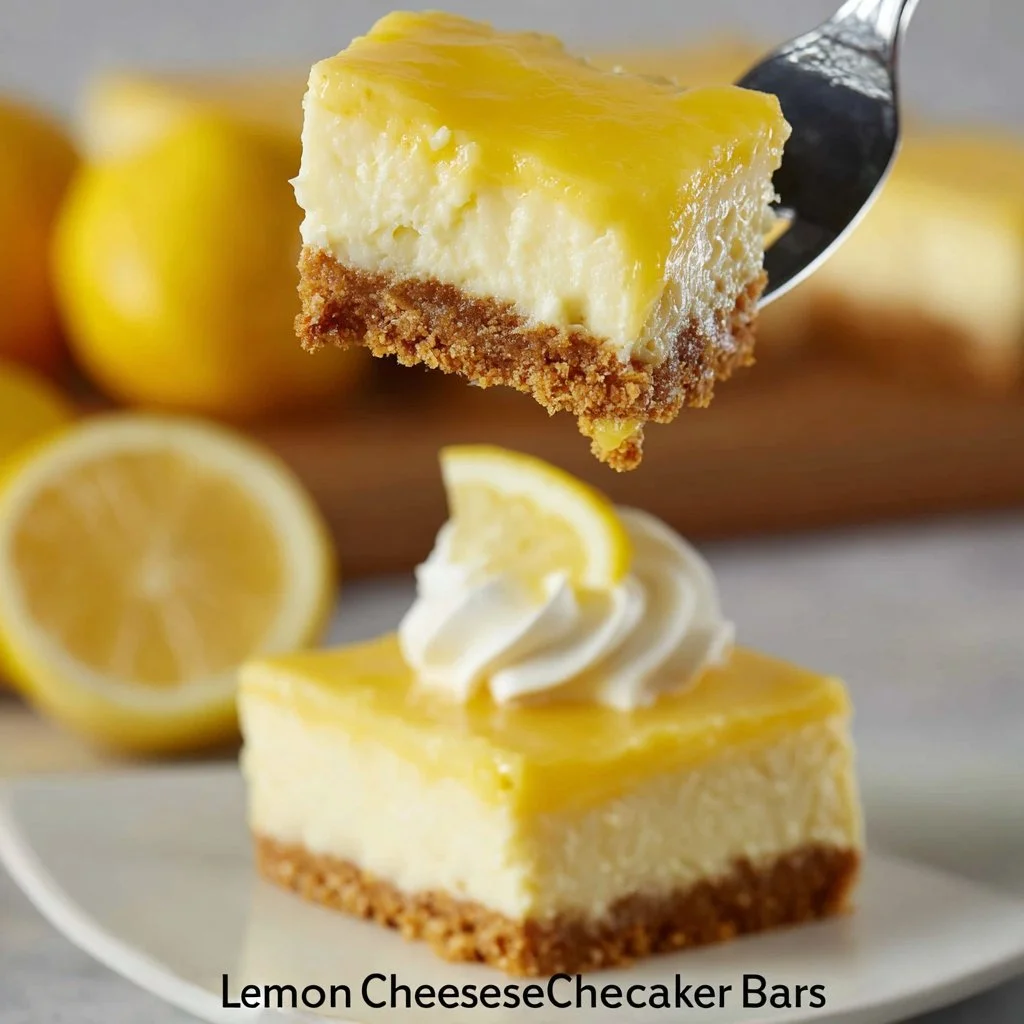
After a long day, there’s something truly comforting about slicing into a dessert that feels like a cozy hug. These lemon cheesecake bars offer a delightful tanginess balanced with creamy richness, making them perfect for enjoying during weeknights, weekends, or gatherings with friends. Their simplicity allows you to whip them up quickly, and they bring a refreshing vibe that fits both casual moments and special occasions. Step into the warmth of your kitchen and enjoy creating these bars.
Why You’ll Love This Tangy Lemon Cheesecake Bars
These Tangy Lemon Cheesecake Bars are not only easy to prepare but also reliably delicious. Their creamy texture paired with a zesty flavor makes for a pleasant treat that fits seamlessly into your everyday routine. Enjoy them as a sweet finish to a family meal or as a satisfying snack throughout the week.
Kitchen Tools You’ll Need
- Mixing bowls
- 9×9-inch baking pan
- Whisk or electric mixer
- Rubber spatula
- Measuring cups and spoons
Ingredients
- Graham cracker crumbs (for a crumbly, base texture)
- Melted butter (helps bind the crust together)
- Sugar (adds sweetness to the crust and filling)
- Full-fat cream cheese (provides a rich, creamy texture)
- Sour cream (adds tanginess and moisture)
- Vanilla extract (enhances flavor depth)
- Lemon extract (contributes a bright, citrus note)
- Large eggs (binds the filling and gives structure)
- Lemon pie filling (provides tangy flavor)
How to Make Tangy Lemon Cheesecake Bars
Step 1. Start by preparing the crust. Mix the graham cracker crumbs with the melted butter and sugar in a bowl until the mixture resembles wet sand. You want the crumbs to hold together when pressed. This step ensures a flavorful, sturdy base that will hold the cheesecake filling.
Step 2. Press the crust mixture firmly into the bottom of a greased 9×9-inch baking pan. Use the back of a measuring cup or your hands to flatten it evenly. This creates a solid foundation for your cheesecake bars. Look for an even surface without gaps or cracks.
Step 3. In a separate mixing bowl, beat the full-fat cream cheese until smooth and creamy. Make sure there are no lumps since this will impact the filling’s texture. This process helps to achieve a velvety consistency, essential for a lovely cheesecake.
Step 4. Add the sour cream, vanilla extract, lemon extract, and sugar to the whipped cream cheese. Mix until everything is well combined. The mixture should be smooth with a homogenous color. This combination balances richness with tanginess for the filling.
Step 5. Incorporate the large eggs one at a time, mixing well after each addition. This ensures even distribution of the eggs throughout the filling. The mixture should look thick and creamy, indicating that it’s well combined and ready for baking.
Step 6. Pour the cream cheese mixture over the prepared crust in the baking pan, smoothing it out with a spatula. Make sure it covers the crust evenly to ensure every bite has a balanced flavor. This layer will rise slightly during baking, resulting in a deliciously creamy filling.
Step 7. Spoon the lemon pie filling over the cream cheese layer. Swirl it gently with a knife or spatula to create a marbled effect, but don’t overmix. This step adds vibrant tangy flavor and visually appealing swirls to your cheesecake bars.
Step 8. Bake the bars in a preheated oven until the filling is set but slightly jiggly in the center. You’ll want to keep an eye on the edges; they should look firm and slightly puffed. This helps ensure that the texture remains creamy after cooling.
Step 9. Remove the baking pan from the oven and let the bars cool completely at room temperature before refrigerating them. Cooling them down allows the flavors to meld, enhancing the overall taste. Be patient; this step is crucial for the final texture.
Step 10. Once chilled, cut into squares. Serve them as an elegant dessert or a cozy snack. The bars should hold their shape and offer a smooth, creamy bite, accentuated by the tangy lemon flavor.

Serving Suggestions
These Tangy Lemon Cheesecake Bars are quite versatile. Enjoy them for breakfast alongside your morning coffee or as a quick mid-afternoon snack. They can serve as a sweet finish to family meals or even as a light dessert to share with friends. If you have leftovers, they make a delightful addition to lunch boxes throughout the week, providing a touch of brightness to each day.
Pro Tips for Best Results
- Ensure the cream cheese is softened at room temperature before mixing to avoid lumps.
- Press the crust firmly into the pan for a denser base to support the creamy filling.
- Allow the cheesecake bars to cool completely in the pan before refrigerating for the best texture.
- Use fresh lemon zest in addition to lemon extract for an extra zing if desired.
- For a thicker filling, consider using extra cream cheese or slightly reducing the amount of lemon pie filling.
Common Mistakes to Avoid
- Using cold cream cheese: Cold cream cheese won’t blend smoothly and may result in lumps. Always let it come to room temperature before mixing.
- Overbaking: Baking too long can lead to a dry filling instead of a creamy texture. Look for a slight jiggle in the center when done.
- Skipping the cooling step: Cutting into warm cheesecake bars can disrupt the texture. Allowing them to cool fully is essential for properly set bars.
- Not pressing crust firmly: A loosely packed crust may crumble when sliced. Make sure to press it down firmly into the pan.
- Overmixing once eggs are added: Overmixing can incorporate too much air, leading to cracks during baking. Mix just until combined after adding eggs.
- Using stale graham crackers: Stale crackers can affect the crust’s flavor and texture. Use fresh ingredients for the best results.
Variations & Substitutions
To mix things up a bit, consider using a flavored pie filling like berry for a different fruity twist. You could also experiment with different extracts, such as almond or coconut, for unique flavor profiles. If you prefer a less tangy dessert, reducing the lemon extract slightly will yield a milder cheesecake.
Storage & Reheating
For room-temperature storage, keep the lemon cheesecake bars covered for a few hours if serving immediately. For longer-lasting freshness, store them in the refrigerator, where they can last several days. If you opt to freeze, wrap the bars tightly in plastic wrap and place them in an airtight container. To reheat, let thaw in the refrigerator overnight, then allow to come to room temperature before serving for the best texture.
Frequently Asked Questions
Can I make this recipe ahead of time?
Yes, these cheesecake bars can be prepared a day or two in advance. Just store them in the refrigerator after fully cooling.
How long does it last in the fridge?
If stored properly in the refrigerator, they should maintain their quality for about 5-7 days.
Can I freeze this recipe?
Yes, you can freeze the cheesecake bars for up to 2-3 months. Make sure to wrap them well to avoid freezer burn.
What can I substitute for one ingredient?
If you do not have lemon extract, you can use additional lemon pie filling for a stronger lemon flavor.
Why didn’t my recipe turn out as expected?
Common issues might include overbaking or not allowing adequate cooling time. Adjusting your methods can help achieve better results next time.
Final Thoughts
Making Tangy Lemon Cheesecake Bars is a simple and rewarding experience that brings a delightful treat to your table. With just a few basic ingredients and steps, you create a dessert that is both refreshing and comforting. Enjoy sharing these bars with loved ones or savoring them quietly at home. The joy of cooking shines through with each bite.

Tangy Lemon Cheesecake Bars
Ingredients
For the crust
- 1 cup Graham cracker crumbs For a crumbly, base texture
- 1/4 cup Melted butter Helps bind the crust together
- 1/4 cup Sugar Adds sweetness to the crust
For the filling
- 16 oz Full-fat cream cheese Provides a rich, creamy texture
- 1/2 cup Sour cream Adds tanginess and moisture
- 1 tsp Vanilla extract Enhances flavor depth
- 1 tsp Lemon extract Contributes a bright, citrus note
- 3 Large eggs Binds the filling and gives structure
- 1/2 cup Lemon pie filling Provides tangy flavor
- 1/2 cup Sugar Adds sweetness to the filling
Instructions
Preparation
- Start by preparing the crust. Mix the graham cracker crumbs with the melted butter and sugar in a bowl until the mixture resembles wet sand.
- Press the crust mixture firmly into the bottom of a greased 9-inch by 9-inch baking pan.
- In a separate mixing bowl, beat the full-fat cream cheese until smooth and creamy.
- Add the sour cream, vanilla extract, lemon extract, and sugar to the whipped cream cheese. Mix until everything is well combined.
- Incorporate the large eggs one at a time, mixing well after each addition.
- Pour the cream cheese mixture over the prepared crust in the baking pan, smoothing it out with a spatula.
- Spoon the lemon pie filling over the cream cheese layer and swirl it gently with a knife or spatula.
Baking
- Bake the bars in a preheated oven until the filling is set but slightly jiggly in the center.
- Remove the baking pan from the oven and let the bars cool completely at room temperature before refrigerating them.
- Once chilled, cut into squares and serve them.


