Pumpkin Magic Bars
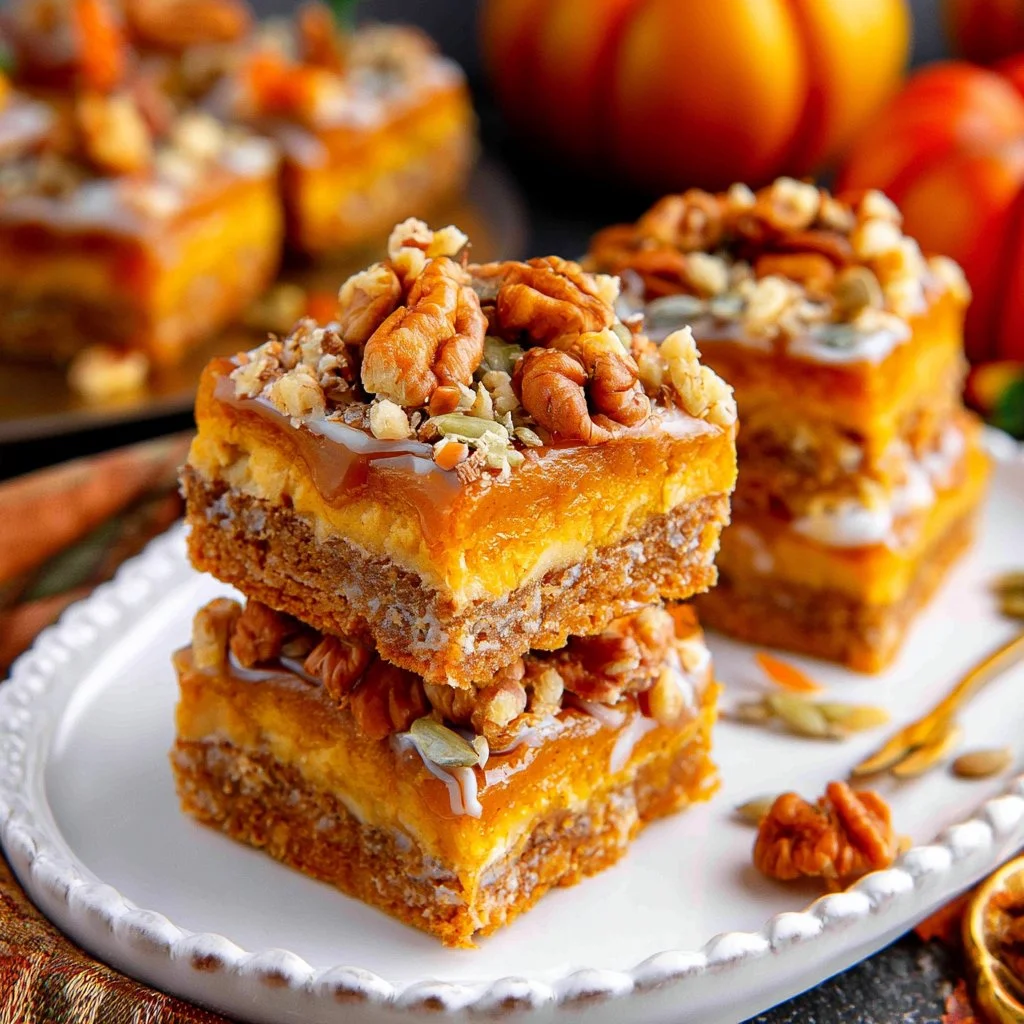
Making a comforting treat is always rewarding, and this recipe offers a delightful balance of flavors and textures. With creamy pumpkin pie filling and a sweet, crunchy topping, each bite is satisfying. As you assemble these bars, you’ll appreciate the simplicity that comes from familiar ingredients like unsalted butter, light brown sugar, and plenty of spices that evoke the warmth of fall. Let’s dive into making these Pumpkin Magic Bars.
Why You’ll Love This Recipe Pumpkin Magic Bars
These Pumpkin Magic Bars are not only easy to prepare, but they also deliver a comforting flavor that combines the sweetness of butterscotch, the crunch of pecans, and the warm spiciness of pumpkin pie spices. The straightforward steps make them a reliable dessert option for gatherings, family snacks, or even breakfast indulgences. With balanced flavors and a practical approach, these bars are sure to impress without requiring a lot of effort.
Kitchen Tools You’ll Need
- Mixing bowl
- Baking dish (11×7)
- Foil
- Cooking spray
- Measuring cups and spoons
- Electric mixer (optional)
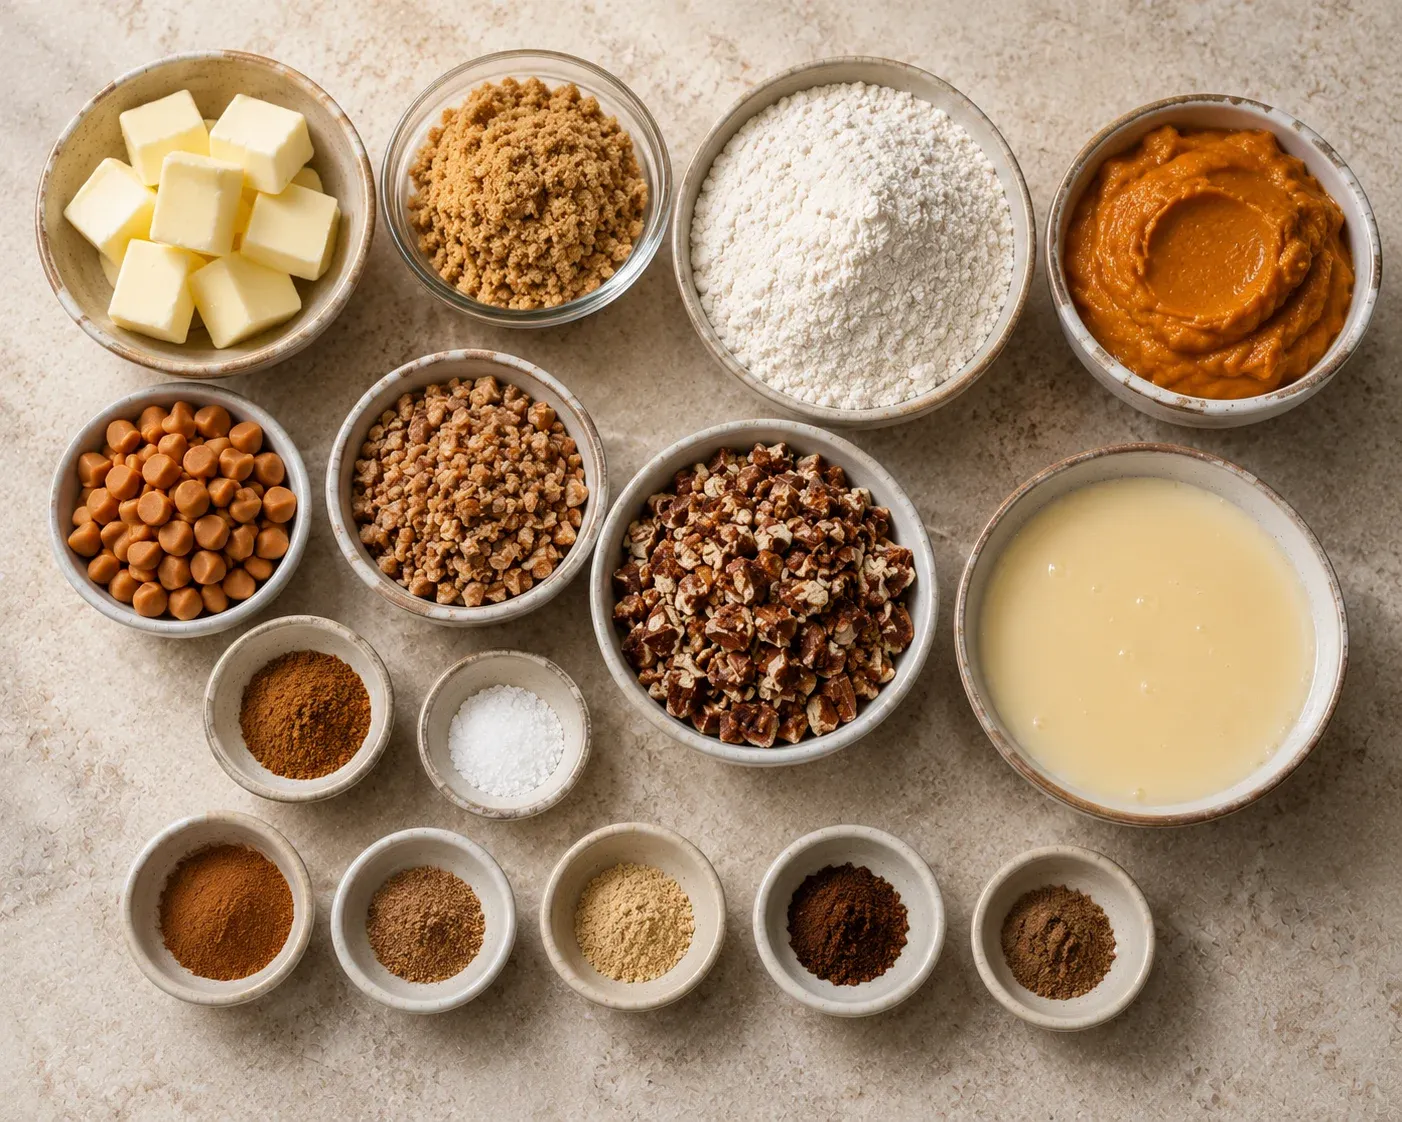
Ingredients
- 1/2 cup unsalted butter (adds richness)
- 1/3 cup light brown sugar packed (for sweetness and moisture)
- 1 cup all-purpose flour (provides structure)
- 1/2 teaspoon pumpkin pie spice (adds warmth and depth)
- Pinch of fine sea salt (balances sweetness)
- 1 cup pumpkin pie filling (contributes creaminess and flavor)
- 11 ounces butterscotch chips (offers sweetness and texture)
- 1 cup toffee bits (adds crunch and a caramel flavor)
- 2 cups chopped pecans (provide nuttiness and crunch)
- 14 ounces sweetened condensed milk (adds moisture and sweetness)
- 2 teaspoons ground cinnamon (enhances warmth and flavor)
- 1/8 teaspoon nutmeg (adds a warm, slightly sweet flavor)
- 1/4 teaspoon ground ginger (provides a bit of spice)
- 1/4 teaspoon ground cloves (adds warmth and depth)
- 1/2 teaspoon ground allspice (offers a complex flavor profile)
How to Make Pumpkin Magic Bars
Step 1. Preheat the oven to 350°F. Prepare an 11×7 baking dish by lining it with foil and spraying the foil with cooking spray. This helps in removing the bars easily after they cool. Ensuring it’s properly greased will prevent sticking and make cleanup easier.
Step 2. In a large bowl, cream together the unsalted butter and light brown sugar until the mixture becomes light and fluffy, which should take about 2 minutes. This blending process is essential as it introduces air into the butter, creating a lighter texture for the crust. Look for it to lighten in color and become smooth.
Step 3. Add the all-purpose flour, pumpkin pie spice, and pinch of salt into the bowl. Mix these ingredients until they are thoroughly combined and there are no dry patches remaining. At this point, the mixture should start to hold together but still appear crumbly. You’ll want to ensure it is uniformly mixed for even baking.
Step 4. Press the mixture firmly into the bottom of the prepared baking dish. This forms the base layer and should be spread evenly across the dish. Aim for a flat and compact layer, which will help it hold together once baked. Bake it in the oven for about 15 minutes until the edges are lightly browned.
Step 5. Once the crust has baked, spread the pumpkin pie filling evenly over the warm crust. Smooth it out with the back of a spoon or a spatula. The warmth of the crust helps the filling spread more easily, and you’ll end up with a lovely layer of creamy pumpkin goodness.
Step 6. Layer the butterscotch chips, toffee bits, and chopped pecans on top of the pumpkin filling in that specific order. Sprinkle them evenly to create a balanced topping that will melt and adhere as it bakes. This combination adds a delightful sweetness contrasted with the nuts’ crunchiness.
Step 7. Pour the sweetened condensed milk over the top, ensuring it flows evenly over the entire surface. This will tie all the layers together and provide additional moisture. You should cover the toppings generously so everything bakes cohesively.
Step 8. Place the dish back in the oven and bake for an additional 30-35 minutes. Look for the top to be golden brown and bubbly, which indicates it’s ready. Keep an eye on the edges to ensure they don’t overbrown.
Step 9. Once baked, remove the dish from the oven and allow it to cool completely at room temperature. To make cutting easier, it’s best to refrigerate the bars for a while. This lets them firm up for cleaner slices.
Serving Suggestions
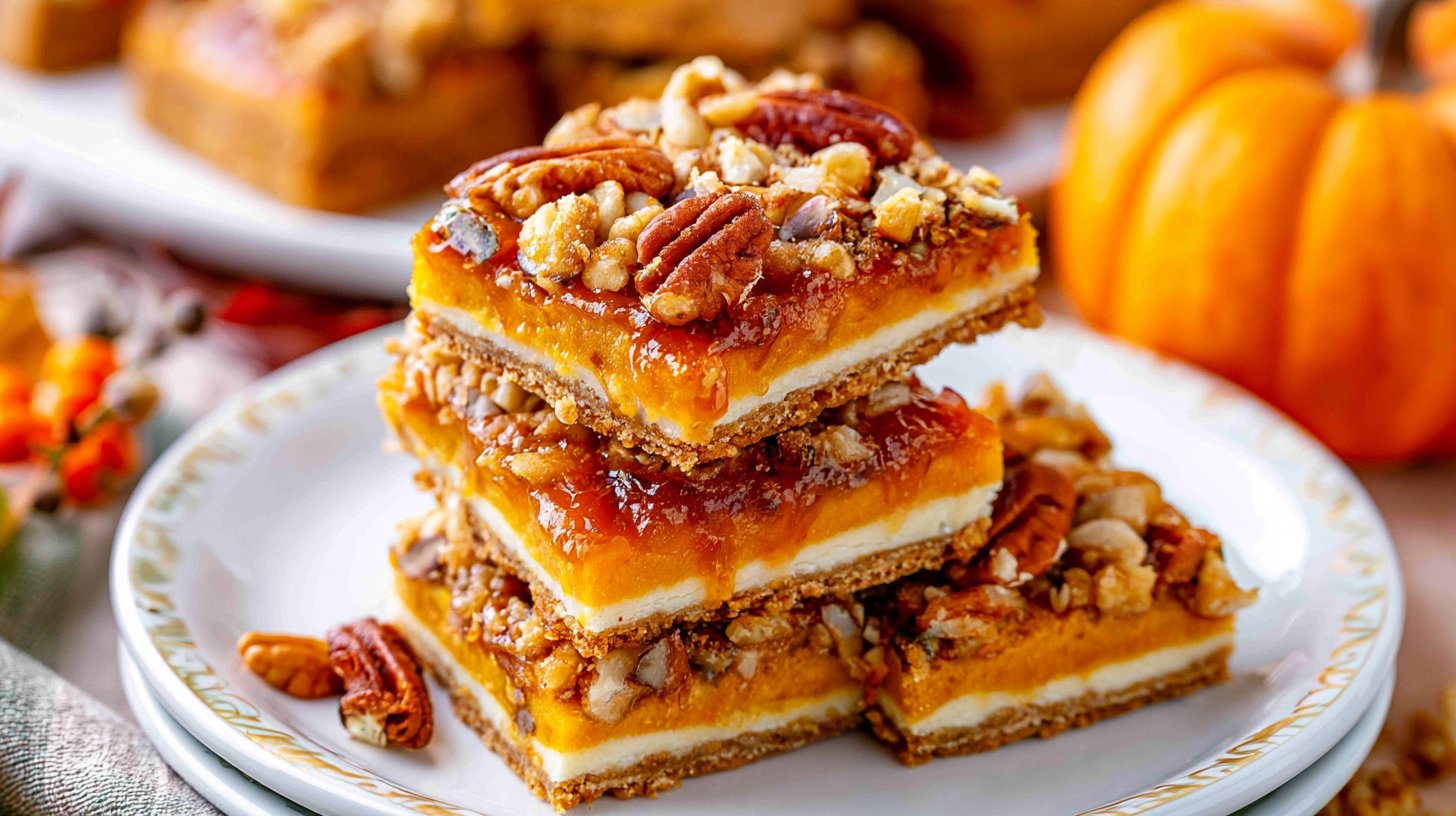
These Pumpkin Magic Bars make for a versatile treat. They’re perfect for breakfast paired with coffee or tea, where their sweetness is sure to brighten your morning. As an afternoon snack, they provide a satisfying pick-me-up, especially when shared with a group. For family meals, they can serve as a delightful dessert at gatherings or holiday dinners. If you have leftovers, they can easily be enjoyed for days, making them a practical addition to your dessert rotation.
Pro Tips for Best Results
- Make sure the butter is softened for easy creaming with sugar. This ensures the crust comes together smoothly.
- Press the crust firmly into the baking dish to create a solid base that won’t crumble later.
- When layering, don’t skimp on the toppings; they enhance both flavor and texture.
- Allow enough cooling time before cutting to keep the bars intact.
- Store them in an airtight container for optimal freshness.
Common Mistakes to Avoid
- Not softening butter: Using cold butter results in a dense crust. Always allow your butter to reach room temperature for easier creaming.
- Skipping the foil: Baking without lining the dish can lead to sticky bars. Always use foil to line your baking dish for easy removal.
- Overmixing the flour: Overmixing can lead to a tough crust. Blend until just combined to maintain a tender texture.
- Not cooling properly: Cutting the bars before they fully cool can cause them to crumble. Patience is key for neat slices.
- Uneven layering: Skipping even distribution of toppings can result in uneven flavor. Take your time to layer ingredients thoughtfully.
- Not checking for doneness: Trusting time alone can lead to under or overbaked bars. Always look for the visual cues of browning and bubbling.
Variations & Substitutions
For those looking to customize, consider adding a dollop of cream cheese frosting on top for extra creaminess. If pecans aren’t your favorite, walnuts can be an excellent substitute. For a hint of caramel flavor, drizzle a bit of caramel sauce over the top before serving. If desired, you could mix in some chocolate chips along with the butterscotch for a richer dessert.
Storage & Reheating
These Pumpkin Magic Bars can be stored at room temperature for a few days in an airtight container. For longer storage, refrigerate them, where they’ll last about a week. They can also be frozen for a couple of months; just be sure to wrap them tightly to prevent freezer burn. When reheating, place them in the microwave for a few seconds to warm slightly without losing their texture.
Nutrition Information
Nutrition information is not available.
Frequently Asked Questions
Can I make this recipe ahead of time?
Yes, these bars can be made a day or two in advance, allowing the flavors to meld. Just store them in the refrigerator until you’re ready to serve.
How long does it last in the fridge?
These Pumpkin Magic Bars can last about a week in the fridge when kept in an airtight container. Just make sure they are cooled completely before covering them.
Can I freeze this recipe?
Absolutely! You can freeze these bars for up to two months. Wrap them well in plastic wrap or aluminum foil and place them in a freezer-safe container.
What can I substitute for one ingredient?
If you need to replace the butterscotch chips, chocolate chips could work as a nice alternative, offering a different yet enjoyable flavor combination.
Why didn’t my recipe turn out as expected?
Several factors can affect the outcome, such as ingredient measurements or oven temperature. Make sure to measure accurately and check that your oven is calibrated correctly.
Final Thoughts
Making Pumpkin Magic Bars is a wonderful way to indulge in comforting flavors without a lot of fuss. The combination of creamy pumpkin filling and crunchy toppings creates a delightful treat for any occasion. As you enjoy these bars, know that they embody the cozy, home-cooked charm we all love in a sweet dessert. Happy baking!
Pumpkin Magic Bars
Ingredients
Crust
- 1/2 cup unsalted butter adds richness
- 1/3 cup light brown sugar, packed for sweetness and moisture
- 1 cup all-purpose flour provides structure
- 1/2 teaspoon pumpkin pie spice adds warmth and depth
- Pinch fine sea salt balances sweetness
Filling and Toppings
- 1 cup pumpkin pie filling contributes creaminess and flavor
- 11 ounces butterscotch chips offers sweetness and texture
- 1 cup toffee bits adds crunch and a caramel flavor
- 2 cups chopped pecans provide nuttiness and crunch
- 14 ounces sweetened condensed milk adds moisture and sweetness
- 2 teaspoons ground cinnamon enhances warmth and flavor
- 1/8 teaspoon nutmeg adds a warm, slightly sweet flavor
- 1/4 teaspoon ground ginger provides a bit of spice
- 1/4 teaspoon ground cloves adds warmth and depth
- 1/2 teaspoon ground allspice offers a complex flavor profile
Instructions
Preparation
- Preheat the oven to 350°F. Prepare an 11×7 baking dish by lining it with foil and spraying the foil with cooking spray.
- In a large bowl, cream together the unsalted butter and light brown sugar until the mixture becomes light and fluffy, about 2 minutes.
- Add the all-purpose flour, pumpkin pie spice, and pinch of salt into the bowl. Mix until thoroughly combined, ensuring there are no dry patches.
- Press the mixture firmly into the bottom of the prepared baking dish and bake for about 15 minutes until the edges are lightly browned.
- Spread the pumpkin pie filling evenly over the warm crust.
- Layer the butterscotch chips, toffee bits, and chopped pecans on top of the pumpkin filling in that order.
- Pour the sweetened condensed milk over the toppings, covering them evenly.
- Return the dish to the oven and bake for an additional 30-35 minutes until the top is golden brown and bubbly.
- Remove the dish from the oven and allow to cool completely at room temperature before refrigerating for easier cutting.