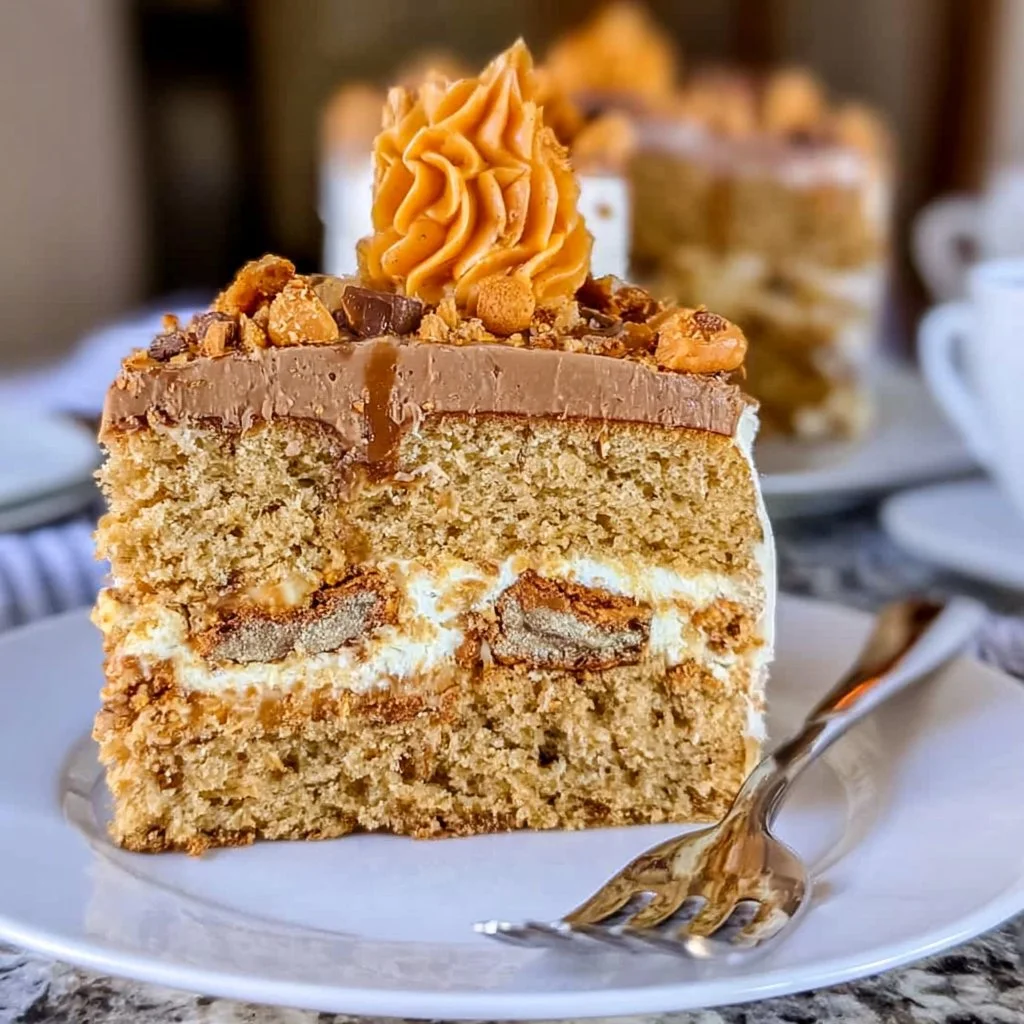
Baking is a delightful way to bring warmth into your kitchen, and this recipe for Butterfinger Cake is no exception. The combination of peanut butter and chocolate flavors, alongside the crunch of Butterfingers, makes this cake a satisfying treat for any occasion. When you slice into this cake, you’ll discover layers of moist, tender cake and creamy filling that will please anyone who loves a classic dessert. Let’s dive into how to make it.
Why You’ll Love This Butterfinger Cake
This Butterfinger Cake is not only easy to make, but it also delivers reliable results every time. The comforting balance between rich peanut butter and chocolate flavors creates a nostalgic and enjoyable experience. With its practical ingredients, this cake is perfect for everyday celebrations or as an indulgent snack. It effortlessly brings people together around the table, making it a go-to recipe in any home kitchen.
Kitchen Tools You’ll Need
- 3 8-inch round cake pans
- Medium saucepan
- Large mixing bowl
- Electric mixer
- Rubber spatula
- Wire racks
- Piping bag (optional)
Ingredients
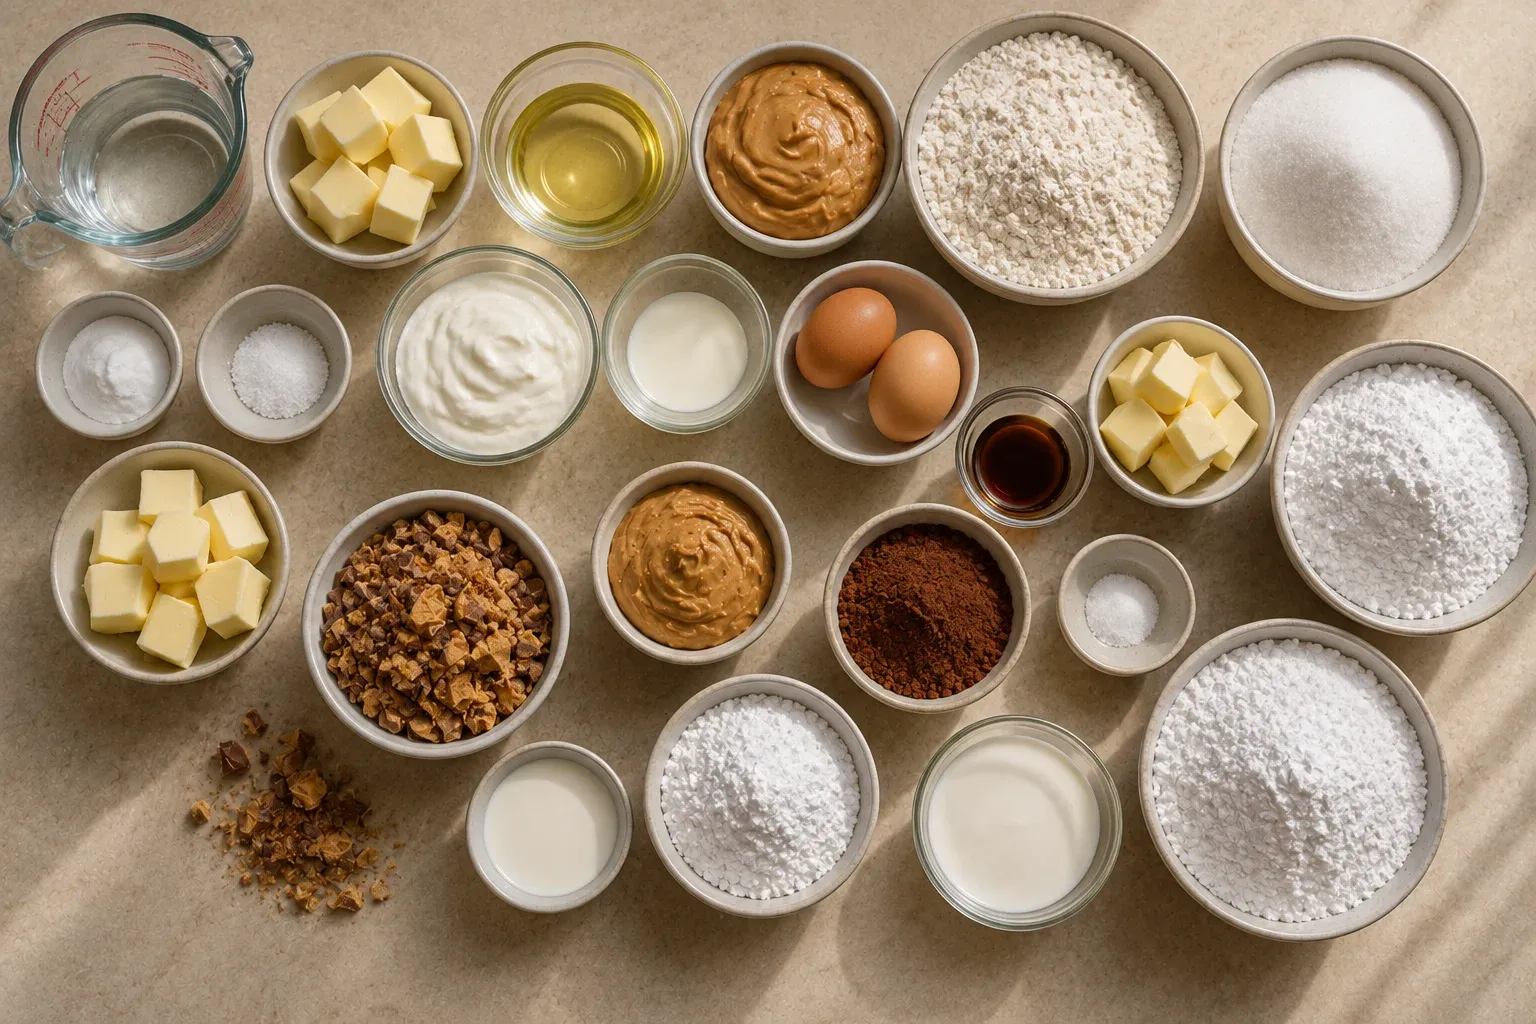
- 1 cup water
- 1/2 cup unsalted butter (adds richness)
- 1/2 cup vegetable oil (provides moisture)
- 1/2 cup creamy peanut butter (contributes flavor and texture)
- 2 cups all-purpose flour (structure)
- 2 cups granulated sugar (sweetness)
- 1 teaspoon baking soda (leavening)
- 3/4 teaspoon salt (enhances flavor)
- 1/2 cup full fat sour cream (moisture and tang)
- 3 tablespoons whole milk (adds moisture)
- 2 large eggs (binding)
- 1 teaspoon vanilla extract (flavor)
- 1/2 cup unsalted butter (at room temperature) (for filling)
- 3 cups powdered sugar (sweetness and consistency)
- 3 tablespoons milk or heavy cream (for consistency)
- 1/4 teaspoon salt (enhances flavor)
- 3/4 cup finely chopped Butterfingers (texture and flavor)
- 3/4 cup unsalted butter (at room temperature) (for frosting)
- 1/4 cup creamy peanut butter (for flavor)
- 1/2 cup cocoa powder (richness)
- 1/4 teaspoon salt (for balance)
- 5 to 8 tablespoons milk or cream (for adjusting consistency)
- 4 to 4 1/2 cups powdered sugar (for sweetness and structure)
- Additional chopped Butterfingers for garnish (for decoration)
How to Make Butterfinger Cake
Step 1. Preheat your oven to 350 degrees Fahrenheit. Prepare your three 8-inch round cake pans by spraying them with cooking spray and lining them with parchment paper. This will ensure that the cakes release smoothly after baking, preventing any frustration when it’s time to serve.
Step 2. In a medium saucepan, combine the water, unsalted butter, vegetable oil, and creamy peanut butter. Cook over medium heat, stirring frequently, until the mixture is melted and smooth. Once it’s all blended together, remove the saucepan from the heat and allow it to cool slightly before using.
Step 3. In a large bowl, measure out the all-purpose flour, granulated sugar, baking soda, and salt. Mix the dry ingredients well so that the baking soda and salt are evenly distributed throughout the flour and sugar, creating a balanced base for your cake.
Step 4. Add the full fat sour cream, whole milk, eggs, and vanilla extract to the bowl of dry ingredients. Mix everything together until just combined, ensuring there are no dry spots left. The batter may be a bit thick, which is normal at this stage.
Step 5. Pour in the cooled peanut butter mixture from Step 2 into the batter. Stir until the mixture is smooth and fully integrated, with no visible lumps. This step introduces a rich peanut butter flavor and adds moisture to the cake.
Step 6. Divide the batter evenly among the three prepared pans. Once filled, place the pans in the preheated oven and bake for 29 to 35 minutes. You can check for doneness by inserting a toothpick into the center of a cake; it should come out clean. After baking, let the layers cool in the pans for 30 minutes, then invert them onto wire racks to cool completely.
Step 7. While the cakes are cooling, prepare the filling. In a mixing bowl, combine the room temperature unsalted butter, powdered sugar, milk, and salt. Beat the mixture until it is smooth. After it reaches the right consistency, gently fold in the finely chopped Butterfingers, which will add a nice crunch.
Step 8. For the frosting, use a mixer to beat the room temperature unsalted butter with the creamy peanut butter until smooth and creamy. Gradually mix in the cocoa powder and salt, ensuring it has a uniform color. Add the powdered sugar and milk or cream bit by bit until the frosting is at the desired consistency—smooth and spreadable but not too runny.
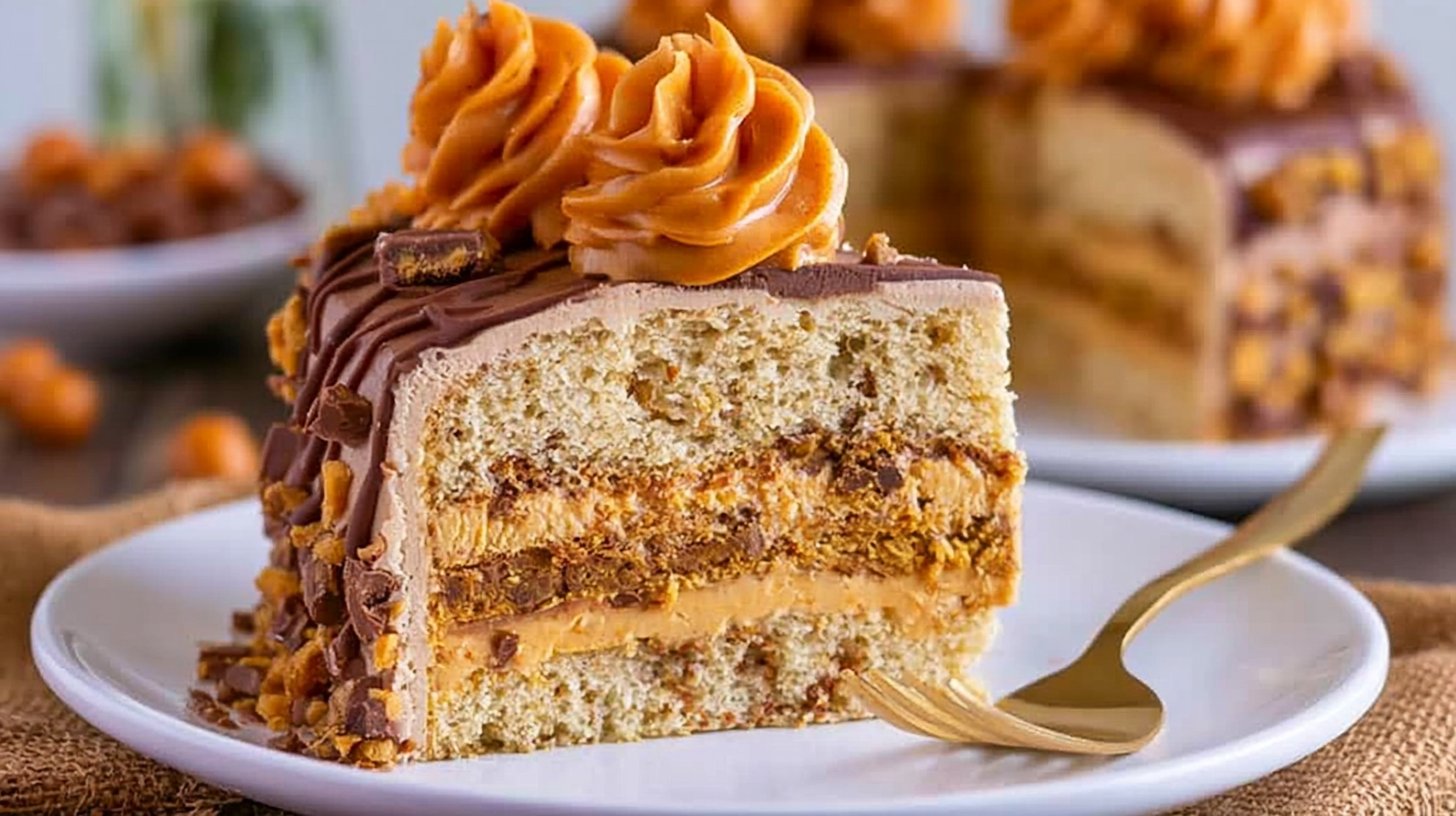
Step 9. To assemble the cake, begin by placing one layer on a cake stand or serving plate. Pipe a border of frosting around the edge of the cake layer to create a dam. Spoon the filling in the center, spreading it gently to the edge of the frosting. Add the next layer and repeat the process. Finally, place the last layer on top and frost the entire outside of the cake. For extra flair, garnish the cake with additional chopped Butterfingers.
Serving Suggestions
Butterfinger Cake is a versatile dessert that fits well into various occasions. It makes a wonderful addition to breakfast alongside coffee or tea, serving as a sweet treat that can brighten the morning. For snacks, cut generous slices to satisfy your sweet tooth during the day. At family gatherings or parties, this cake can be the perfect centerpiece. Any leftovers can be enjoyed later, simply stored in an airtight container to keep it fresh.
Pro Tips for Best Results
- Ensure all ingredients are at room temperature for better mixing and a smoother batter.
- Don’t overmix the batter in Step 4, as this can lead to a denser cake.
- Use a toothpick test to ensure cakes are perfectly cooked; underbaking can result in a raw center.
- Level your cake layers with a serrated knife if they have domed tops for a more polished appearance.
- Store leftover cake in an airtight container to prolong its freshness and flavor.
- Let the cake cool completely before frosting to avoid melting the icing.
Common Mistakes to Avoid
- Not measuring ingredients accurately: Improper measurements can lead to dry or overly wet cake. Use dry measuring cups for solids and liquid measuring cups for liquids to avoid this issue.
- Using cold ingredients: Cold butter or eggs can make the batter difficult to mix and affect the cake’s rise. Always let them come to room temperature prior to use.
- Overbaking the cake: Letting your cake sit in the oven too long can dry it out. Keep an eye on the time and use a toothpick for testing doneness.
- Inconsistent mixing: Failing to mix the batter fully can result in uneven texture. Mix just until combined to avoid lumps but be careful not to overmix.
- Ignoring cooling time: Attempting to frost a warm cake can lead to melting frosting. Allow the layers to cool completely before assembly.
- Not lining the pans properly: Skipping parchment paper can result in cakes sticking to the pans. Always line the pans as directed to prevent this problem.
Variations & Substitutions
You can experiment with different types of frosting by incorporating chocolate ganache instead of peanut butter frosting for a richer flavor. For a simpler presentation, serve the cake without frosting and dust with powdered sugar for a quick finish. If you’re looking for a nut-free version, use sun butter in place of peanut butter, keeping in mind that the flavor will differ slightly.
Storage & Reheating
Store Butterfinger Cake at room temperature in a covered container for up to two days. If you prefer longer storage, place it in the refrigerator where it will last up to a week. Alternatively, you can freeze the cake for several months; just wrap the layers tightly in plastic wrap and foil. To reheat, let the cake thaw in the refrigerator overnight, and enjoy it at room temperature or warm it in the microwave briefly if desired.
Frequently Asked Questions
Can I make this recipe ahead of time?
Yes, you can bake the cake layers in advance and store them in the refrigerator for a couple of days. Frost and assemble right before serving for the best texture and flavor.
How long does it last in the fridge?
When stored properly in an airtight container, Butterfinger Cake can last up to one week in the refrigerator, although it’s best enjoyed fresh.
Can I freeze this recipe?
Yes, you can freeze the cake. Wrap the cooled layers individually with plastic wrap, then store them in an airtight container. They should keep well for up to three months.
What can I substitute for one ingredient?
If you don’t have creamy peanut butter, you can use almond butter, but this will alter the flavor. Also, if you don’t have sour cream, plain yogurt can be a good substitute for moisture.
Why didn’t my recipe turn out as expected?
Common issues include incorrect measuring of ingredients, overmixing the batter, or baking at an incorrect temperature. Ensure you follow each step carefully for the best outcome.
Final Thoughts
Making Butterfinger Cake is a joyful experience that results in a delightful dessert enjoyed by family and friends. The combination of flavors and textures creates something truly comforting that anyone can appreciate. No matter what the occasion, this cake brings satisfaction and a sense of nostalgia to the table. Enjoy each slice and the simple pleasure it brings.
Butterfinger Cake
Ingredients
For the Cake
- 1 cup water
- 1/2 cup unsalted butter
- 1/2 cup vegetable oil
- 1/2 cup creamy peanut butter
- 2 cups all-purpose flour
- 2 cups granulated sugar
- 1 teaspoon baking soda
- 3/4 teaspoon salt
- 1/2 cup full fat sour cream
- 3 tablespoons whole milk
- 2 large eggs
- 1 teaspoon vanilla extract
For the Filling
- 1/2 cup unsalted butter (at room temperature)
- 3 cups powdered sugar
- 3 tablespoons milk or heavy cream
- 1/4 teaspoon salt
- 3/4 cup finely chopped Butterfingers
For the Frosting
- 3/4 cup unsalted butter (at room temperature)
- 1/4 cup creamy peanut butter
- 1/2 cup cocoa powder
- 1/4 teaspoon salt
- 5 to 8 tablespoons milk or cream
- 4 to 4 1/2 cups powdered sugar
For Garnish
- to taste Additional chopped Butterfingers
Instructions
Preparation
- Preheat your oven to 350 degrees Fahrenheit. Prepare your three 8-inch round cake pans by spraying them with cooking spray and lining them with parchment paper.
- In a medium saucepan, combine the water, unsalted butter, vegetable oil, and creamy peanut butter. Cook over medium heat, stirring frequently, until melted and smooth.
- In a large bowl, measure and mix together the all-purpose flour, granulated sugar, baking soda, and salt.
- Add the full fat sour cream, whole milk, eggs, and vanilla extract to the dry ingredients and mix until just combined.
- Pour the cooled peanut butter mixture into the batter and stir until smooth.
Baking
- Divide the batter evenly among the prepared pans. Bake for 29 to 35 minutes, or until a toothpick comes out clean.
- Let the layers cool in the pans for 30 minutes, then invert them onto wire racks to cool completely.
Filling Preparation
- In a mixing bowl, combine the room temperature unsalted butter, powdered sugar, milk, and salt. Beat until smooth, then gently fold in chopped Butterfingers.
Frosting Preparation
- Beat the room temperature unsalted butter with creamy peanut butter until smooth. Gradually mix in cocoa powder, salt, powdered sugar, and milk until desired consistency is achieved.
Assembly
- Place one cake layer on a serving plate, pipe a border of frosting, and fill the center with the Butterfinger filling. Repeat with the next layer, then top with the final layer and frost the entire cake.
- Garnish with additional chopped Butterfingers.