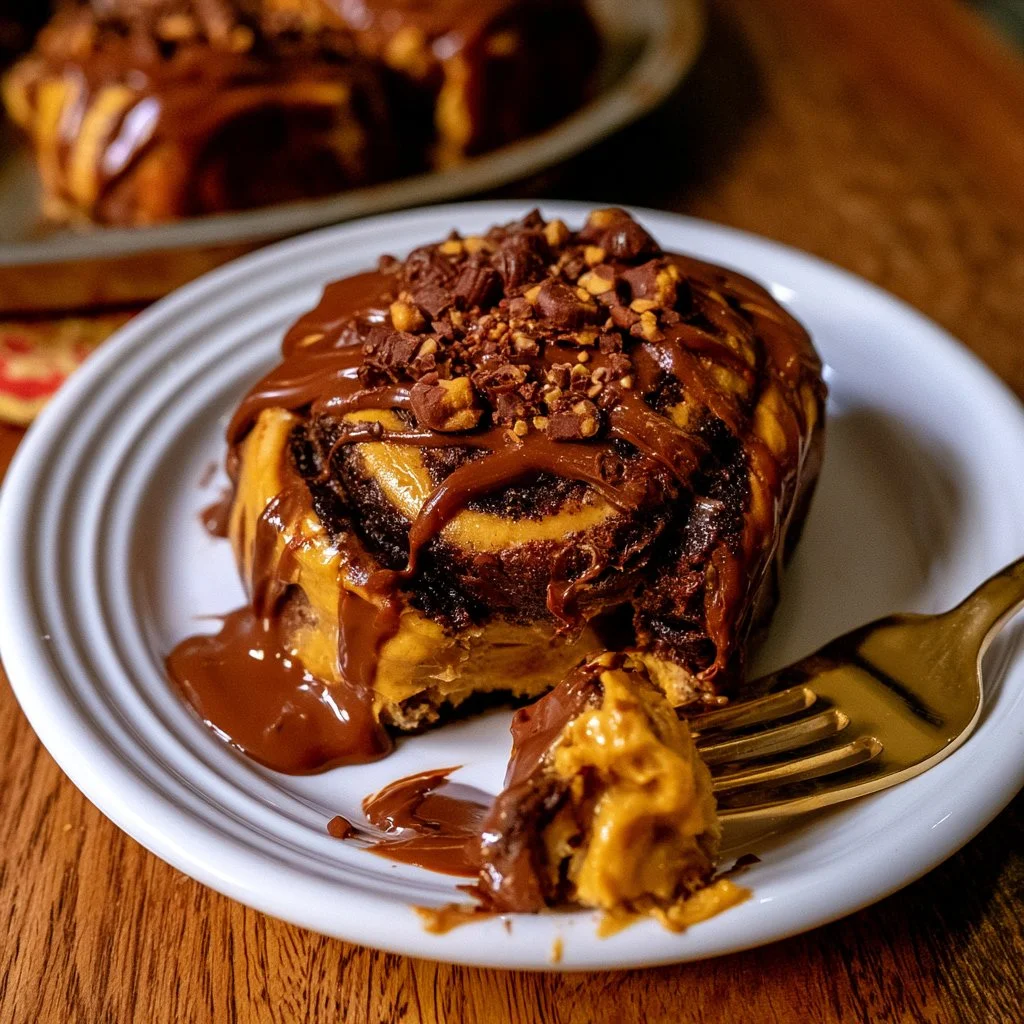
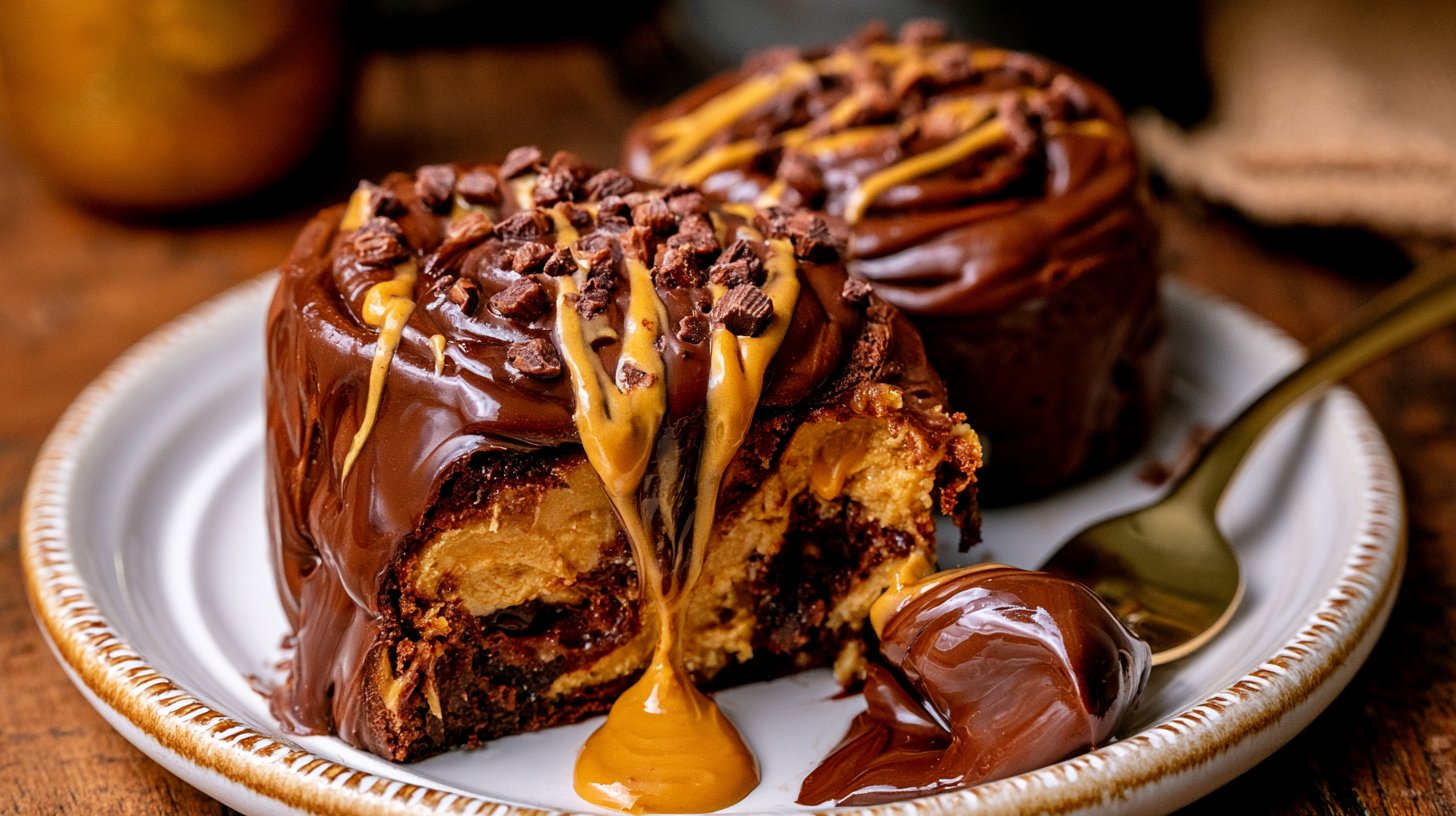
Warm, freshly baked rolls filled with the rich taste of chocolate and the creamy goodness of peanut butter make for a delightful treat. When you combine the flavors of cocoa, peanut butter, and a touch of sweetness, it transforms an ordinary roll into something truly special. These Chocolate Peanut Butter Rolls are perfect for breakfast or as a satisfying snack. Let’s dive into the recipe and see how easy it is to create this comforting indulgence.
Why You’ll Love This Chocolate Peanut Butter Rolls
This recipe combines the ease of homemade rolls with the delightful flavors of chocolate and peanut butter. Each step is straightforward, making it reliable for any home cook looking for a satisfying treat. The comforting blend of textures from the soft rolls to the creamy filling and icing strikes a perfect balance that everyone will enjoy. Chocolate Peanut Butter Rolls are a wonderful addition to your everyday baking repertoire, providing both comfort and practical value.
Kitchen Tools You’ll Need
- Mixing bowls
- Rolling pin
- Baking pan
- Measuring cups and spoons
- Electric mixer
- Sifter
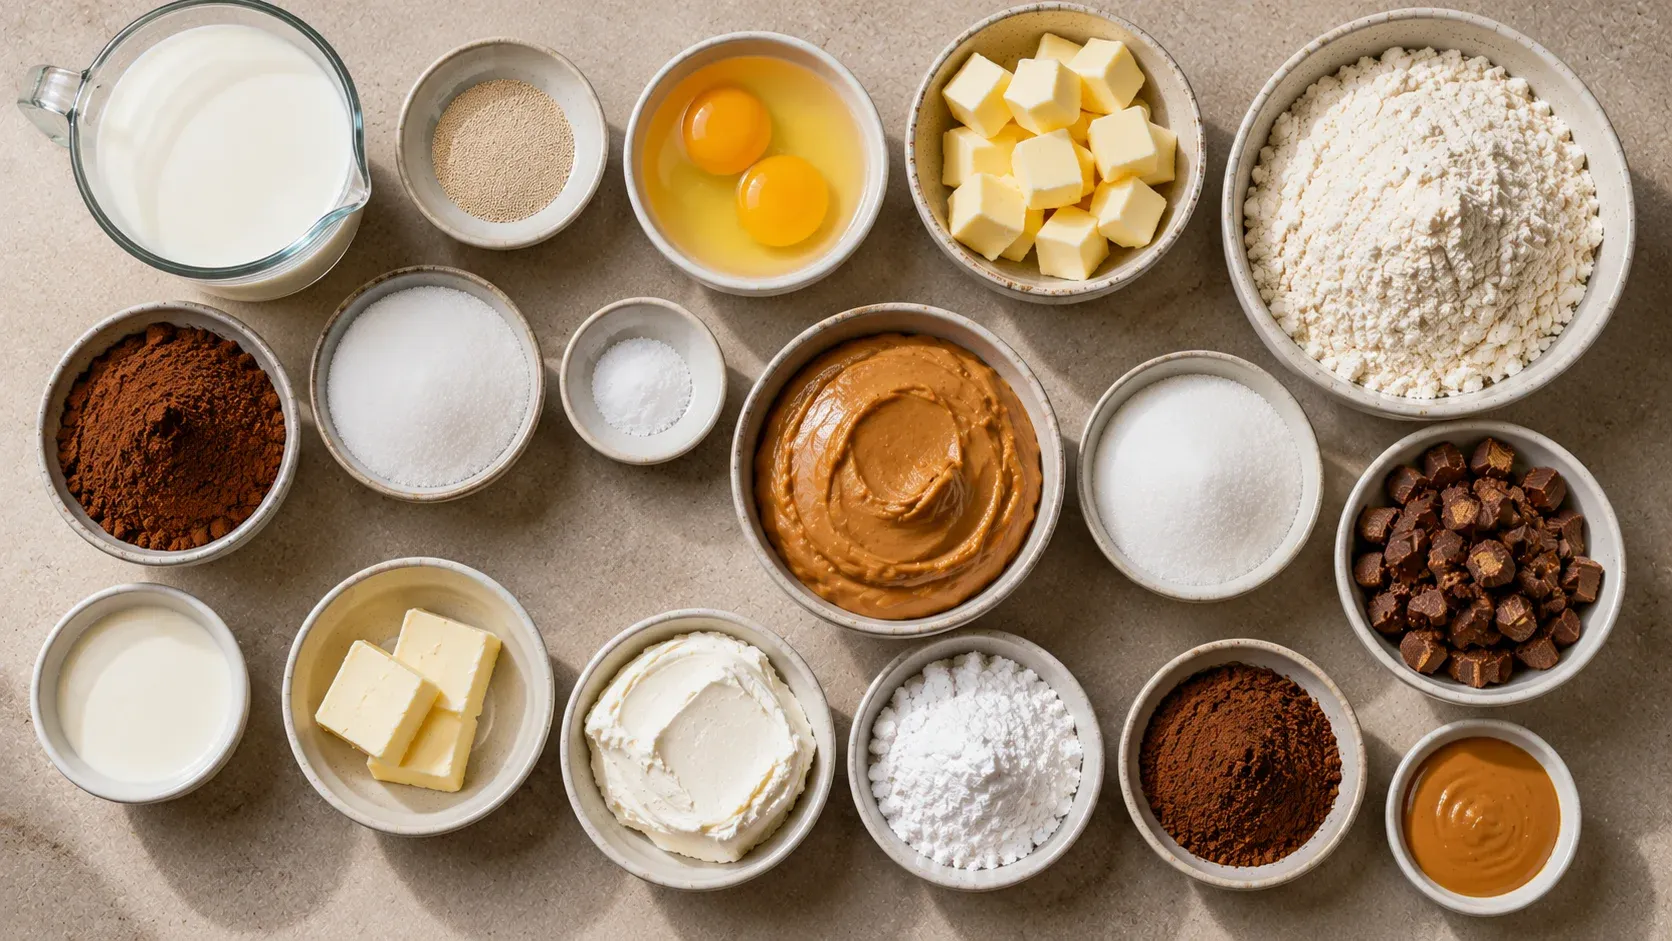
Ingredients
- 1 cup Milk, warmed to 110℉ (moisture)
- 2 1/4 tsp Active dry yeast (leavening agent)
- 2 Large eggs, room temperature (binding agent)
- 10 TBSP Unsalted butter, room temperature and cubed (richness)
- 4 cups All-purpose flour (structure)
- 1/2 cup Unsweetened cocoa powder (flavor and color)
- 1/4 cup White granulated sugar (sweetness)
- 1 tsp Salt (enhances flavor)
- 1 1/4 cup Peanut butter, creamy or crunchy (filling texture)
- 1/2 cup White granulated sugar (sweetness)
- 1 1/4 cup Mini Reese’s, chopped (added chocolate flavor)
- 1/2 cup Heavy cream (moisture)
- 4 TBSP Unsalted butter, room temperature (richness for icing)
- 4 oz Cream cheese, room temperature (smooth consistency)
- 1 cup Powdered sugar, sifted (sweetness for icing)
- 2 TBSP Unsweetened cocoa powder, sifted (flavor for icing)
- 1/4 cup Peanut butter, melted (drizzle on top)
How to Make Chocolate Peanut Butter Rolls
Step 1. In a small bowl, heat the milk for about 45 seconds until it reaches 110℉. This gentle warmth helps activate the yeast. Once heated, add in the yeast and a pinch of sugar. Allow this mixture to sit for 10 minutes. You’ll know it’s ready when it becomes bubbly and frothy, indicating that the yeast is active.
Step 2. In a large bowl, sift together the all-purpose flour and cocoa powder. Sifting aerates the ingredients, resulting in a lighter texture. To this mixture, add the sugar and salt, stirring gently to combine everything evenly.
Step 3. Add the bubbly milk and yeast mixture, along with the cubed butter and lightly beaten eggs, into the bowl with the dry ingredients. Start mixing on low speed to incorporate the liquids, then increase to medium speed. Mix until a dough forms, and continue for about 5 minutes. The dough should become soft and slightly tacky to the touch.
Step 4. Preheat your oven to 200℉, then set your kneaded dough into a greased bowl. Ensure the bowl is covered so the dough can rise without drafts. Allow it to rise for 1 hour, during which it should roughly double in size.
Step 5. As the dough rises, chop the Mini Reese’s Peanut Butter Cups into small pieces. These pieces will be sprinkled into the filling, enhancing the overall flavor and texture of the rolls.
Step 6. After the dough has risen, turn it out on a lightly floured surface. Roll it out into a rectangle that’s about 1/4 inch thick. This uniform thickness is crucial for even cooking and filling distribution.
Step 7. In a separate bowl, mix the peanut butter with the sugar until it becomes smooth and creamy. Spread this mixture evenly over the rolled-out dough. Once fully covered, sprinkle the chopped Reese’s over the peanut butter layer, ensuring an even distribution.
Step 8. Starting from the short side of the rectangle, roll the dough into a log. This tight roll will create well-defined swirls in the finished rolls. After rolling, use a sharp knife to cut the log into 12 equal pieces.
Step 9. Place the cut rolls in a greased baking pan, ensuring there’s enough space between them for rising. Cover the pan and let the rolls rise for another 20 minutes, which will puff them up.
Step 10. Adjust your oven temperature to 375℉ and pour the heavy cream around the rolls in the baking pan. This cream will help keep the rolls moist as they bake. Bake for about 28-33 minutes, watching for them to turn a golden brown.
Step 11. For the icing, beat the room temperature butter and cream cheese together until smooth. Gradually add in the sifted powdered sugar and cocoa, mixing until well blended. Once the rolls are done, spread the icing over them while they are still warm. Finally, drizzle melted peanut butter on top for an extra touch of flavor.
Serving Suggestions
These Chocolate Peanut Butter Rolls can be enjoyed in various settings. They make for a heartwarming breakfast option, perfect for family brunches or cozy evenings at home. They also serve as tasty snacks, whether you’re looking for something sweet to enjoy with coffee or a treat to share with friends. Leftovers, if there are any, can be stored for later and are just as delicious eaten cold or warmed up in the microwave.
Pro Tips for Best Results
- Ensure the yeast is fresh for proper rising; expired yeast may not work well, leading to dense rolls.
- Don’t skip sifting the dry ingredients; it helps create lighter, fluffier rolls.
- Make sure the butter is at room temperature for easier blending with the other ingredients.
- Roll the dough evenly to ensure consistent cooking and filling distribution.
- Allow adequate time for rising; this is key for soft, fluffy rolls.
- If rolling is difficult, a lightly floured surface and rolling pin can help.
Common Mistakes to Avoid
- Not activating the yeast properly: If the milk isn’t the right temperature, the yeast won’t activate, resulting in flat rolls. Always check the temperature before combining.
- Too much or too little flour: Using too much flour can make the dough dry, while too little can make it sticky. Measure carefully and adjust if necessary during mixing.
- Skipping the rising time: Each rise is crucial for developing the texture of the rolls. Don’t rush this step; let the dough rise until it has doubled in size.
- Overbaking rolls: If you leave the rolls in the oven too long, they will dry out. Keep an eye on the rolls in the last few minutes to ensure they are just golden.
- Not enough icing: Icing adds moisture and flavor; be generous when spreading it on warm rolls to enhance the taste.
- Improper storage: Leaving rolls out overnight can dry them out. Store them in an airtight container to maintain freshness.
Variations & Substitutions
- For a more intense chocolate flavor, you can increase the cocoa powder by a tablespoon.
- If you prefer crunchy peanut butter, use that instead of creamy for added texture in your filling.
- Try adding chopped nuts or a sprinkle of sea salt on top for a sophisticated twist.
- To switch things up, consider using different candy fillings beyond Reese’s, such as chopped chocolate bars or other candy pieces.
- If you want a less sweet filling, reduce the amount of sugar in the peanut butter mixture.
Storage & Reheating
After baking, allow the rolls to cool completely before storing. If kept at room temperature, place them in an airtight container for up to two days. For longer storage, refrigerate them in a well-sealed container for about a week. These rolls can also be frozen; simply wrap each one tightly and store them in a freezer-safe bag for up to three months. To reheat, place the rolls in the microwave for about 15 seconds to restore their moisture.
Frequently Asked Questions
Can I make this recipe ahead of time?
Yes, you can prepare the dough the night before and allow it to rise in the refrigerator. Shape and bake the rolls in the morning for fresh, warm treats.
How long does it last in the fridge?
These rolls can last for about a week if stored in the refrigerator in an airtight container.
Can I freeze this recipe?
Absolutely, you can freeze the baked rolls. Just ensure they’re tightly wrapped, and they should remain good for up to three months.
What can I substitute for one ingredient?
If you need to substitute the heavy cream, you can use whole milk or half-and-half, but the texture may not be as rich.
Why didn’t my recipe turn out as expected?
There are many reasons, including improper yeast activation, incorrect baking times, or inconsistent ingredient measurements. Ensure you follow each step carefully for the best results.
Final Thoughts
Making Chocolate Peanut Butter Rolls is a rewarding experience that yields delightful, comforting treats. The soft, rich texture paired with the creamy filling creates a memorable flavors that your family will enjoy. Baking these rolls not only fills your kitchen with a wonderful aroma but also brings a sense of satisfaction knowing you’ve created something special from scratch. Enjoy each bite and the smiles that come with sharing them.