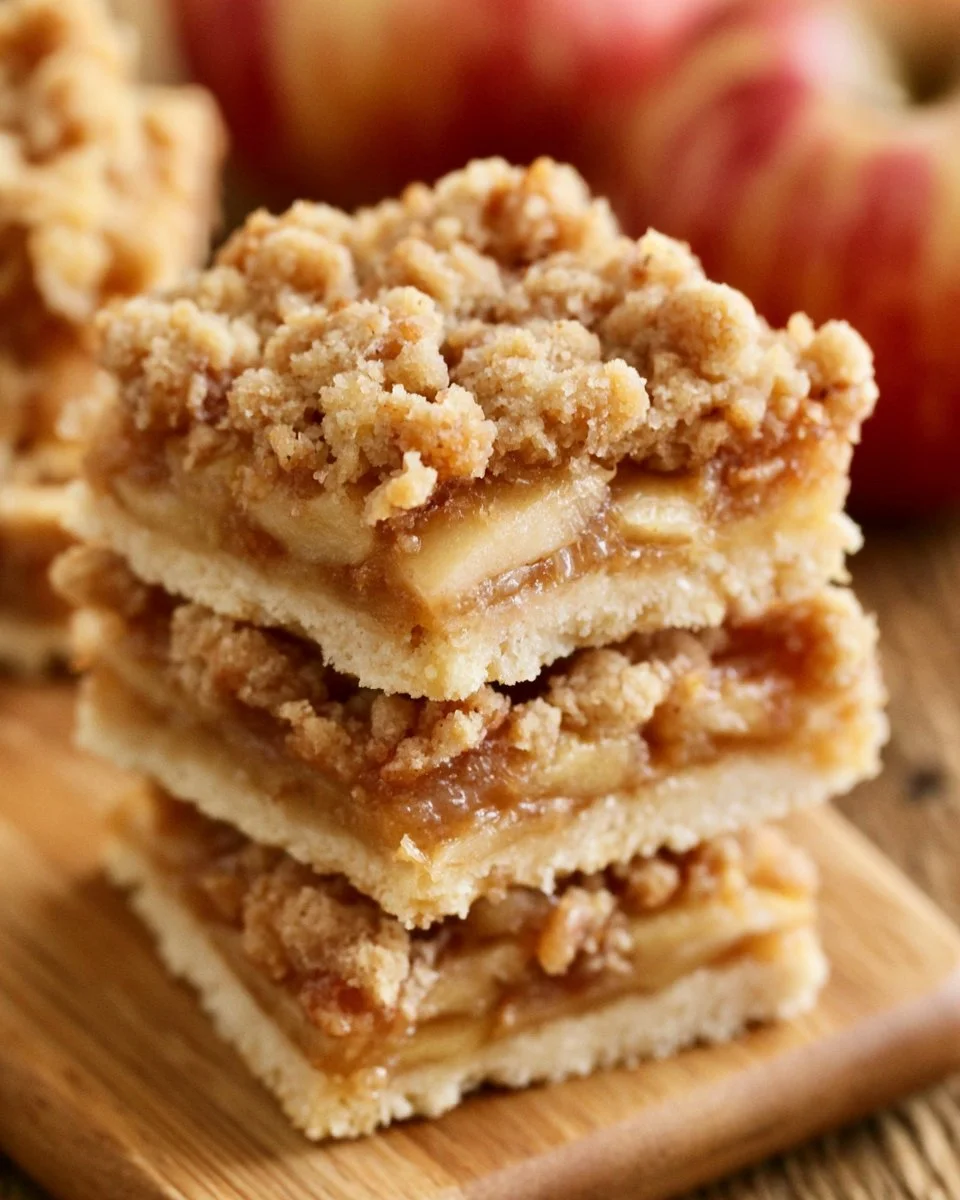
Baking can often bring comfort to our busy lives, and there’s something truly special about the mix of buttery shortbread with sweet, spiced apples. These apple crisp shortbread bars offer a delightful balance of flavors and textures that are perfect for any occasion. With simple ingredients and straightforward steps, you’ll find these bars easy to make and sure to impress. Let’s dive right into the process of creating this delicious treat.
Why You’ll Love This The BEST Apple Crisp Shortbread Bars
This recipe boasts ease and reliability, making it a go-to for home bakers. The combination of buttery shortbread, tender apples, and a warm spice blend creates a comforting dessert that everyone will enjoy. Topped with a sugary crisp layer, these bars are delightfully satisfying without being overly indulgent. With the everyday ingredients and straightforward steps, you can easily whip this up for family dinners or casual snacks.
Kitchen Tools You’ll Need
- 8×8 baking pan
- Parchment paper
- Mixing bowls
- Electric mixer or whisk
- Measuring cups and spoons
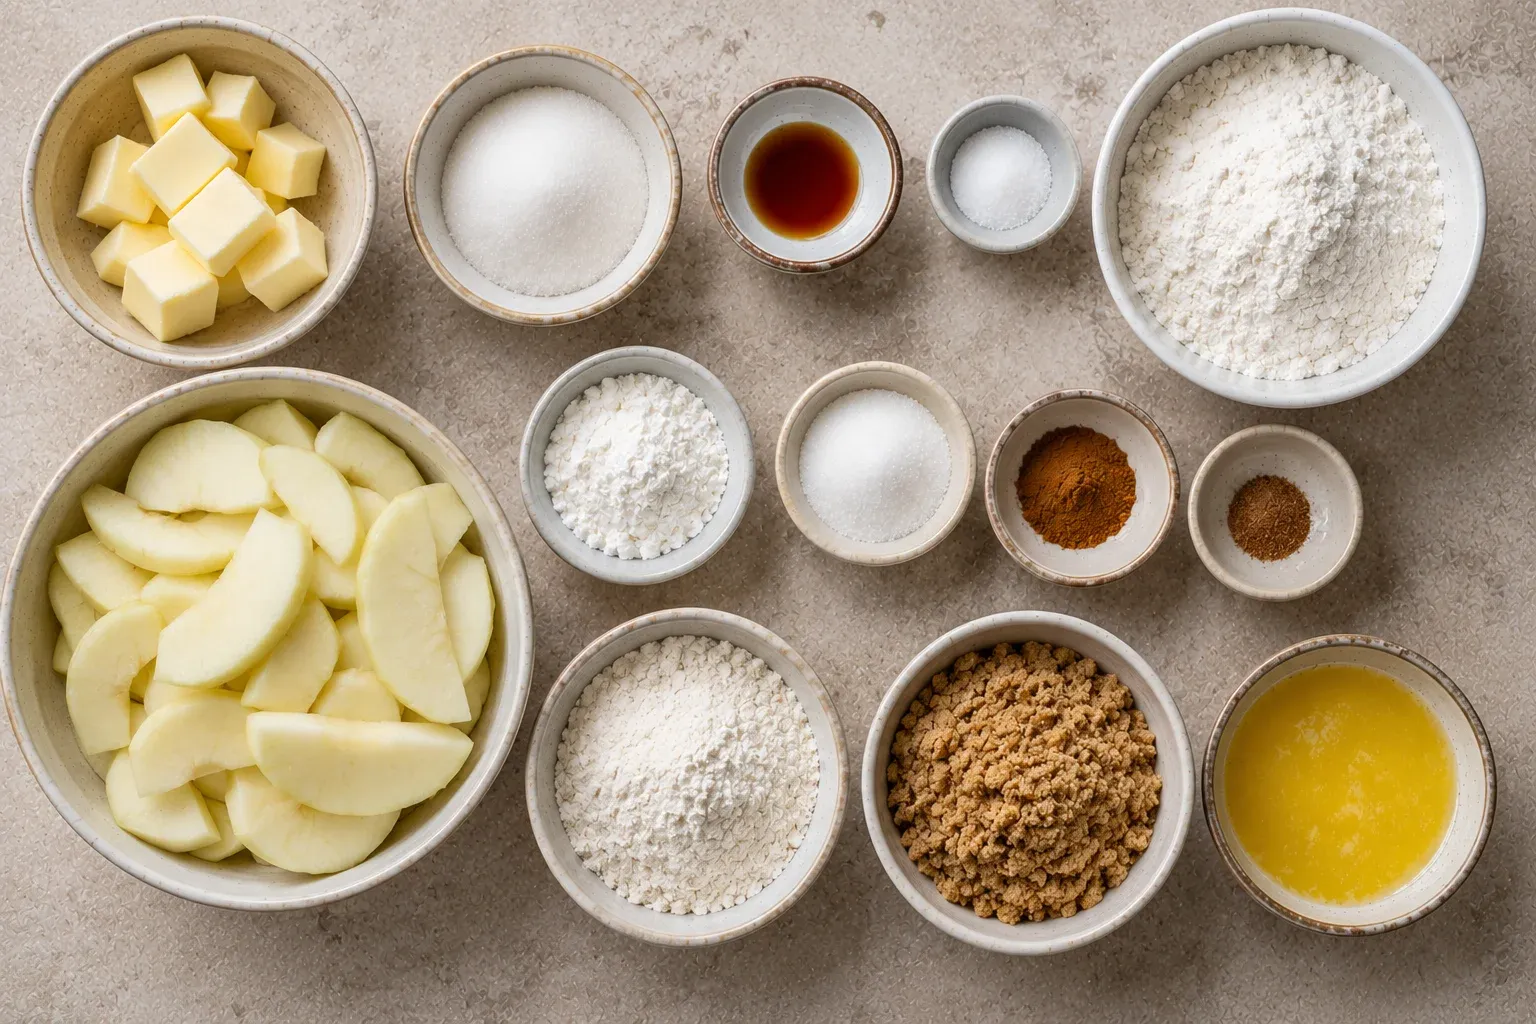
Ingredients
- ½ cup unsalted butter, room temperature (provides moisture and richness)
- ¼ cup sugar (adds sweetness)
- 1 teaspoon vanilla extract (enhances flavor)
- ¼ teaspoon salt (balances sweetness)
- 1 cup all-purpose flour (forms the base)
- 3 large apples, peeled and thinly sliced (adds fruitiness and moisture)
- 2 Tablespoons all-purpose flour (thickens the apple mixture)
- 2 Tablespoons sugar (adds sweetness to the apples)
- 1 teaspoon ground cinnamon (adds warmth and spice)
- ¼ teaspoon ground nutmeg (adds depth of flavor)
- ½ cup all-purpose flour (for the topping)
- ¾ cup brown sugar (contributes sweetness and chewiness)
- ¼ cup butter, melted or room temp to cut in (binds the topping)
How to Make The BEST Apple Crisp Shortbread Bars
Step 1. Preheat your oven to 300 degrees F and line an 8×8 baking pan with parchment paper. This step ensures an easy release of the bars once they are baked. The parchment will prevent sticking, allowing for a clean cut into squares once cooled.
Step 2. Cream the butter on high for 5 minutes until it turns white. Be sure to scrape down the sides of the bowl as needed to ensure even mixing. The butter should look light and fluffy, indicating that it has been properly aerated and is ready to combine with the other ingredients.
Step 3. Mix in sugar, vanilla, and salt. This addition introduces sweetness and flavor while also contributing to the overall texture. Blend until everything is well incorporated and you achieve a smooth mixture.
Step 4. Add flour and stir well. As you combine the flour, watch for a dough-like consistency that will hold together when pressed into the pan. It should be mixed until just combined to avoid overworking and creating a tough texture.
Step 5. Press the mixture into the pan and bake for 15 minutes. As it bakes, it should set slightly around the edges while staying soft in the middle. This initial bake creates a firm base for the apple filling.
Step 6. For the filling, mix apples, flour, sugar, cinnamon, and nutmeg in a bowl. Tossing these ingredients together coats the apples in a sweet and spicy mixture. Ensure the apples are evenly distributed, giving every bite a good balance of flavor.
Step 7. For the topping, mix flour and brown sugar, cut in the butter. Use a fork or pastry cutter to incorporate the butter until the mixture resembles coarse crumbs. This texture will create a lovely, crisp topping.
Step 8. Increase the oven temperature to 350 degrees F. This helps to achieve a nice golden-brown color on the topping as it bakes.
Step 9. Layer half of the topping on the crust, then the apples, then the rest of the topping. Ensure the apples are evenly spread out to prevent any one part from being too thick. You want crumbles of topping on top to provide a crunchy contrast to the tender apples.
Step 10. Bake for 30 minutes, watching for a bubbly filling and a golden topping. This baking time should allow the flavors to meld while promoting a crispy texture on top.
Step 11. Allow to cool and chill in the fridge for at least 2 hours before lifting out with the parchment paper and cutting into 16 squares. Chilling helps the bars set better, making them easier to slice without falling apart.
Serving Suggestions
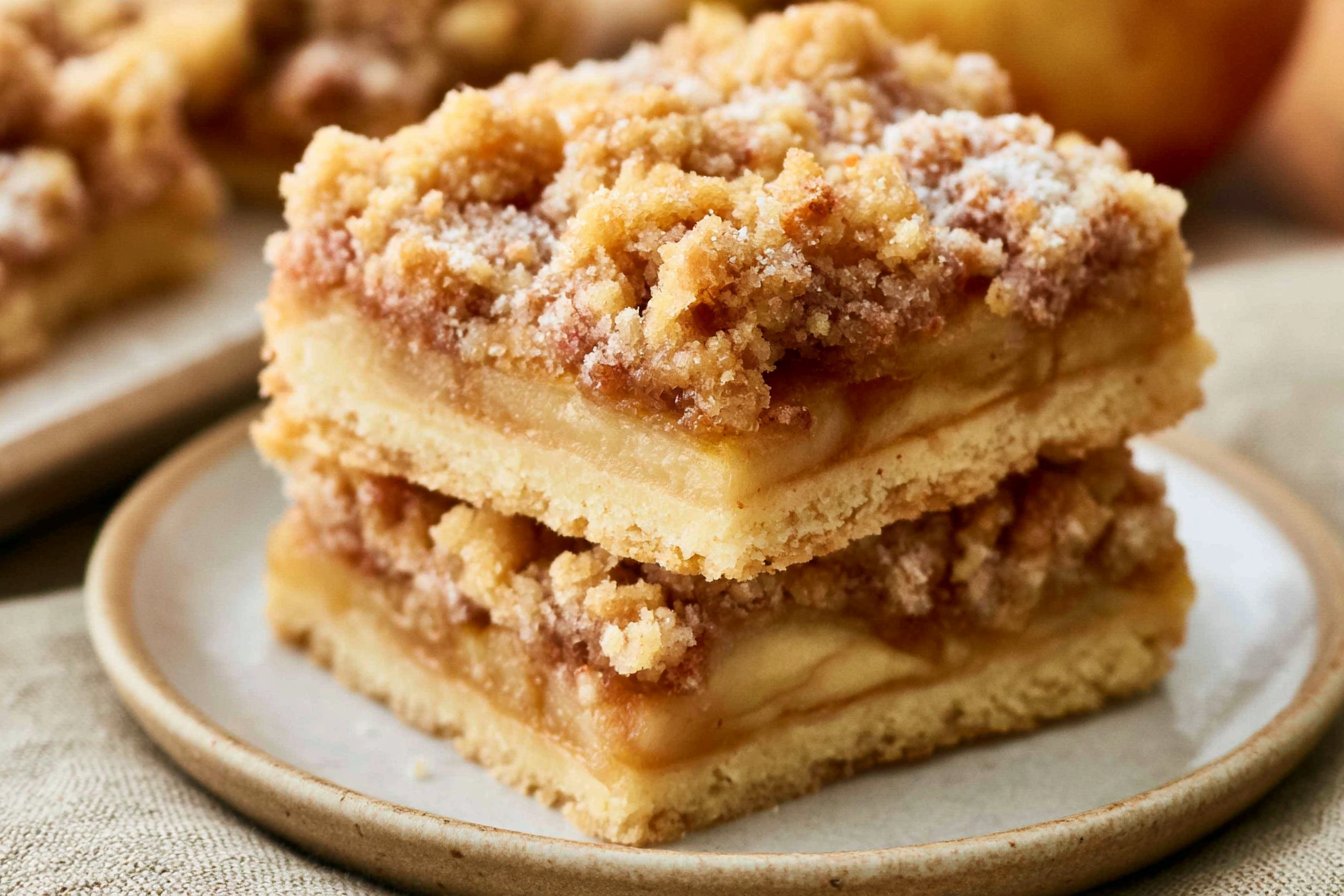
These apple crisp shortbread bars are versatile and are great for various occasions. Serve them as a delightful breakfast with coffee or tea, offering a sweet start to the day. They also make for a perfect snack, whether enjoyed with family at home or packed in lunchboxes for a midday treat. These bars can be a comforting addition to family meals or served at gatherings. Leftovers, if there are any, can be enjoyed straight from the fridge or slightly warmed for that freshly-baked feel.
Pro Tips for Best Results
- Use firm apples for slicing, as they hold their shape better during baking.
- Don’t skip cooling the bars before cutting; this will help the layers set properly.
- For a spicier flavor, consider adding a touch more cinnamon or nutmeg based on your taste preference.
- Keep an eye on the topping as it bakes, ensuring it doesn’t over-brown.
- Use fresh spices for the best flavor in the topping; check your spice cabinet for freshness.
Common Mistakes to Avoid
- Not cream the butter adequately. Failing to aerate it properly can lead to a denser texture in the crust. Cream until light and fluffy for best results.
- Overmixing the dough. This can cause the shortbread crust to become tough instead of tender. Mix until just combined and no longer to avoid this.
- Using too many apples. Overloading the filling can lead to soggy bars. Stick to the recommended amount for proper baking.
- Skipping the chilling step. Cutting the bars too soon can result in a messy slice. Patience during cooling improves appearance and texture.
- Not adjusting baking time based on oven variations. Each oven behaves differently; keep an eye on your bars and adjust as needed to achieve the right doneness.
- Using warm or melted butter for the topping. This can lead to a greasy texture instead of a crumbly topping. Ensure the butter is at the correct temperature for desired results.
Variations & Substitutions
If you’re looking for a twist on the classic, consider adding nuts like walnuts or pecans for extra crunch. You could also swap in different fruits like pears or peaches for a seasonal flavor change. For a more indulgent treat, a drizzle of caramel sauce over the finished bars can elevate the dessert, providing an added layer of sweetness.
Storage & Reheating
At room temperature, these bars can be stored for about 2 days in an airtight container. For longer freshness, keep them in the refrigerator where they can last up to a week. If you want to keep them even longer, these bars can also be frozen. Wrap them tightly in plastic wrap and store in a freezer-safe container for up to 3 months. When ready to enjoy, simply let them thaw in the refrigerator overnight. Reheating in the oven or microwave will help restore some of that crispiness of the topping.
Frequently Asked Questions
Can I make this recipe ahead of time?
Yes, you can prepare these bars a day or two in advance. They keep well in the refrigerator, making them a great option for meal prep or gatherings. Just remember to let them cool completely before storing.
How long does it last in the fridge?
These apple crisp shortbread bars can last about a week in the refrigerator when stored properly in an airtight container. This makes them a good option for snacks or desserts throughout the week.
Can I freeze this recipe?
Absolutely! You can freeze these bars. Just wrap them tightly in plastic wrap, then place them in a freezer-safe container. They can last up to 3 months in the freezer and will taste great once thawed.
What can I substitute for one ingredient?
If you don’t have brown sugar on hand, you can use granulated sugar instead. While it may slightly alter the flavor profile, the bars will still be delicious.
Why didn’t my recipe turn out as expected?
There could be several reasons, such as not mixing ingredients thoroughly or incorrect baking times. Make sure to follow the steps closely and keep an eye on the bars while they bake.
Final Thoughts
Making apple crisp shortbread bars can be a straightforward and rewarding experience in the kitchen. The blend of flavors and textures creates a dessert that feels both comforting and satisfying. Allowing the bars to cool and chill enhances their structure, making them perfect for sharing. Enjoy the process of baking, and savor the delightful results with friends and family.
Apple Crisp Shortbread Bars
Ingredients
For the crust
- ½ cup unsalted butter, room temperature Provides moisture and richness
- ¼ cup sugar Adds sweetness
- 1 teaspoon vanilla extract Enhances flavor
- ¼ teaspoon salt Balances sweetness
- 1 cup all-purpose flour Forms the base
For the filling
- 3 large apples, peeled and thinly sliced Adds fruitiness and moisture
- 2 Tablespoons all-purpose flour Thickens the apple mixture
- 2 Tablespoons sugar Adds sweetness to the apples
- 1 teaspoon ground cinnamon Adds warmth and spice
- ¼ teaspoon ground nutmeg Adds depth of flavor
For the topping
- ½ cup all-purpose flour For the topping
- ¾ cup brown sugar Contributes sweetness and chewiness
- ¼ cup butter, melted or room temp to cut in Binds the topping
Instructions
Preparation
- Preheat your oven to 300 degrees F and line an 8×8 baking pan with parchment paper.
- Cream the butter on high for 5 minutes until it turns white, scraping down the sides of the bowl as needed.
- Mix in sugar, vanilla, and salt until well incorporated.
- Add flour and stir well to form a dough-like consistency.
- Press the mixture into the pan and bake for 15 minutes.
Filling
- Mix apples, flour, sugar, cinnamon, and nutmeg in a bowl until the apples are evenly coated.
Topping
- Mix flour and brown sugar, then cut in the butter until the mixture resembles coarse crumbs.
- Increase the oven temperature to 350 degrees F.
- Layer half of the topping on the crust, then the apples, then the rest of the topping.
Baking
- Bake for 30 minutes until bubbly filling and a golden topping.
- Allow to cool and chill in the fridge for at least 2 hours before cutting into 16 squares.