Red Velvet Cake Pops have a special place in my kitchen because they capture everything I love about baking—joy, connection, and a little bit of fun. Hi, I’m Amanda, the heart behind BeamRecipes. For me, cooking has never just been about feeding people; it’s about creating comfort and memories that last. From childhood afternoons experimenting with flavors to busy weeknights with my family, food has always been my love language. BeamRecipes is where I share recipes made for real life—simple, approachable, and filled with heart—so you can feel confident turning everyday meals into unforgettable moments.
Why Red Velvet Cake Pops Work
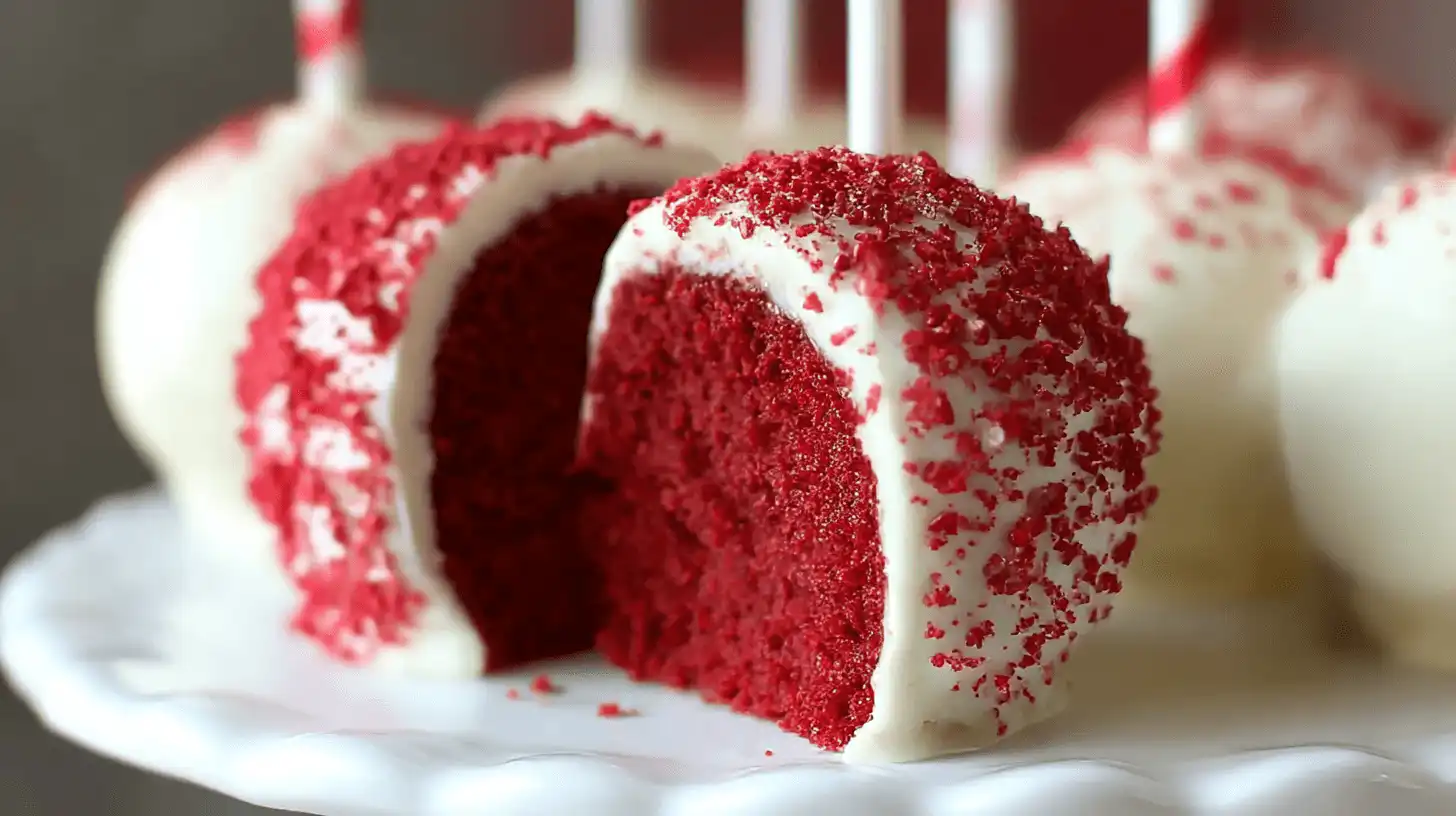
Bite-Sized Joy
Red Velvet Cake Pops deliver sweetness in just the right amount. Instead of cutting a slice of cake, each guest can enjoy a neat, handheld treat. They’re tidy for little hands and elegant enough for adult gatherings, which makes them a versatile dessert.
Easy to Customize
These pops are like a blank canvas. Dip them in white chocolate for a classic look, go with dark chocolate for richness, or keep it playful with colorful candy melts. Add sprinkles, crushed cookies, or a drizzle of contrasting chocolate to match any party theme.
Make-Ahead Friendly
Life gets busy, and that’s why these cake pops shine. You can prepare them days ahead, store them in the fridge, or freeze them for weeks. When party day comes, they’ll be ready to grab and serve without stress.
Kid and Adult Approved
Cake pops bridge the gap between childhood nostalgia and modern dessert fun. Kids love the colors and sprinkles, while adults appreciate the flavor of red velvet paired with smooth cream cheese frosting. Everyone feels included with this playful dessert.
Ingredients & Swaps
Main Ingredients
- 1 baked red velvet cake (boxed mix for convenience or homemade for tradition)
- 1 cup cream cheese frosting (gives that signature tangy balance)
- 2 cups melting chocolate (choose from white, milk, or dark)
- Sprinkles, crushed cookies, or nuts for garnish
Optional Swaps
- Frosting Swap: Try vanilla buttercream if cream cheese frosting isn’t your favorite.
- Diet-Friendly: Use a gluten-free cake mix and certified gluten-free chocolate to make this recipe safe for everyone.
- Easier Dipping: Candy melts are designed for coating, making them less temperamental than chocolate if you’re short on time.
- Flavor Boost: Add a teaspoon of vanilla or almond extract to the frosting mixture for extra depth.
Instructions
Step 1: Crumble the Cake
Once the red velvet cake is baked and cooled completely, break it into fine crumbs using your hands or a fork. The texture should feel even, like soft sand.
Step 2: Mix with Frosting
Stir in the cream cheese frosting, starting with half a cup and adding more only as needed. The mixture should form a dough-like consistency that holds its shape without being sticky.
Step 3: Shape the Balls
Scoop about one tablespoon of the mixture and roll into a smooth ball. Line them up on a baking sheet lined with parchment paper. Keeping the size consistent ensures even dipping later.
Step 4: Chill Before Dipping
Place the tray in the freezer for about 20 minutes. This step keeps the balls firm and prevents them from breaking apart in the warm melted chocolate.
Step 5: Insert Sticks
Dip just the tip of each cake pop stick into melted chocolate, then push it halfway into the center of each ball. This “glue” helps the stick stay put. Return them to the freezer for 5–10 minutes.
Step 6: Dip in Chocolate
Working one at a time, fully submerge each cake ball into the melted chocolate. Lift it out gently, letting excess drip back into the bowl. Rotate slightly to get an even coat.
Step 7: Decorate and Set
Before the coating sets, add sprinkles, cookie crumbs, or drizzle with another chocolate color. Place each pop upright in a foam block to dry, or lay them flat on parchment for a more rustic look.
Why This Recipe Works
Moist Texture
The frosting isn’t just for sweetness—it binds the crumbs together, giving each bite a soft, truffle-like texture instead of something dry or crumbly. That balance between cake and frosting is what makes cake pops irresistible.
Chill Step Prevents Breakage
When you freeze the cake balls before dipping, you’re giving them structure. Without this step, the heat from the melted chocolate would soften them too quickly, leading to cracked coatings or cake slipping off the stick.
Chocolate Seal
The chocolate coating is more than decoration—it acts like a protective shell. It locks in moisture, adds a satisfying crunch, and keeps the pops fresh for days.
Easy Portion Control
Each pop is a single serving, making them perfect for sharing. You won’t need plates, forks, or napkins—just grab and enjoy. It’s dessert simplified.
Versatile Decoration
Because of their small size, cake pops adapt to any occasion. From pastel sprinkles for baby showers to bold drizzles for game day, you can dress them up or down without changing the recipe.
Variations & Adaptations
Holiday Pops
Dress your cake pops for the season: red and green sprinkles for Christmas, candy hearts for Valentine’s Day, or black-and-orange drizzle for Halloween. They instantly become themed treats.
Cheesecake Twist
Add a block of softened cream cheese directly to the cake crumbs for a denser, tangier bite—like cheesecake and red velvet rolled into one.
Mini Pops
For a crowd, make smaller, bite-sized pops using toothpicks. They’re perfect for kids’ parties or when you want to stretch a single cake into dozens of treats.
Adult Upgrade
For a more refined touch, dip the pops in dark chocolate and sprinkle lightly with espresso powder or cocoa nibs. The bitterness balances the sweetness beautifully.
Nutty Coating
Roll the dipped pops in finely crushed pistachios, almonds, or hazelnuts for crunch and a gourmet look. This variation pairs especially well with white chocolate coating.
Common Mistakes to Avoid
Adding Too Much Frosting
It’s tempting to add more frosting, but too much makes the mixture sticky and hard to roll. Start small—you can always add more, but you can’t take it out.
Skipping the Chill
Patience pays off. If you rush into dipping without chilling, the cake balls will crumble or fall off the sticks. The freezer step is your safety net.
Overheating Chocolate
Chocolate can burn easily. Use low heat or a double boiler, stirring often. Smooth, glossy chocolate makes dipping easier and gives a prettier finish.
Thick Coating
If your coating feels heavy, thin it with a teaspoon of coconut oil or shortening. This helps it glide over the cake balls and set with a clean, even surface.
FAQ
How long do red velvet cake pops last?
They’ll stay fresh up to 5 days in the refrigerator and about 2 months in the freezer if sealed in an airtight container.
Can I make them without sticks?
Yes! Leave out the sticks and you’ll have cake truffles. They’re just as delicious and even easier to transport.
What’s the best way to store them?
Arrange them in a single layer in an airtight container. If stacking, place parchment paper between layers to prevent sticking.
Can I use store-bought frosting?
Definitely. Store-bought frosting makes this recipe quicker and still delivers that sweet, creamy texture. Choose cream cheese or vanilla for the best results.
Can I use white chocolate chips instead of candy melts?
Yes, but add a teaspoon of coconut oil to help them melt smoothly. Candy melts are designed for dipping, while chocolate chips can seize if overheated.
notes Final Encouragement
These red velvet cake pops aren’t just treats—they’re little moments of happiness on a stick. Whether you’re pulling them out for a birthday, a holiday, or simply a Tuesday afternoon surprise, they have a way of sparking smiles. Don’t worry about making them perfect—the joy is in the process, the sprinkles scattered on the counter, and the laughter of whoever gets to enjoy them with you.

Red Velvet Cake Pops
Equipment
- Baking Sheet
- Parchment Paper
- Mixing Bowl
- Cake pop sticks or lollipop sticks
- Microwave‑safe bowl or double boiler
Ingredients
Main Ingredients
- 1 baked red velvet cake homemade or boxed, fully cooled
- 1 cup cream cheese frosting for binding cake crumbs
- 2 cups melting chocolate white, milk, or dark, for coating
- Sprinkles or crushed cookies or nuts for decoration
Instructions
- Crumble the cooled red velvet cake into fine crumbs. You want the texture to be like soft sand.
- Mix the cake crumbs with cream cheese frosting, starting with ½ cup of frosting; add more only if needed until it holds its shape but isn’t too sticky.
- Roll the mixture into balls (about 1 tbsp each) and place on a parchment‑lined baking sheet.
- Freeze the balls for ~20 minutes to firm them up.
- Dip the tip of each stick into melted chocolate, then insert halfway into each ball. Freeze again for 5‑10 minutes to set the stick.
- Working one by one, dip each ball fully in the melted chocolate. Let excess drip off, rotate for even coverage.
- Decorate immediately—sprinkles, crushed nuts, a drizzle of contrasting chocolate—then set upright or on parchment paper to finish hardening.


