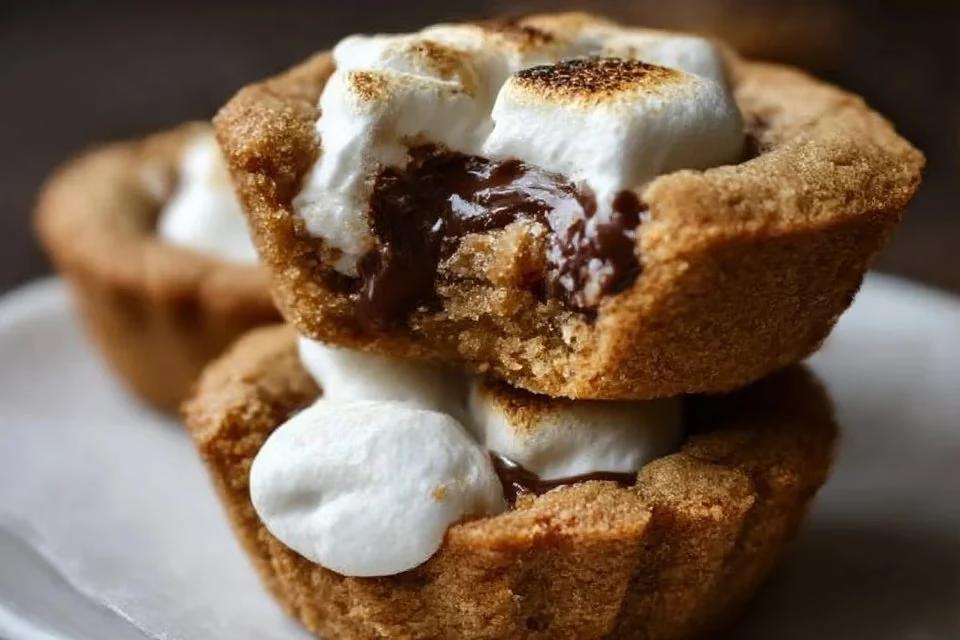
Why You’ll Love This S’mores Cookie Cups
This s’mores cookie cups recipe is both simple and dependable, allowing even novice bakers to create a delicious treat. The flavors are well-balanced—sweet from the sugars, rich from the chocolate, and comforting from the marshmallow fluff, making them hard to resist. With easily sourced ingredients and straightforward instructions, this recipe fits seamlessly into everyday life, perfect for enjoying after a meal or as a fun snack.
Kitchen Tools You’ll Need
- Mixing bowl
- Whisk
- Measuring cups
- Measuring spoons
- Muffin tin
- Rubber spatula
Ingredients
- 1 cup graham cracker crumbs (for texture and flavor)
- 1/2 cup all-purpose flour (for structure)
- 1/2 cup brown sugar (for moisture and sweetness)
- 1/4 cup granulated sugar (for sweetness)
- 1/2 cup unsalted butter, softened (for richness and moisture)
- 1 large egg (for binding)
- 1 teaspoon vanilla extract (for flavor)
- 1/2 teaspoon baking soda (for leavening)
- 1/4 teaspoon salt (to balance sweetness)
- 1 cup chocolate bar pieces (for melting, richness, and sweetness)
- 1/2 cup marshmallow fluff (for gooey texture and sweetness)
How to Make S’mores Cookie Cups
Step 1
Preheat your oven to 350°F (175°C). This temperature is ideal for baking cookie cups, ensuring they cook evenly and develop a nice golden color on the outside. While the oven is heating, gather all your ingredients to streamline the process and ensure everything is ready for mixing. This initial step sets you up for the rest of the baking process.
Step 2
In a large mixing bowl, combine the graham cracker crumbs, all-purpose flour, brown sugar, granulated sugar, baking soda, and salt. Use a whisk to blend these dry ingredients thoroughly, ensuring there are no lumps. This mixture will provide the foundation of your cookie cups, bringing in the classic graham cracker flavor and balancing out the sweetness. Once completely mixed, set the bowl aside.
Step 3
In another bowl, beat the softened unsalted butter until it’s creamy and fluffy. This can be done using a hand mixer or a spatula. Incorporating air into the butter helps create a light texture in your cookie cups. Once the butter is light and fluffy, add the egg and vanilla extract, blending until fully combined. The egg acts as a binding agent, which is crucial for the consistency of the cookie.
Step 4
Gradually add the dry mixture into the bowl containing the wet ingredients. Use a spatula to gently fold the dry ingredients into the wet. Be careful not to overmix; you want to incorporate everything just until combined. This step ensures a nice dough that retains a good texture after baking.
Step 5
Spoon the dough into a greased muffin tin, filling each cup about two-thirds full. Use the back of a spoon or your fingers to press the dough gently down into the bottom of each cup. This creates a little well for the filling later. Make sure the dough is evenly distributed to allow for uniform baking, which will help all cookie cups to have the same texture.
Step 6
Bake the muffin tin in your preheated oven for about 10-12 minutes. Keep an eye on them; you want the edges to turn lightly golden while the centers remain soft. This combination will give you that ideal cookie cup texture—crisp on the edges and tender in the middle. Once they are baked, remove the tin from the oven and let them cool slightly.
Step 7
While the cookie cups are still warm, press a few pieces of chocolate bar into the center of each cup. The warmth of the cookie will melt the chocolate slightly, creating a deliciously gooey filling. Ensure that you distribute the chocolate evenly, so each cookie cup gets a good amount of melted chocolate.
Step 8
Next, spoon a dollop of marshmallow fluff on top of each melted chocolate piece. This provides that classic s’mores flavor and adds a wonderful creaminess. You may want to use the back of a spoon to spread it slightly to ensure it covers the chocolate completely.
Step 9
To finish, place the muffin tin back in the oven for an additional 2-3 minutes. This will help the marshmallow fluff become warm and slightly toasted, enhancing its flavor and texture. Watch closely so that it doesn’t get too brown; you’re aiming for soft and gooey.
Step 10
After the final baking time, remove the muffin tin from the oven and allow the cookie cups to cool for a few minutes. Once they are cool enough to handle, gently lift them out of the tin. Using a small spatula will help prevent them from breaking apart.
Step 11
Let the cookie cups cool completely on a wire rack. This cooling process allows them to firm up and makes them easier to serve later. Dedicated time for cooling ensures that the marshmallow fluff sets nicely, keeping the cookie cups intact for serving or storing.
Serving Suggestions
These s’mores cookie cups can be enjoyed in various situations. They make a great after-school snack for kids, perfect for satisfying a sweet tooth during movie nights, or even a delightful addition to breakfast alongside a cup of coffee. If you find yourself with leftovers, they can be stored easily and enjoyed the next day, making for quick and easy treats.
Pro Tips for Best Results
- Use softened butter for easy blending; make sure to leave it out of the fridge for about an hour before starting.
- Don’t skip the cooling step; this helps the cookie cups set properly.
- If you like a bit of crunch, add some crushed graham crackers on top of the marshmallow fluff.
- Store leftover cookie cups in an airtight container to maintain their freshness.
- Feel free to experiment with different chocolate types or add a sprinkle of sea salt on top for a gourmet touch.
Common Mistakes to Avoid
- Not measuring ingredients accurately: This can lead to incorrect textures. Use dry measuring cups for dry ingredients and liquid measuring cups for wet ones to ensure accuracy.
- Using cold butter: Cold butter doesn’t blend well, leading to a dense texture. Always soften your butter to room temperature for the best results.
- Overmixing the dough: This can result in tough cookie cups. Mix just until combined—no need to blend until smooth.
- Not preheating the oven: Baking in an oven that isn’t ready can affect cooking times and texture. Always preheat to ensure even cooking.
- Skipping the cooling period: Removing them too soon can cause them to fall apart. Give enough time for the cookie cups to cool before taking them out of the tin.
- Using a muffin tin that isn’t greased well: This can lead to sticking and broken cookie cups. A light greasing with cooking spray or butter ensures easy removal.
Variations & Substitutions
You can easily modify the filling by using mini marshmallows instead of fluff or try adding a drizzle of caramel sauce for added sweetness. For a twist, consider adding various types of chocolate, such as milk, dark, or even peanut butter chocolate. If you prefer to skip the marshmallow, simply top with whipped cream after baking for a different experience.
Storage & Reheating
Store the cookie cups at room temperature for about 2-3 days, keeping them in an airtight container to maintain freshness. If you need longer storage, they can be kept in the refrigerator for up to a week. Freezing is also an option; place them in a freezer-safe container for up to a month. When it’s time to enjoy them again, reheat in a microwave for about 10-15 seconds or in the oven at 300°F for a few minutes to restore their soft texture.
Nutrition Information
Nutrition values are estimates and may vary based on ingredients used.
Frequently Asked Questions
Can I make this recipe ahead of time?
Yes, you can prepare the dough ahead of time. Store it in the refrigerator for up to 24 hours before baking. You can also bake the cookie cups in advance, allowing them to cool, and then store them for later enjoyment.
How long does it last in the fridge?
When stored in an airtight container, s’mores cookie cups can last in the fridge for about a week. They are best enjoyed fresh, but refrigeration helps maintain their texture.
Can I freeze this recipe?
Absolutely! S’mores cookie cups can be frozen for up to a month. Make sure they are completely cooled and stored in a freezer-safe container to prevent freezer burn.
What can I substitute for one ingredient?
If you need to substitute graham cracker crumbs, you can use crushed vanilla cookies or even oreo crumbs for a different flavor twist. Just ensure the texture remains similar for the best results.
Why didn’t my recipe turn out as expected?
Several factors could affect the outcome, including measuring errors, incorrect oven temperature, or not allowing enough cooling time. Double-checking ingredient amounts and following the instructions can help avoid common pitfalls.
Final Thoughts
Making s’mores cookie cups can be an enjoyable and fulfilling experience, bringing a bit of nostalgia together with the ease of a modern treat. These little bites are a wonderful way to bring comfort into your kitchen, and they are sure to be a hit at any gathering. Whether you savor them alone or share with friends and family, they provide a delightful balance of flavor and texture. Enjoy your time in the kitchen, and don’t hesitate to create your own serving traditions around these charming cookies.

S’mores Cookie Cups
Ingredients
For the Cookie Cups
- 1 cup graham cracker crumbs for texture and flavor
- 1/2 cup all-purpose flour for structure
- 1/2 cup brown sugar for moisture and sweetness
- 1/4 cup granulated sugar for sweetness
- 1/2 cup unsalted butter, softened for richness and moisture
- 1 large egg for binding
- 1 teaspoon vanilla extract for flavor
- 1/2 teaspoon baking soda for leavening
- 1/4 teaspoon salt to balance sweetness
For the Filling
- 1 cup chocolate bar pieces for melting, richness, and sweetness
- 1/2 cup marshmallow fluff for gooey texture and sweetness
Instructions
Preparation
- Preheat your oven to 350°F (175°C). Gather all your ingredients.
- In a large mixing bowl, combine the graham cracker crumbs, all-purpose flour, brown sugar, granulated sugar, baking soda, and salt. Whisk to blend thoroughly.
- In another bowl, beat the softened unsalted butter until creamy and fluffy. Add the egg and vanilla extract, blending until fully combined.
- Gradually add the dry mixture to the wet ingredients. Use a spatula to gently fold until just combined.
- Spoon the dough into a greased muffin tin, filling each cup about two-thirds full.
Baking
- Bake for about 10-12 minutes until the edges are lightly golden and the centers remain soft.
- While warm, press a few pieces of chocolate into the center of each cup.
- Spoon a dollop of marshmallow fluff on top of each melted chocolate piece.
- Return the muffin tin to the oven for an additional 2-3 minutes to warm and slightly toast the marshmallow fluff.
- Remove the muffin tin and allow to cool for a few minutes before lifting out of the tin.
- Let cool completely on a wire rack.


