Why You’ll Love This Recipe
These Danish biscuits are not only easy to prepare, but they also deliver a reliable, satisfying flavor profile. Their crisp, buttery texture complements the rich chocolate dip, offering a perfect balance of sweetness and indulgence. With their practical everyday value, you can enjoy them for breakfast, as a snack, or dessert, making them a versatile addition to your baking repertoire.
Kitchen Tools You’ll Need
- Mixing bowl
- Baking sheet
- Parchment paper
- Rolling pin
- Knife or pastry cutter
Ingredients
- All-purpose flour (structure)
- Unsalted butter, softened (moisture, flavor)
- Sugar (sweetness)
- Baking powder (leavening)
- Egg yolk (richness, binding)
- Heavy cream (moisture, richness)
- Semisweet chocolate (flavor, richness)
How to Make Crisp and Buttery Danish Biscuits with Chocolate Dip
Step 1. Begin by mixing the softened butter and sugar in a mixing bowl. Use a sturdy spatula or wooden spoon to cream them together until the mixture is light and fluffy. This should take about 3 to 5 minutes. The goal here is to create a light texture that will help the biscuits rise during baking. Watch for a creamy consistency, which indicates that the sugar is well incorporated with the butter.
Step 2. Next, add the egg yolk to the butter and sugar mixture, then mix until fully combined and the mixture appears smooth. This step adds richness and acts as a binding agent that helps the biscuits hold together. Ensure that the egg yolk is well distributed throughout the mixture before moving on to the next step.
Step 3. Gradually incorporate the all-purpose flour and baking powder into the wet mixture. Stir gently to avoid overmixing, which can make the biscuits tough. The dry and wet ingredients should come together to form a soft dough. Watch for the dough pulling away from the sides of the bowl, indicating that it is ready for the next stage.
Step 4. Once your dough is formed, lightly flour a clean surface and turn the dough onto it. Use a rolling pin to roll it out to about 1/4 inch thick. Try to maintain an even thickness for uniform baking. As you roll, dust the surface and the dough with flour as needed to prevent sticking, ensuring the dough remains manageable and does not lose its shape.
Step 5. Cut the rolled dough into desired shapes using a knife or pastry cutter. Place the cut biscuits onto a baking sheet lined with parchment paper, ensuring they have enough space between them to rise. This allows air to circulate during baking, promoting a crisp texture. Aim for pieces that are consistent in size, which helps in achieving an even bake.
Step 6. Preheat your oven to the appropriate temperature for baking. Once it reaches the desired heat, put the baking sheet in the oven and bake the biscuits until they are golden brown and crisp. Keep an eye on them as baking times can vary slightly. When they are done, the tops should be lightly browned, which indicates they are ready to be taken out.
Step 7. Meanwhile, prepare the chocolate dip. Using a microwave-safe bowl, melt the semisweet chocolate until smooth. Stir frequently to avoid overheating and ensure it melts evenly without burning. The chocolate dip should have a glossy texture, making it perfect for dipping after the biscuits have cooled.
Step 8. After removing the biscuits from the oven, allow them to cool on the baking sheet for a moment. Then transfer them to a wire rack to cool completely. This step is essential as it allows the biscuits to firm up, ensuring they maintain their crispiness. Be patient during this cooling period as it enhances the overall texture of the biscuits.
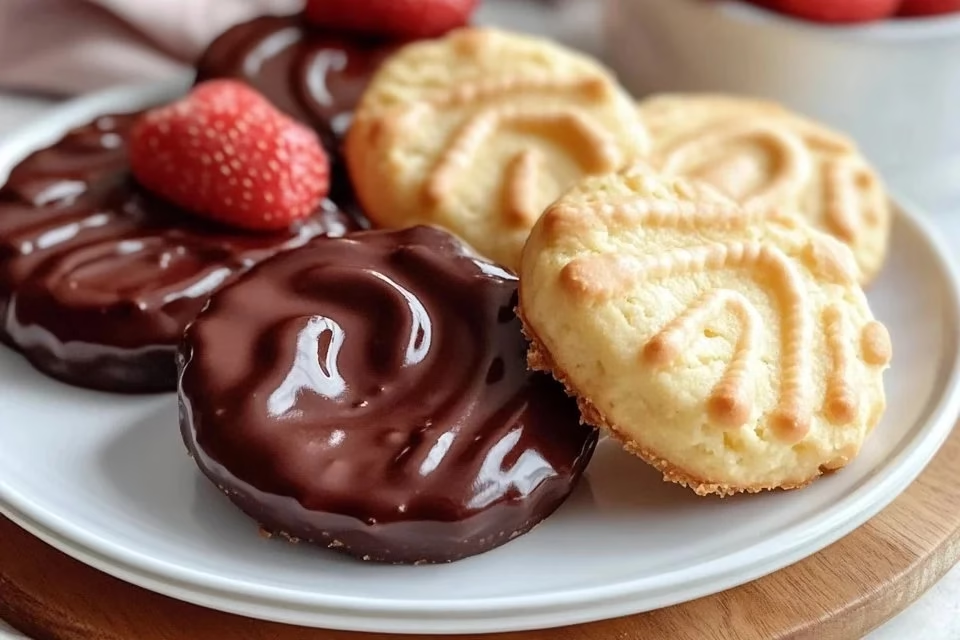
Step 9. Once cooled, arrange the biscuits on a serving plate. Serve them with the melted chocolate dip on the side, allowing everyone to dip as they please. This makes for a delightful presentation and interactive experience while enjoying the biscuits.
Serving Suggestions
Crisp and Buttery Danish Biscuits with Chocolate Dip can be enjoyed in a variety of ways. They make a wonderful breakfast treat when paired with coffee or tea. As a snack, they are perfect for afternoon get-togethers or a sweet pick-me-up. Leftovers can easily be stored for later indulgence, ready to complement any meal or as a delightful dessert option to share with family and friends.
Pro Tips for Best Results
- Ensure that the butter is at room temperature for easier creaming with sugar.
- Avoid overworking the dough to maintain flakiness and crispness in the biscuits.
- Use parchment paper on the baking sheet to prevent sticking and make cleanup easier.
- Allow the biscuits to cool completely before dipping in chocolate for the best texture.
Common Mistakes to Avoid
- Using cold butter: This can prevent proper creaming with sugar, leading to a denser biscuit. Always use softened butter for the best texture.
- Overmixing the dough: This can make the biscuits tough instead of crisp. Mix just until combined to keep them light and airy.
- Inconsistent dough thickness: Uneven thickness can lead to uneven baking. Roll the dough evenly to ensure all biscuits cook at the same rate.
- Skipping cooling time: Dipping warm biscuits in chocolate can result in the chocolate melting too much. Cool biscuits completely before dipping.
- Overbaking or underbaking: This can lead to biscuits that are too hard or too soft. Keep an eye on them to ensure they are perfectly golden when done.
- Not adjusting baking temperature: Every oven is different. It’s essential to monitor them closely and adjust the temperature if needed.
Variations & Substitutions
For a twist on the classic recipe, you can try adding vanilla extract to the dough for added flavor. Alternatively, consider mixing in finely chopped nuts or dried fruit for texture. If you’re feeling adventurous, experiment with other chocolate types, such as dark or white chocolate, for dipping. Each variation provides its unique taste experience.
Storage & Reheating
Store these biscuits at room temperature in an airtight container for up to a week. To maintain their crispy texture, avoid refrigerating them, as moisture can lead to sogginess. If you need to store them longer, consider freezing them in a single layer in a freezer-safe container. When ready to enjoy, thaw at room temperature and briefly reheat in the oven to restore crispness.
Nutrition Information
Nutrition values are estimates and may vary based on ingredients used.
Frequently Asked Questions
Can I make this recipe ahead of time?
Yes, you can prepare the dough ahead of time and refrigerate it for up to 24 hours before baking. Just let it come to room temperature before rolling out.
How long does it last in the fridge?
These biscuits are best enjoyed fresh but can be kept in the fridge for about a week. However, they might lose some crispness.
Can I freeze this recipe?
Absolutely. The baked biscuits freeze well. Just ensure they are stored in an airtight container. They can be frozen for up to three months.
What can I substitute for one ingredient?
If you need a substitute for unsalted butter, you can use margarine, though this may slightly alter the flavor and texture.
Why didn’t my recipe turn out as expected?
There are several reasons, such as improper measurements or mixing. Make sure to follow the recipe closely and measure ingredients accurately for best results.
Final Thoughts
Making Crisp and Buttery Danish Biscuits with Chocolate Dip is a rewarding experience that combines simplicity and comfort in one delightful package. As you enjoy these biscuits, you’ll appreciate their rich flavors and satisfying textures that make them a go-to treat for any occasion. Remember, baking is about enjoyment and experimentation, and with this recipe, you’re sure to create something special for yourself and those you share it with.
Crisp and Buttery Danish Biscuits with Chocolate Dip
Ingredients
For the Biscuits
- 2 cups All-purpose flour Essential for structure.
- 1/2 cup Unsalted butter, softened Should be at room temperature.
- 1/2 cup Sugar Adds sweetness.
- 1 tbsp Baking powder For leavening.
- 1 large Egg yolk Provides richness and binding.
- 2 tbsp Heavy cream Adds moisture and richness.
For the Chocolate Dip
- 1 cup Semisweet chocolate For melting as a dip.
Instructions
Preparation
- In a mixing bowl, cream together the softened butter and sugar until light and fluffy (about 3 to 5 minutes).
- Add the egg yolk and mix until fully combined and smooth.
- Gradually incorporate the all-purpose flour and baking powder into the mixture until a soft dough forms.
- Lightly flour a surface and turn the dough out. Roll it to about 1/4 inch thick, dusting with flour as needed.
- Cut the rolled dough into desired shapes and place them on a baking sheet lined with parchment paper.
Baking
- Preheat the oven and bake the biscuits until golden brown (around 15 minutes).
- Meanwhile, melt the semisweet chocolate in a microwave until smooth.
- Allow the biscuits to cool on a wire rack before serving with the chocolate dip.


