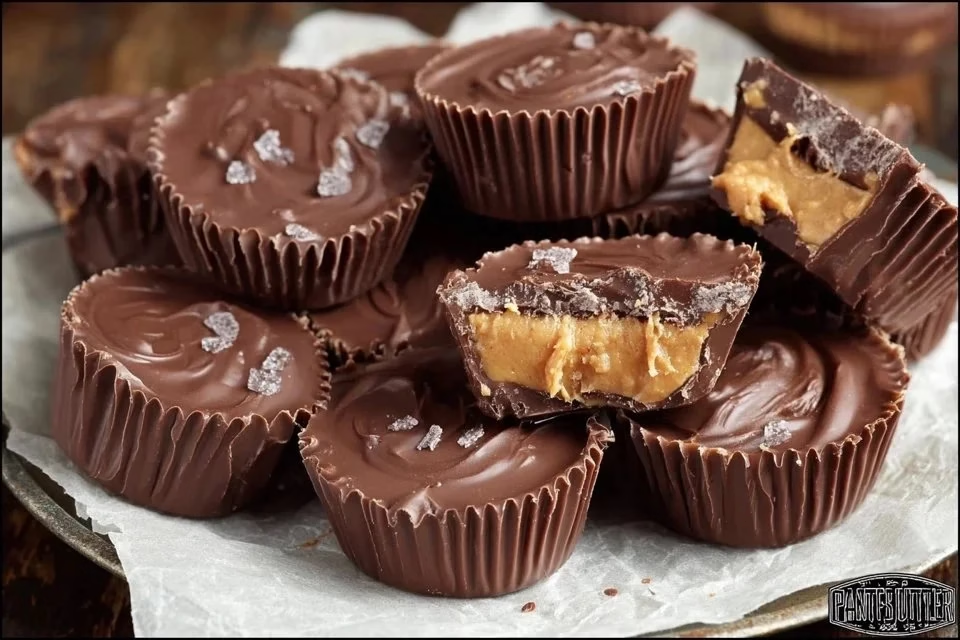
Making your own peanut butter cups is a delightful blend of simplicity and comfort. This treat is perfect for quiet evenings at home or gatherings with friends and family. Whether enjoyed as an after-dinner snack or a special weekend dessert, homemade peanut butter cups offer a satisfying experience that balances sweet and salty flavors. This recipe embraces everyday ingredients, making it practical and approachable. Let’s dive into the comforting world of homemade peanut butter cups.
Why You’ll Love This Recipe
This recipe is a breeze to follow, providing reliable results every time. The combination of rich chocolate and creamy peanut butter creates a comforting balance that appeals to many palates. It offers practical everyday value, making it an excellent choice for satisfying sweet cravings. Homemade Peanut Butter Cups fit seamlessly into any busy schedule, perfect for those moments when you need a little indulgence.
Kitchen Tools You’ll Need
- Mixing bowl
- Microwave-safe bowl
- Rubber spatula
- Measuring cups
- Baking sheet
- Cupcake liners
Ingredients
- 2 ⅓ cups milk chocolate chips or semi-sweet (sweetness and meltability)
- 2 tsp shortening (smoothness)
- 1 ¾ cup powdered sugar (sweetness and structure)
- 1 cup creamy peanut butter (texture and flavor)
- ¼ cup salted butter, room temp (richness and moisture)
- 1 ½ tsp vanilla extract (flavor enhancement)
- 1 tsp salt (balance)
How to Make Homemade Peanut Butter Cups
Step 1. Begin by preparing a baking sheet. Line it with cupcake liners to create a base for the peanut butter cups. This step helps shape the cups and makes for easy removal later. Ensure the liners are nested securely in the sheet to hold their shape during filling.
Step 2. In a microwave-safe bowl, combine the milk chocolate chips and shortening. Heat in the microwave in short bursts of 30 seconds, stirring in between until the mixture is completely melted and smooth. It’s important not to overheat, as chocolate can seize, resulting in a mixture that is difficult to work with.
Step 3. Carefully spoon a small amount of the melted chocolate mixture into the bottom of each cupcake liner, enough to cover the bottom completely. Use a brush or the back of a spoon to spread it evenly. Watch for any gaps as you want the base to be fully covered before adding the peanut butter filling.
Step 4. Once you’ve filled each liner, place the baking sheet in the refrigerator for about 10 minutes to allow the chocolate to set. This step is crucial for ensuring a solid foundation for your peanut butter cups, preventing the layers from mixing later.
Step 5. While the chocolate sets, prepare the peanut butter filling. In a mixing bowl, blend together the creamy peanut butter, powdered sugar, salted butter, vanilla extract, and salt until smooth and well combined. The mixture should be thick but spreadable, similar to a frosting.
Step 6. Retrieve the baking sheet from the refrigerator and add a dollop of the peanut butter filling on top of the set chocolate layer. Gently spread it out to cover the chocolate evenly in each liner. Make sure to leave a little space at the top so that the final layer of chocolate will fit.
Step 7. Return the baking sheet to the refrigerator again for another 10 minutes, allowing the peanut butter filling to firm up slightly. This will prevent the chocolate from sinking into the filling when you add the top layer.
Step 8. Using the remaining melted chocolate mixture, carefully spoon it over the peanut butter layer until each cup is filled to the top. Smooth it out as needed to create a nice finish. Take care to cover the peanut butter completely to seal it inside.
Step 9. Place the baking sheet back in the refrigerator for at least 30 minutes or until the chocolate has fully set. This cooling time is essential as it ensures the chocolate hardens properly, making the cups easier to remove.
Step 10. Once set, remove the peanut butter cups from the refrigerator and carefully peel the cupcake liners away. The cups should come out easily, revealing smooth chocolate edges. These bites are now ready to be enjoyed or stored for later.
Serving Suggestions
Homemade peanut butter cups make a wonderful treat for breakfast paired with coffee or as a quick snack during the day. They are also a delightful addition to family meals, serving as a sweet finish after dinner. If you happen to have leftovers, just store them in the fridge for those moments when you’re craving a quick chocolate fix. These cups are versatile and can be enjoyed any time you need a little pick-me-up.
Pro Tips for Best Results
- Use a microwave-safe bowl to avoid heat damage.
- Stir the chocolate frequently to ensure it melts evenly.
- Allow adequate time for each layer to set.
- Measure ingredients accurately for best texture.
- Keep the finished cups refrigerated until serving.
- Use high-quality chocolate for richer flavor.
Common Mistakes to Avoid
- Overheating the Chocolate: This can lead to a gritty texture if the chocolate seizes. Instead, heat the chocolate in short bursts and stir frequently until just melted.
- Not Setting Layers Properly: Skipping or shortening the refrigeration times can cause layers to blend together, making it difficult to achieve distinct layers. Allow each layer to set completely before adding the next.
- Incorrect Peanut Butter Consistency: Using chunky peanut butter instead of creamy can create a lumpy filling, which may not hold together well. Stick to creamy peanut butter for a smooth texture.
- Skipping the Shortening: Omitting the shortening can result in chocolate that is too thick and difficult to spread. The shortening helps to thin the mix and achieve a smoother texture.
- Failure to Refrigerate Long Enough: Cutting corners on chilling time may result in soft, mushy cups that don’t hold their shape. Be patient; allowing the cups to chill thoroughly ensures they firm up nicely.
- Not Using Cupcake Liners: Attempting to pour the chocolate directly into the sheet without liners can result in a sticky mess that’s difficult to remove. The liners provide easy serving and cleanup.
Variations & Substitutions
Consider trying dark chocolate instead of milk chocolate for a richer flavor. You can also mix in chopped nuts or crushed pretzels into the peanut butter filling for an added crunch. If you fancy a sweeter bite, consider incorporating a layer of caramel between the peanut butter and chocolate layers.
Storage & Reheating
Store your peanut butter cups in an airtight container at room temperature for up to a week. For longer storage, keep them in the refrigerator, where they will last for two weeks. You can freeze them for up to three months; simply wrap each cup individually in plastic wrap before placing them in a freezer-safe container. When ready to enjoy, let them thaw at room temperature for the best texture.
Frequently Asked Questions
Can I make this recipe ahead of time?
Yes, you can make these peanut butter cups a few days in advance. They store well in the fridge, so you can prepare them ahead of time for parties or events.
How long does it last in the fridge?
Stored in an airtight container, these homemade peanut butter cups can last for about two weeks in the refrigerator. Ensure they are kept cool to maintain their texture.
Can I freeze this recipe?
Absolutely! You can freeze the peanut butter cups for up to three months. Just make sure they are well-wrapped to prevent freezer burn and help preserve their flavor.
What can I substitute for one ingredient?
If you’re out of shortening, you can use coconut oil instead. It will help to achieve a similar consistency in the chocolate without affecting the flavor much.
Why didn’t my recipe turn out as expected?
Common issues include not properly setting the layers due to skipping refrigeration times or overheating the chocolate. Following the steps carefully and allowing for setting times will help ensure success.
Final Thoughts
Making Homemade Peanut Butter Cups is a rewarding experience that results in a comforting treat beloved by many. The process is straightforward, providing both the joy of creation and a delightful reward in every bite. Embrace the simplicity and satisfaction of this recipe, and enjoy the sweet moments it brings to your table.

Homemade Peanut Butter Cups
Ingredients
Chocolate Layer
- 2 ⅓ cups milk chocolate chips or semi-sweet For sweetness and meltability
- 2 tsp shortening For smoothness
Peanut Butter Filling
- 1 cup creamy peanut butter For texture and flavor
- 1 ¾ cups powdered sugar For sweetness and structure
- ¼ cup salted butter, room temp For richness and moisture
- 1 ½ tsp vanilla extract For flavor enhancement
- 1 tsp salt For balance
Instructions
Preparation
- Begin by preparing a baking sheet. Line it with cupcake liners to create a base for the peanut butter cups.
- In a microwave-safe bowl, combine the milk chocolate chips and shortening. Heat in short bursts of 30 seconds, stirring in between until melted and smooth.
- Spoon a small amount of the melted chocolate mixture into the bottom of each cupcake liner to cover completely.
- Place the baking sheet in the refrigerator for about 10 minutes to allow the chocolate to set.
- In a mixing bowl, blend together the creamy peanut butter, powdered sugar, salted butter, vanilla extract, and salt until smooth.
Assembly
- Retrieve the baking sheet and add a dollop of the peanut butter filling on top of the set chocolate layer, spreading it evenly.
- Return the baking sheet to the refrigerator for another 10 minutes.
- Using the remaining melted chocolate, spoon it over the peanut butter layer until the cups are filled to the top.
- Place the baking sheet back in the refrigerator for at least 30 minutes or until the chocolate has fully set.
- Once set, remove the peanut butter cups from the refrigerator and peel the cupcake liners away.


