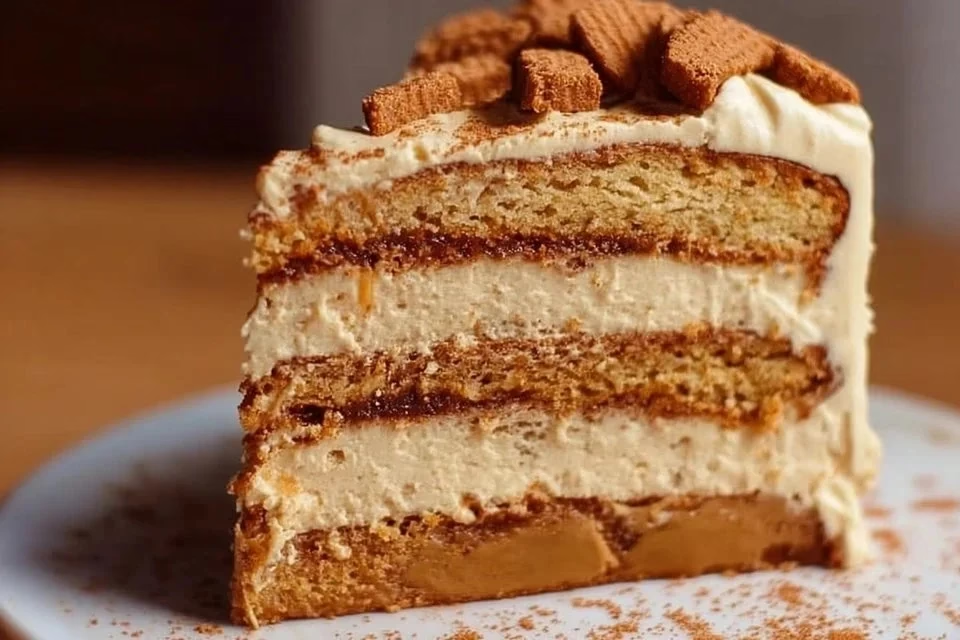
Baking can often feel like a comforting ritual, filling the kitchen with delightful aromas and bringing a little joy to our day. This cake is an inviting choice, perfect for cozy weeknight dinners or weekend gatherings. With its soft texture and the warm flavor of cookie butter, it effortlessly fits into any quiet moment or celebration. It’s an easy recipe that makes for a satisfying treat any time you’re looking for something sweet. Let’s dive into this deliciously simple recipe!
Why You’ll Love This Recipe Biscoff Cookie Butter Cake
This recipe is all about ease and reliability, making it an approachable choice for both novice and experienced bakers. The balanced flavors and comforting texture ensure that each bite is delightful. The Biscoff Cookie Butter Cake is practical for everyday enjoyment, whether you’re serving it for dessert or enjoying a slice with coffee.
Kitchen Tools You’ll Need
- Mixing bowls
- Whisk
- Rubber spatula
- Measuring cups
- Measuring spoons
- Baking pan
Ingredients
- 2 ½ cups + 2 tbsp cake flour (see notes for measuring)
- 1 ½ cups granulated sugar
- 1 tbsp baking powder
- 1/2 tsp fine sea salt
- 6 ½ tbsp unsalted butter (room temperature and cubed)
- ⅓ cup cookie butter
- 1 cup sour cream (room temperature)
- ¼ cup vegetable or canola oil
- 1 cup whole milk (room temperature)
- 2 large eggs (room temperature)
- 1 1/2 tsp vanilla extract
- 3 tbsp melted cookie butter (for swirling)
- 1 1/2 cups unsalted butter (softened)
- 2/3 cup cookie butter
- 1 ¾ cup powdered sugar
- 2 tbsp heavy cream
- ½ tsp vanilla extract
- ½ cup Biscoff cookie crumbs (for the center of the cake and sides)
- ½ cup cookie butter (for the layers and top of the cake)

How to Make Biscoff Cookie Butter Cake
Step 1. Start by preheating your oven to the appropriate temperature and preparing your baking pan by greasing it lightly. This preparation ensures that the cake will release easily after baking, giving you a clean slice.
Step 2. In a mixing bowl, whisk together the cake flour, granulated sugar, baking powder, and fine sea salt. This step helps to combine the dry ingredients evenly, ensuring a smooth batter without any clumps and sets the base for your cake.
Step 3. Add the cubed unsalted butter to the dry ingredients and beat them together until the mixture resembles a coarse meal. The butter’s richness will create a tender texture, contributing to that lovely moist crumb.
Step 4. In a separate bowl, combine the cookie butter, sour cream, vegetable oil, whole milk, eggs, and vanilla extract. Mix these wet ingredients until they’re well blended, aiming for a smooth, unified consistency that will bring moisture and flavor to the cake.
Step 5. Gradually add the wet mixture into the dry ingredients. Stir gently until just combined, being careful not to over-mix. The batter should be smooth but slightly thick, indicating that it’s ready for the baking pan.
Step 6. Pour the batter into the prepared baking pan, smoothing the top with a spatula. This step helps to ensure even baking, allowing the cake to rise uniformly for a lovely shape.
Step 7. To create a beautiful swirl, drizzle melted cookie butter over the top of the batter. Use a knife or a skewer to gently swirl it into the mixture, which will add a delightful flavor and visual appeal once baked.
Step 8. Bake in the preheated oven, watching for the cake to rise and develop a golden-brown top. It’s ready when a toothpick inserted into the center comes out clean, ensuring a light and moist interior.
Step 9. Allow the cake to cool in the pan for a bit before transferring it to a wire rack. Cooling is crucial as it allows the cake to set, making it easier to slice without falling apart.
Step 10. For the frosting, beat the softened unsalted butter and cookie butter together until creamy. This mixture will provide a rich and cohesive frosting that complements the cake perfectly without overpowering it.
Step 11. Gradually add powdered sugar and heavy cream to the butter mixture while continuing to beat. This will create a thick yet spreadable frosting, enhancing the cake’s overall flavor without adding too much sweetness.
Step 12. Once the cake is completely cooled, frost the layers generously, using some of the cookie crumbs to decorate the sides and top. The crumbs add a delightful texture and make for a visually appealing finish.
Step 13. Allow the frosted cake to set for a short time before serving. This step helps to firm up the frosting slightly, making it easier to slice the cake while maintaining that lovely buttery consistency.

Serving Suggestions
This cake is versatile enough to enjoy any time of day. It makes a lovely breakfast paired with coffee or tea, or it can serve as an afternoon snack. It’s also a great dessert option for family meals or gatherings, delighting guests young and old alike. Leftovers, if there are any, can be stored for later enjoyment, ensuring you always have a sweet treat on hand.
Pro Tips for Best Results
- Ensure that all your ingredients are at room temperature before mixing; this promotes better incorporation and a smoother batter.
- Use a toothpick test to check for doneness; it should come out clean, indicating that the cake is perfectly baked.
- Let the cake cool completely before frosting to avoid melting the buttercream.
- For an even creamier frosting, whip the heavy cream slightly before adding it to the butter mixture.
- Don’t skip the swirling with the melted cookie butter; it adds both flavor and a lovely visual element.
- Store any leftovers in an airtight container to maintain freshness.
Common Mistakes to Avoid
- Not measuring flour correctly: Using too much flour can lead to a dense cake. Always spoon the flour into the measuring cup and level it off with a straight edge.
- Using cold ingredients: Cold ingredients can cause the batter to curdle. Make sure all ingredients, especially butter and eggs, are at room temperature for even mixing.
- Overmixing the batter: This can make the cake tough. Mix until just combined for a tender crumb.
- Not checking doneness: Baking times can vary, so always check the cake a few minutes early to prevent drying out.
- Skipping the cooling step: Frosting a warm cake can lead to a messy situation, as the frosting may melt and slide off.
- Incorrectly storing leftovers: Leaving the cake uncovered may dry it out. Store it properly to maintain its moisture and flavor.
Variations & Substitutions
This cake allows for creativity. You can try adding a mix of spices, like cinnamon or nutmeg, to the batter for a warm twist. For a different texture, consider folding in some chopped nuts or chocolate chips. Additionally, if you’re in the mood for a layered treat, consider making smaller round cakes and stacking them with frosting in between layers.
Storage & Reheating
For room-temperature storage, keep the cake in an airtight container for up to three days. In the refrigerator, it will last about a week. If you have leftovers that you want to store for longer, you can freeze individual slices wrapped tightly in plastic wrap. When you’re ready to enjoy a slice, thaw it in the refrigerator or at room temperature. To refresh the texture when reheating, a few seconds in the microwave can bring back that fresh-from-the-oven feel.
Frequently Asked Questions
Can I make this recipe ahead of time?
Yes, you can bake the cake a day ahead. Store it in an airtight container at room temperature until you’re ready to frost and serve.
How long does it last in the fridge?
In the refrigerator, the cake will stay fresh for about a week when stored properly in an airtight container.
Can I freeze this recipe?
Absolutely! You can freeze the cake slices. Just wrap them well in plastic wrap and aluminum foil, and they’ll keep for a few months.
What can I substitute for one ingredient?
If you need to replace sour cream, plain yogurt works well to maintain moisture and slightly tangy flavor.
Why didn’t my recipe turn out as expected?
Common issues include inaccurate measurements or using cold ingredients. Ensure correct measuring and bring ingredients to room temperature for the best results.
Final Thoughts
Making this cake can be a delightful experience, bringing simple joy through easy steps and comforting flavors. Each slice can remind you of the pleasures of home baking—soft, sweet, and thoroughly satisfying. Whether shared with family or enjoyed during a quiet moment, this Biscoff Cookie Butter Cake invites warmth into any occasion.

Biscoff Cookie Butter Cake
Ingredients
For the cake
- 2 ½ cups cake flour See notes for measuring
- 1 ½ cups granulated sugar
- 1 tbsp baking powder
- ½ tsp fine sea salt
- 6 ½ tbsp unsalted butter Room temperature and cubed
- ⅓ cup cookie butter
- 1 cup sour cream Room temperature
- ¼ cup vegetable or canola oil
- 1 cup whole milk Room temperature
- 2 large eggs Room temperature
- 1 ½ tsp vanilla extract
- 3 tbsp melted cookie butter For swirling
For the frosting
- 1 ½ cups unsalted butter Softened
- ⅔ cup cookie butter
- 1 ¾ cups powdered sugar
- 2 tbsp heavy cream
- ½ tsp vanilla extract
- ½ cup Biscoff cookie crumbs For the center of the cake and sides
- ½ cup cookie butter For the layers and top of the cake
Instructions
Preparation
- Preheat your oven and prepare your baking pan by greasing it lightly.
- In a mixing bowl, whisk together the cake flour, granulated sugar, baking powder, and fine sea salt.
- Add the cubed unsalted butter to the dry ingredients and beat until it resembles a coarse meal.
- In a separate bowl, combine cookie butter, sour cream, vegetable oil, whole milk, eggs, and vanilla extract. Mix until well blended.
- Gradually add the wet mixture to the dry ingredients, stirring gently until just combined.
- Pour the batter into the prepared baking pan and smooth the top.
- Drizzle melted cookie butter over the top and swirl it into the batter.
Baking
- Bake in the preheated oven until a toothpick inserted into the center comes out clean.
- Allow the cake to cool in the pan for a short time before transferring it to a wire rack.
Frosting
- Beat the softened unsalted butter and cookie butter together until creamy.
- Gradually add powdered sugar and heavy cream while continuing to beat.
Assembly
- Once the cake is cooled, frost the layers generously and use cookie crumbs to decorate the sides and top.
- Allow the frosted cake to set before serving.