Hi, I’m Lina. I’m 30 years old and living here in the United States, and if there’s one place that always feels like home, it’s the kitchen. One day, while chatting with a stranger at a coffee shop, she mentioned her favorite dessert — a Chocolate Peanut Butter Cup Trifle. I tried it that weekend and instantly understood why she loved it. Food really does have a way of connecting us. Try it and tell me — isn’t it amazing how food brings people together?
Why You’ll Love This Recipe
This Chocolate Peanut Butter Cup Trifle is pure dessert joy. It’s a crowd-pleaser that feels fancy but is totally foolproof. You don’t have to bake from scratch (unless you want to), and it can be made ahead—actually, it tastes even better as it chills. Each spoonful has a little bit of everything: chocolate cake, fluffy peanut butter mousse, creamy whipped topping, and chunks of peanut butter cups. It’s comfort and celebration all in one bite.
ingridient
- 1 box of chocolate cake mix (plus ingredients on the box) — rich, fudgy base layer
- 2 cups cold heavy whipping cream — makes the whipped cream light and airy
- 1 cup powdered sugar — adds subtle sweetness
- 1 tsp vanilla extract — enhances all the flavors
- 1 (8 oz) package cream cheese, softened — adds richness and structure
- 1 cup creamy peanut butter — gives the trifle its signature flavor
- 1 (14 oz) can sweetened condensed milk — makes the mousse silky and smooth
- 20 mini peanut butter cups, chopped — for texture and fun layers
- Optional: chocolate sauce for drizzling — for that perfect glossy finish
How to Make Chocolate Peanut Butter Cup Trifle
Step 1: Bake the Chocolate Cake
Prepare the chocolate cake according to package directions. Once baked, let it cool completely. Cut or crumble it into bite-sized chunks—it’ll form the base of your layers.
Step 2: Whip the Cream
In a chilled mixing bowl, beat together the heavy cream, powdered sugar, and vanilla extract until stiff peaks form. The texture should be smooth and fluffy, not grainy. Set aside.
Step 3: Make the Peanut Butter Mousse
In another bowl, beat the cream cheese and peanut butter until smooth and creamy. Add the sweetened condensed milk and mix until fully blended. Gently fold in half of the whipped cream to create a light, mousse-like texture.
Step 4: Chop the Peanut Butter Cups
Roughly chop the mini peanut butter cups into small pieces. These will be sprinkled between the layers for that irresistible crunch and flavor burst.
Step 5: Assemble the Trifle
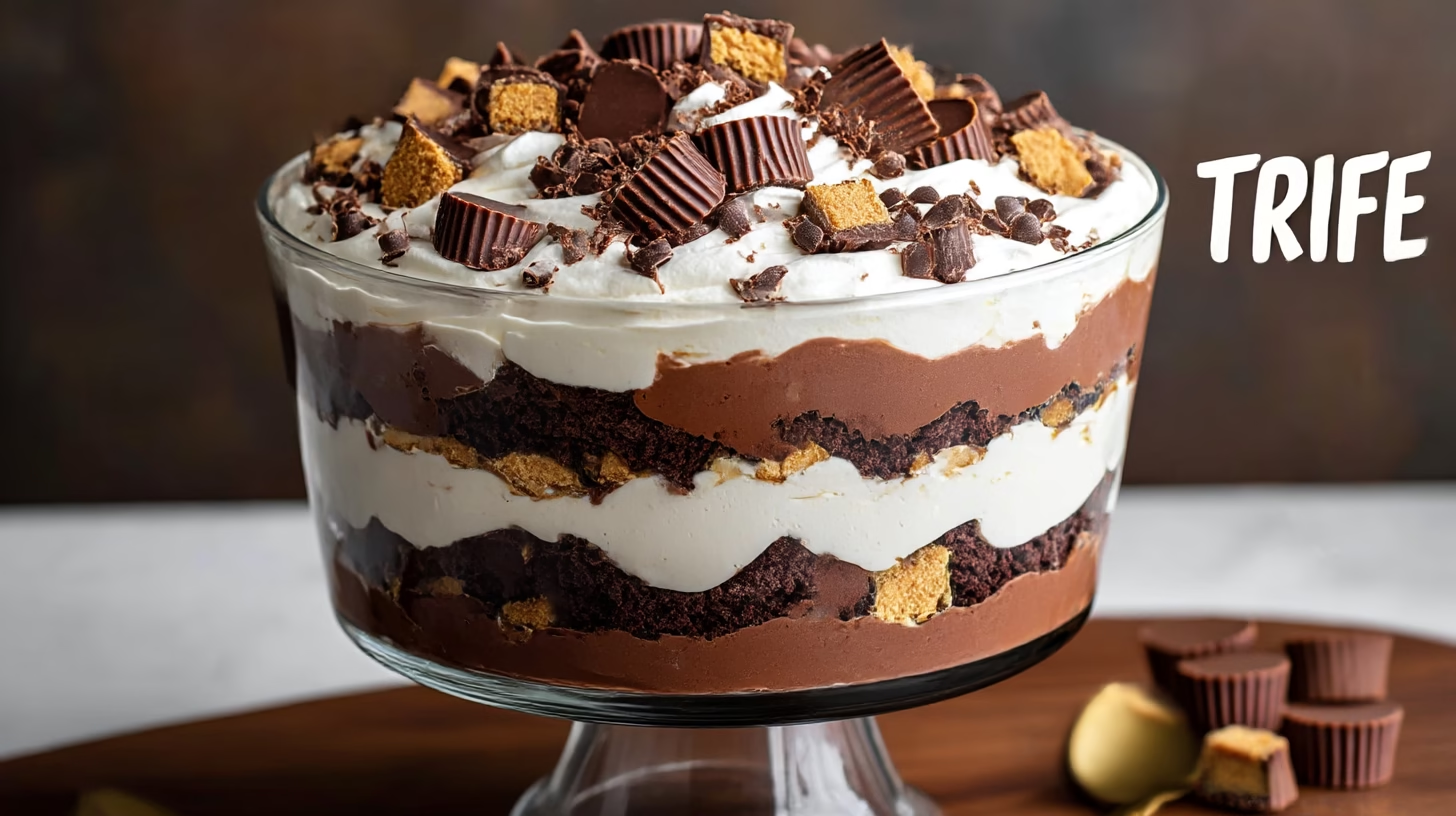
In a large trifle dish, start with a layer of chocolate cake chunks, followed by peanut butter mousse, whipped cream, and chopped peanut butter cups. Repeat until the dish is full. Finish with a final layer of whipped cream, extra peanut butter cups on top, and a drizzle of chocolate sauce if desired.
A Little Dessert Inspiration
This trifle captures everything we love about classic American layered desserts—big, bold flavors and beautiful presentation with minimal effort. It’s the kind of recipe that feels both nostalgic and modern, the best of chocolate and peanut butter combined in a way that’s impossible to resist.
Serving Suggestions
There are so many fun and delicious ways to enjoy this Chocolate Peanut Butter Cup Trifle—it’s practically impossible to go wrong!
- With a big glass of cold milk or coffee: The creamy, rich trifle pairs perfectly with something cool or slightly bitter to balance the sweetness.
- Add fresh fruit: Try sliced strawberries, raspberries, or even banana slices on the side. Their brightness cuts through the chocolate and peanut butter richness beautifully.
- After a light dinner: Since this dessert is indulgent, pair it with something simple like grilled chicken, a fresh salad, or roasted veggies. It’s the perfect grand finale to a balanced meal.
- Make mini trifles: Scoop the layers into small mason jars, parfait glasses, or clear plastic cups. They’re adorable for parties and make serving super easy.
- Dress it up: Add a drizzle of warm chocolate sauce, a sprinkle of chopped nuts, or even a dollop of whipped cream just before serving for that “wow” factor.
Pro Tips for Success
- Chill your tools: Pop your mixing bowl and beaters in the fridge for 10 minutes before whipping the cream—it helps it whip faster and hold better.
- Fold gently: When combining the whipped cream with the peanut butter mixture, fold slowly with a spatula to keep that mousse light and airy.
- Cool cake completely: A warm cake will melt your layers and ruin the texture—patience here makes all the difference.
- Use a clear trifle dish: The beauty of this dessert is in the layers, so let them shine through glass.
- Top it like a pro: Reserve a handful of chopped peanut butter cups for the final topping—it makes the presentation irresistible.
- Chill before serving: Let the trifle rest in the fridge for a couple of hours so the layers meld together perfectly.
Common Mistakes to Avoid
- Overbeating whipped cream: Once you see stiff peaks, stop mixing! Overdoing it can turn the cream grainy or even buttery.
- Using a warm cake: If your cake isn’t cool, the mousse will melt and the layers will slide apart.
- Skipping the folding step: Be gentle when mixing in the whipped cream to avoid losing that fluffy texture.
- Not chilling long enough: The trifle needs time to set—at least a few hours—for the flavors and layers to come together.
- Too many layers: Resist the temptation to overfill; leave a little room at the top so it doesn’t overflow when serving.
Storage & Make-Ahead Tips
- Fridge: Store your trifle tightly covered for up to 3 days. The flavors get even better as they mingle, and the texture stays creamy and smooth.
- Freezer: Not recommended—cream and condensed milk layers don’t thaw evenly and can separate.
- Make-Ahead: Assemble the trifle up to 6 hours before serving and keep it chilled until ready to serve. For the freshest look, sprinkle the chopped peanut butter cups and drizzle chocolate sauce right before bringing it to the table.
- Travel tip: If taking it to a party, assemble in a plastic trifle bowl with a tight lid or transport the layers separately and put it together on-site.
❓ Frequently Asked Questions
Q: Can I make it gluten-free?
: Yes! Just use a gluten-free chocolate cake mix—the rest of the ingredients are naturally gluten-free.
Q: Can I use Cool Whip instead of whipped cream?
: Definitely! It’s a great shortcut. You’ll need about 3 cups to replace the homemade whipped cream, and it holds up well in the fridge.
Q: Can I make it in individual cups?A:
Absolutely. Mason jars or clear plastic cups are perfect for mini trifles. They’re great for parties, picnics, or portion control (if that’s your thing!).
Q: What’s the best peanut butter to use?
: Go for creamy, shelf-stable peanut butter like Jif or Skippy. Natural peanut butters can separate and make the mousse too oily or dense.
Q: Can I make it ahead for an event?
: Yes! This trifle actually tastes better when made a few hours ahead—the flavors blend beautifully. Just wait to add the toppings until right before serving.
Wrap-Up
This Chocolate Peanut Butter Cup Trifle looks like a bakery masterpiece but is secretly one of the easiest desserts you’ll ever make. It’s perfect for holidays, birthdays, or any day you want to make special. With its layers of chocolate, cream, and peanut butter, it’s a dessert that makes everyone smile.
Final Thoughts
There’s just something about this trifle that feels like a hug in dessert form. It’s comforting, playful, and so satisfying to make (and eat!). I hope it brings as much joy to your table as it does to mine.

Chocolate Peanut Butter Cup Trifle
Equipment
- Mixing Bowls
- Electric Mixer
- Spatula
- Trifle Dish
- Cake Pan
Ingredients
Chocolate Cake Layer
- 1 box chocolate cake mix plus ingredients listed on the box
Whipped Cream
- 2 cups cold heavy whipping cream
- 1 cup powdered sugar
- 1 tsp vanilla extract
Peanut Butter Mousse
- 8 oz cream cheese softened
- 1 cup creamy peanut butter
- 14 oz sweetened condensed milk
Toppings
- 20 mini peanut butter cups chopped
- chocolate sauce optional, for drizzling
Instructions
- Prepare chocolate cake mix according to package directions. Let it cool completely, then cut into bite-sized chunks.
- In a chilled mixing bowl, whip the heavy cream, powdered sugar, and vanilla until stiff peaks form. Set aside.
- In another bowl, beat cream cheese and peanut butter until smooth. Add sweetened condensed milk and mix until combined. Gently fold in half of the whipped cream to create the mousse.
- Chop mini peanut butter cups into small pieces.
- Assemble the trifle: Layer chocolate cake chunks, peanut butter mousse, whipped cream, and chopped peanut butter cups. Repeat layers until full, finishing with whipped cream and toppings.
- Drizzle chocolate sauce over the top if desired. Cover and chill for at least 2 hours before serving.


