
Hi, I’m Amanda — and if there’s one recipe that captures pure joy in every bite, it’s this classic red velvet cake from scratch. Soft, velvety layers, a hint of cocoa, and luscious cream cheese frosting make it the kind of dessert that feels like home. Baking it always takes me back to family gatherings filled with laughter and love — the true heart of BeamRecipes. I believe cooking should feel comforting, not complicated, and this cake proves it. Simple ingredients, easy steps, and a touch of sweetness that turns any day into something worth celebrating.
Serving Versatility
This classic red velvet cake from scratch isn’t just for birthdays or holidays. You can serve it as cupcakes for easy portion control, bake it in a sheet pan for a crowd, or even layer it in a trifle dish with extra frosting and berries for a stunning dessert centerpiece. For a romantic twist, bake the batter in heart-shaped pans or make mini red velvet bundt cakes topped with cream cheese glaze. It also pairs beautifully with coffee or a glass of cold milk — simple pleasures that make everyday moments feel a little more special.
Ingredients (Detailed & Humanized)
2½ cups all-purpose flour: gives the cake its tender structure.
2 cups sugar: for just the right touch of sweetness.
1 tablespoon cocoa powder: adds depth and that signature hint of chocolate.
1 teaspoon salt: balances sweetness and enhances flavor.
1 teaspoon baking soda: ensures a light, airy crumb.
2 eggs: for richness and stability in every slice.
1½ cups vegetable oil: keeps the cake moist and soft.
1 cup buttermilk: tenderizes and adds gentle tang.
1 tablespoon white vinegar: reacts with baking soda for extra fluffiness.
1 teaspoon vanilla extract: brings warmth and aroma.
2 oz. red food coloring: for that iconic red hue that makes hearts happy.
Cream Cheese Frosting
8 oz. cream cheese (room temperature): creamy, tangy base that balances the cake’s sweetness.
1 cup butter (room temperature): adds richness and a smooth texture.
1 teaspoon vanilla: enhances the frosting’s flavor.
6 cups powdered sugar: gives that perfectly sweet, fluffy finish.
Directions (Step-by-Step Cooking Guide)
Preheat your oven to 350°F and take a deep breath—this is where the fun begins. Grease and flour two 9-inch round cake pans, letting a soft dusting of flour coat the sides and bottom. It’s a small act of care that ensures your cakes will release effortlessly later, leaving behind only that beautiful, golden edge.
In a medium bowl, lightly whisk the eggs until just combined—no need to overdo it. Pour in the vegetable oil, buttermilk, vinegar, vanilla, and red food coloring. As you stir, watch the color bloom into that gorgeous, deep crimson—an instant mood lifter that feels almost magical.
In a separate large bowl, combine the flour, sugar, cocoa powder, salt, and baking soda. Whisk gently until everything is evenly blended, breaking up any clumps. The cocoa should tint the flour mixture slightly, giving it that subtle chocolatey tone that sets red velvet apart.
Now, slowly pour half of the wet ingredients into the dry mixture, stirring until the batter begins to come together. Add the remaining liquid ingredients and mix again—just until smooth. This is where restraint matters; overmixing can make the cake dense instead of velvety soft. You want a silky, pourable batter that almost shimmers when you lift your whisk.
Divide the batter evenly between your prepared pans. Gently tap each pan on the counter a few times to pop any hidden air bubbles—this little trick helps the cake bake evenly and rise beautifully.
Slide the pans into your preheated oven and bake for 30 minutes, or until a toothpick inserted in the center comes out clean. As it bakes, your kitchen will fill with the comforting aroma of cocoa, sugar, and vanilla—it’s the scent of something wonderful taking shape.
Once baked, let the cakes cool in their pans for about 10 minutes before transferring them to wire racks. Resist the urge to frost right away; cooling completely is the secret to smooth, picture-perfect layers.
For the frosting, sift your powdered sugar to remove any lumps—it’s a simple step that guarantees fluffiness. In a large bowl, beat the cream cheese and butter together until light and airy. Add the vanilla extract, then gradually mix in the powdered sugar, one cup at a time, until you reach that perfectly smooth, dreamy texture.
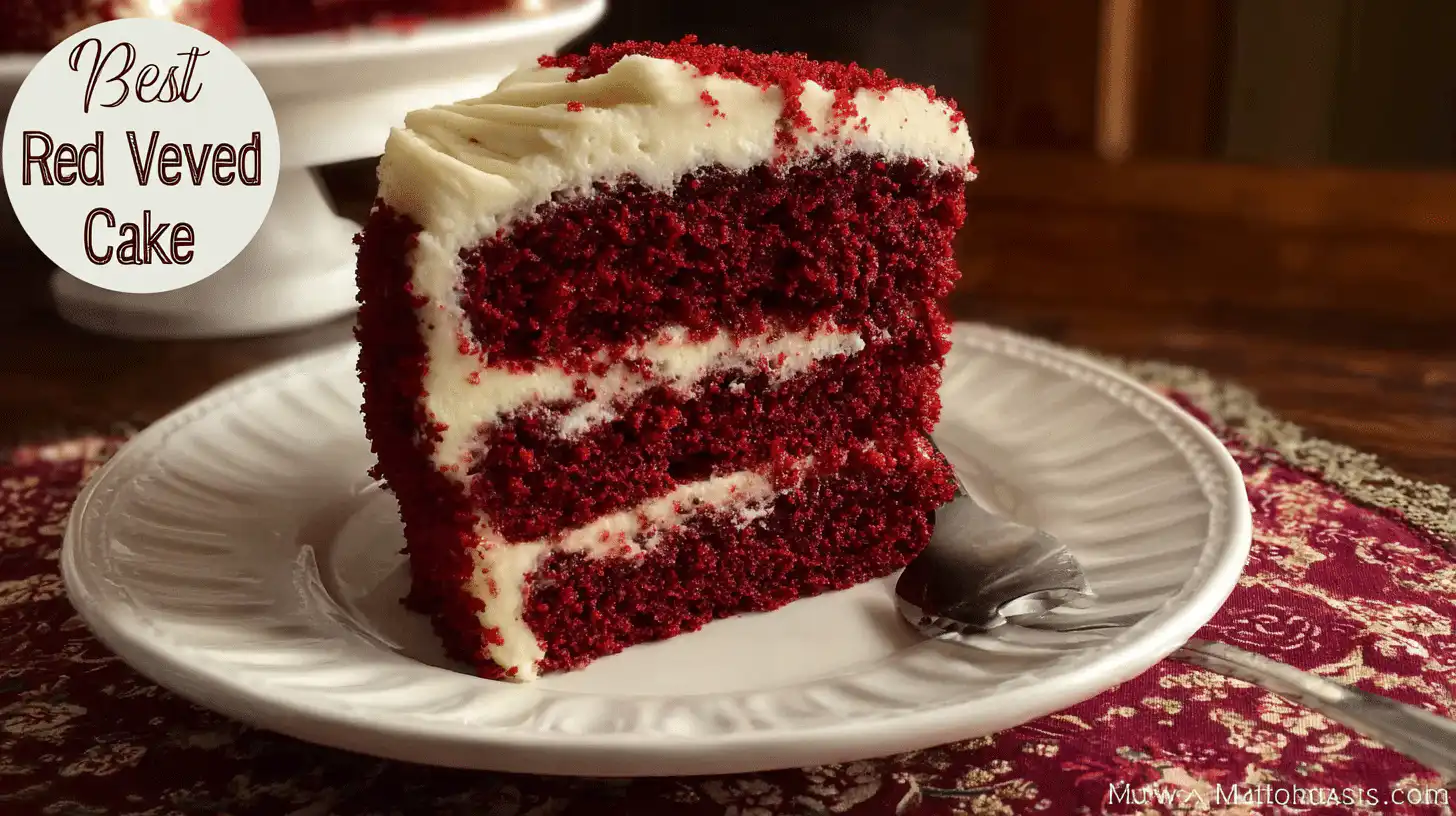
When your cakes are completely cool, spread a generous layer of frosting between them, then cover the top and sides with more of that luscious cream cheese goodness. Use a spatula to create soft swirls or smooth it out for a sleek, bakery-style finish.
Take a step back, admire your creation, and maybe sneak a little taste of frosting (because honestly, who can resist?). This classic red velvet cake from scratch is pure joy—from the first stir to the very last crumb.
Why You’ll Love This Recipe
✅ Quick to make: Simple steps and pantry staples come together beautifully.
✅ Budget-friendly: No fancy ingredients — just the classics you already have.
✅ Cozy, homemade flavor: Every bite tastes like a memory from grandma’s kitchen.
✅ Nutritious balance: Buttermilk adds calcium and tang without heaviness.
✅ Great for meal prep: Make the layers a day ahead and frost when ready.
✅ Family-approved: Loved by kids, friends, and everyone who appreciates a slice of joy.
Cultural or Technique Note
The classic red velvet cake from scratch has Southern roots, often seen as a symbol of celebration and hospitality. It became famous during the mid-20th century, especially in Southern bakeries, where its rich red hue and gentle cocoa flavor made it stand out. The vinegar-and-buttermilk reaction is what gives the cake its characteristic tenderness — a clever technique born from simple pantry staples.
Serving Suggestions
Serve with a scoop of vanilla ice cream for extra indulgence.
Slice it thinly and enjoy with a cup of coffee or tea.
Layer leftover crumbs with frosting and fruit for red velvet parfaits.
Top with fresh berries for a lighter, elegant touch.
Pro Tips for Success
Use room-temperature ingredients — it helps everything blend smoothly.
Don’t skip the vinegar — it makes the cake rise perfectly.
Cool the cakes completely before frosting for neat, even layers.
If your frosting feels too thick, add a tablespoon of milk at a time.
Wipe your knife between slices for clean, bakery-style presentation.
For an extra-moist cake, brush layers with a bit of buttermilk before frosting.
Common Mistakes to Avoid
⚠️ Overmixing the batter: Makes the cake dense — stir gently until combined.
⚠️ Skipping the vinegar: You’ll lose that fluffy texture and signature tang.
⚠️ Frosting while warm: Causes the frosting to melt — always cool completely.
⚠️ Using too much food coloring: A little goes a long way; too much can taste bitter.
⚠️ Not measuring flour correctly: Spoon and level it — packing makes the cake dry.
Storage & Reheating
Store your red velvet cake in an airtight container in the refrigerator for up to 4 days — it actually tastes even better the next day as the flavors settle. To freeze, wrap each layer tightly in plastic wrap and freeze for up to 2 months. When ready to serve, thaw in the fridge overnight and bring to room temperature before frosting or eating. If you like it slightly warm, reheat individual slices for a few seconds in the microwave, just enough to soften the frosting slightly without melting it.
Frequently Asked Questions (FAQ)
Can I use less food coloring?
Yes! You can reduce it for a softer red hue or skip it altogether for a “natural” velvet cake. The taste remains just as delicious.
Can I make this dairy-free?
Absolutely — use almond milk mixed with a teaspoon of vinegar instead of buttermilk, and substitute vegan butter and cream cheese for the frosting.
Can I use cake flour instead of all-purpose?
Yes, it will make the texture even softer. Use 2¾ cups cake flour instead of 2½ cups all-purpose.
Can I bake it as cupcakes?
Definitely! This recipe makes about 24 cupcakes. Bake for 18–20 minutes and frost once cool.
Can I double the recipe for a big crowd?
Yes, just double all ingredients and bake in two batches or in larger pans.
Closing Paragraph
Baking this classic red velvet cake from scratch is more than following a recipe — it’s about creating a little celebration in your own kitchen. From the first stir of cocoa to the final swipe of frosting, every step invites warmth and creativity. I hope this cake becomes one of those go-to recipes you return to again and again — the kind that makes your family gather around the table just a little faster.
Final Thoughts
Whenever I make this cake, I’m reminded that simple, thoughtful baking can be incredibly special. It’s about slowing down, savoring the scent of sugar and vanilla, and creating something beautiful from scratch. Whether you bake it for someone you love or just for yourself, this cake has a way of brightening the day.
Follow me on Pinterest for more cozy, quick, and nostalgic recipes.

Classic Red Velvet Cake
Equipment
- 2 9-inch Cake Pans
- Mixing Bowls
- Electric Mixer
- Wire Rack
Ingredients
Cake Batter
- 2.5 cups all-purpose flour
- 2 cups sugar
- 1 tbsp cocoa powder unsweetened
- 1 tsp salt
- 1 tsp baking soda
- 2 eggs room temperature
- 1.5 cups vegetable oil
- 1 cup buttermilk
- 1 tbsp white vinegar
- 1 tsp vanilla extract
- 2 oz red food coloring
Cream Cheese Frosting
- 8 oz cream cheese room temperature
- 1 cup butter room temperature
- 1 tsp vanilla extract
- 6 cups powdered sugar sifted
Instructions
- Preheat oven to 350°F (175°C). Grease and flour two 9-inch round cake pans.
- In a medium bowl, whisk together eggs, oil, buttermilk, vinegar, vanilla, and food coloring until well combined.
- In a large bowl, whisk together flour, sugar, cocoa powder, salt, and baking soda.
- Gradually add wet ingredients to the dry ingredients, mixing gently until just smooth. Do not overmix.
- Divide batter evenly into prepared pans. Tap pans lightly on the counter to remove air bubbles.
- Bake for 30 minutes or until a toothpick inserted in the center comes out clean.
- Let cakes cool in pans for 10 minutes. Then transfer to wire racks and let cool completely.
- For the frosting, beat cream cheese and butter until light and fluffy. Add vanilla, then gradually beat in sifted powdered sugar until smooth and creamy.
- Frost cooled cakes with cream cheese frosting. Slice and serve.


