
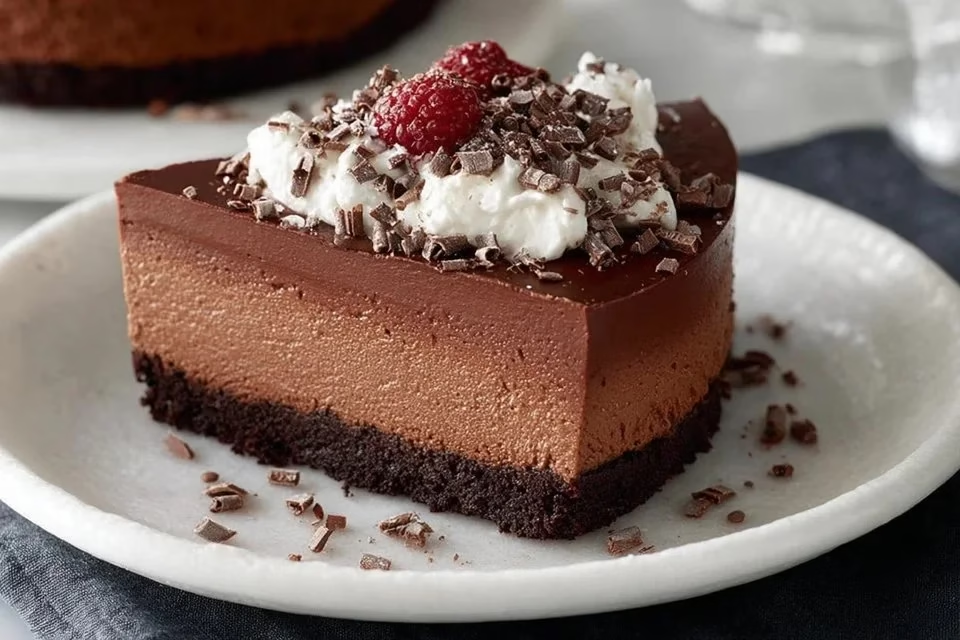
There’s a simple joy in crafting a dessert that feels both indulgent and comforting. This Gluten-Free Chocolate Mousse Cake offers a delightful combination of rich, velvety textures that are perfect for weeknights, relaxed weekends, or even special gatherings. Whenever you need a sweet treat to savor during quiet moments or to celebrate with loved ones, this recipe fits the bill. Its ease of preparation adds to its appeal, inviting you to dive into the process without a second thought.
Why You’ll Love This Gluten-Free Chocolate Mousse Cake
This Gluten-Free Chocolate Mousse Cake is a straightforward dessert that balances rich chocolate flavor with the lightness of mousse for an enjoyable experience. Its reliability makes it a go-to choice for any occasion, and it offers comforting sweetness without being overly heavy. With its comforting texture and straightforward preparation, you can appreciate practical everyday value.
Kitchen Tools You’ll Need
- Mixing bowls
- Whisk
- Rubber spatula
- 9-inch round cake pan
- Electric mixer
- Measuring cups and spoons
Ingredients
- 8 ounces bittersweet or semisweet chocolate, chopped (for rich flavor)
- 1 cup butter (2 sticks) (provides moisture and richness)
- 1 cup sugar (sweetens and enhances flavor)
- 5 eggs (acts as the structural base)
- 1 tablespoon vanilla extract (adds depth of flavor)
- 1/4 teaspoon salt (balances sweetness)
- 1/4 cup gluten-free 1:1 baking flour (gives structure)
- 1 1/3 cup powdered sugar (sweetens and thickens)
- 2 packages (8oz) cream cheese, softened (adds creaminess and tang)
- 2 teaspoons vanilla extract (for flavor enhancement)
- 2 cups cold heavy cream (for lightness and texture)
- 3/4 cup cold heavy cream (for whipped cream texture)
- 2 tablespoons powdered sugar (for sweetening whipped cream)
- 2 teaspoons vanilla extract (for flavor in whipped cream)
- Grated chocolate, for garnish (optional, for visual appeal)

How to Make Gluten-Free Chocolate Mousse Cake
Step 1. Begin by melting the chopped chocolate and butter together in a saucepan over low heat. Stir continuously until both ingredients are fully melted and smoothly combined, then set aside to cool slightly. This mixture forms the base of your cake, providing a rich chocolate flavor. You’ll recognize it’s ready when the mixture is glossy and fully blended.
Step 2. In a large mixing bowl, combine the sugar and the eggs. Using a whisk or electric mixer, beat the mixture until it turns pale and thickens, which will take a few minutes. This step is crucial as it aerates the egg mixture, contributing to the cake’s light texture once baked. You’ll know it’s done when you can produce ribbons with the whisk.
Step 3. Incorporate the melted chocolate mixture into the egg and sugar blend gently, folding until just combined. It’s important to mix thoroughly but carefully. This ensures the final batter maintains its airy quality from the eggs. The batter should have a smooth consistency at this point.
Step 4. Add the vanilla extract and salt to the chocolate mixture, followed by the gluten-free flour. Gently fold these into the batter until no dry flour remains visible, taking care not to overmix. This helps maintain a fluffy texture while enhancing the flavor.
Step 5. Pour the batter into a prepared 9-inch round cake pan and spread it evenly. Place in a preheated oven and bake until the cake sets and a toothpick inserted in the center comes out clean. It’s done when the edges have slightly pulled away from the pan and the top appears firm yet springy to the touch.
Step 6. Once baked, remove the cake from the oven and let it cool completely in the pan. Once it’s at room temperature, carefully invert it onto a serving plate. This will be the base for your mousse, so a smooth surface is important for an appealing presentation.
Step 7. In a separate bowl, beat the cream cheese until it’s smooth and free of lumps. Gradually add in the powdered sugar and two teaspoons of vanilla extract, mixing until fully incorporated. This mixture will create a creamy layer for the mousse, contributing to its texture and flavor.
Step 8. In another bowl, whip the cold heavy cream until soft peaks form. This step adds lightness to the mousse, transforming the denser cream cheese mixture into a lighter, airy mousse. Be cautious not to overwhip; the cream should be thick enough to hold its shape while still maintaining a smooth quality.
Step 9. Carefully fold the whipped cream into the cream cheese mixture, combining them gently to preserve the airy texture. The result should be a luxurious mousse that’s rich yet light. Ensure there are no streaks of cream remaining.
Step 10. Spoon the mousse over the cooled chocolate cake in an even layer, smoothing the top as needed. Refrigerate for several hours or until fully set, allowing the flavors to meld together while the mousse firms up for serving.
Step 11. To serve, whip the remaining heavy cream with powdered sugar and vanilla extract until soft peaks form. Use this whipped cream to dollop or spread over slices of the mousse cake, adding an extra layer of texture and flavor to each portion.
Step 12. Optionally, sprinkle grated chocolate over the top for garnish just before serving to add a nice touch of elegance and an additional chocolate flavor. This completes your dessert beautifully.

Serving Suggestions
This Gluten-Free Chocolate Mousse Cake is enjoyable in various situations. It can be a delightful dessert after a family dinner or served with morning coffee for a sweet start to the day. It’s also ideal for gatherings, as it can be sliced into generous portions to share. The mousse cake stores well, making it a convenient option for snacks or leftover treats. Each bite can serve as a little moment of indulgence in your daily routine.
Pro Tips for Best Results
- Ensure your cream cheese is fully softened before mixing; this promotes a smooth texture.
- Gently fold the whipped cream to maintain its aeration, ensuring a light mousse.
- Do not skip cooling the chocolate mixture before combining it with eggs; this helps prevent cooking the eggs.
- Use high-quality chocolate for a deeper flavor profile.
- Allow the cake and mousse to set properly; this enhances the overall texture and taste.
- When whipping cream, keep the bowl and whisk cold for the best volume.
Common Mistakes to Avoid
- Overmixing the egg and sugar mixture: This can deflate the air you’ve incorporated, leading to a denser cake. Mix until just combined, allowing for some air to remain.
- Not cooling the chocolate enough before mixing: If it’s too hot, it can scramble the eggs, compromising the cake’s texture. Let it cool to a lukewarm temperature before folding.
- Using cold cream cheese: Cold cream cheese will remain lumpy and won’t mix smoothly. Ensure it’s adequately softened at room temperature for optimal results.
- Rushing the cooling process of the cake: Serving the cake warm can lead to a crumbly texture or collapsing mousse. Allow it to cool thoroughly in the pan before inverting.
- Overwhipping the heavy cream: This causes it to turn grainy and can lead to butter if whipped too long. Stop once soft peaks form.
- Not allowing the mousse to set long enough: If it’s not refrigerated long enough, the mousse may not hold its shape. A few hours is ideal for it to firm up properly.
Variations & Substitutions
- For an espresso flavor, consider adding a teaspoon of espresso powder to the chocolate mixture.
- Incorporate a layer of fresh berries between the cake and mousse for added flavor and color.
- For additional texture, fold in finely chopped nuts into the whipped cream.
Storage & Reheating
Store any leftover mousse cake in the refrigerator, where it can last up to four days. Keep it covered to prevent it from drying out. If you need to store it longer, you may freeze slices, but note that the mousse’s texture can change upon thawing. When ready to enjoy again, take it out of the freezer and allow it to thaw slowly in the refrigerator for several hours to maintain the dessert’s gentleness and flavor.
Frequently Asked Questions
Can I make this recipe ahead of time?
Yes, this dessert can be made a day in advance and stored in the refrigerator. This allows the mousse to set and flavors to meld beautifully.
How long does it last in the fridge?
The cake will last about four days when stored covered in the refrigerator. Ensure it stays well-wrapped to maintain freshness.
Can I freeze this recipe?
You can freeze slices of the cake, but the mousse’s texture may change slightly upon thawing. Wrap individual slices carefully before freezing.
What can I substitute for one ingredient?
If you need a replacement for cream cheese, mascarpone cheese provides a similar texture and flavor, though the taste will be a touch different.
Why didn’t my recipe turn out as expected?
Common issues include improper mixing, not cooling chocolate sufficiently, or insufficient refrigeration time for the mousse. Ensuring attention to these details will typically lead to a better result.
Final Thoughts
Making this Gluten-Free Chocolate Mousse Cake can be a fulfilling experience, showcasing how simple ingredients come together to create something special. As you slice into the cake and observe the layers of mousse, there’s a quiet satisfaction in sharing it with others or enjoying a piece quietly at home. This dessert promises both a rewarding process and an enjoyable treat, enhancing your time in the kitchen and around the table.

Gluten-Free Chocolate Mousse Cake
Ingredients
Cake Base
- 8 ounces bittersweet or semisweet chocolate, chopped for rich flavor
- 1 cup butter (2 sticks) provides moisture and richness
- 1 cup sugar sweetens and enhances flavor
- 5 large eggs acts as the structural base
- 1 tablespoon vanilla extract adds depth of flavor
- 1/4 teaspoon salt balances sweetness
- 1/4 cup gluten-free 1:1 baking flour gives structure
Mousse Layer
- 2 packages (8oz) cream cheese, softened adds creaminess and tang
- 1 1/3 cup powdered sugar sweetens and thickens
- 2 teaspoons vanilla extract for flavor enhancement
- 2 cups cold heavy cream for lightness and texture
- 3/4 cup cold heavy cream for whipped cream texture
- 2 tablespoons powdered sugar for sweetening whipped cream
- 2 teaspoons vanilla extract for flavor in whipped cream
Garnish
- grated chocolate optional, for visual appeal
Instructions
Preparation
- Begin by melting the chopped chocolate and butter together in a saucepan over low heat. Stir continuously until both ingredients are fully melted and smoothly combined, then set aside to cool slightly.
- In a large mixing bowl, combine the sugar and the eggs. Using a whisk or electric mixer, beat the mixture until it turns pale and thickens.
- Incorporate the melted chocolate mixture into the egg and sugar blend gently, folding until just combined.
- Add the vanilla extract and salt to the chocolate mixture, followed by the gluten-free flour. Gently fold these into the batter until no dry flour remains visible.
- Pour the batter into a prepared 9-inch round cake pan and spread it evenly. Place in a preheated oven and bake until the cake sets and a toothpick inserted in the center comes out clean.
- Once baked, remove the cake from the oven and let it cool completely in the pan.
Mousse Preparation
- In a separate bowl, beat the cream cheese until it’s smooth and free of lumps. Gradually add in the powdered sugar and two teaspoons of vanilla extract, mixing until fully incorporated.
- In another bowl, whip the cold heavy cream until soft peaks form.
- Carefully fold the whipped cream into the cream cheese mixture.
- Spoon the mousse over the cooled chocolate cake in an even layer. Refrigerate for several hours or until fully set.
- To serve, whip the remaining heavy cream with powdered sugar and vanilla extract until soft peaks form. Use this whipped cream to dollop over slices of the mousse cake.
- Optionally, sprinkle grated chocolate over the top for garnish just before serving.


