
There’s something comforting about baking that feels both simple and rewarding. These lemon bars are a lovely treat that can be enjoyed on busy weeknights, during relaxed weekends, or shared at gatherings. They’re perfect for those quiet moments when you want to unwind with something sweet. With their bright flavor and satisfying texture, they offer a blend of simplicity and comfort that makes them a delightful addition to your recipe collection. Let’s dive into making these enjoyable treats.
Why You’ll Love This Recipe Easy Gluten Free Lemon Bars
This recipe is all about ease and reliability, making it perfect for your everyday baking. The combination of buttery crust and bright lemon filling offers a comforting balance of flavor. Plus, the practical nature of gluten-free lemon bars allows you to enjoy a classic dessert without the hassle of complicated techniques. They’re a comforting treat you can turn to again and again.
Kitchen Tools You’ll Need
- Mixing bowls
- Whisk
- Measuring cups and spoons
- 8×8-inch baking pan
- Rubber spatula
Ingredients
- ½ cup unsalted butter, at room temperature (adds richness and moisture)
- ¼ cup granulated sugar (provides sweetness and texture)
- 1 tbsp lemon zest (enhances citrus flavor)
- 1 tsp vanilla extract (adds warmth and depth)
- 1 cup gluten-free all-purpose flour (provides structure)
- ⅛ tsp kosher salt (balances sweetness)
- 3 eggs, at room temperature (binds ingredients)
- 1 cup granulated sugar (sweetens the filling)
- ½ cup freshly squeezed lemon juice (adds tartness and brightness)
- 1 tbsp lemon zest (intensifies lemon flavor)
- ½ cup gluten-free all-purpose flour (thickens the filling)
- ⅛ tsp kosher salt (enhances flavor)
- Powdered sugar for garnish (adds a sweet finishing touch)

How to Make Easy Gluten Free Lemon Bars
Step 1. Start by preheating your oven to 350°F and preparing your baking pan. Grease an 8×8-inch baking pan lightly, or you can line it with parchment paper for easy removal later. This initial step helps ensure your lemon bars bake evenly and won’t stick to the pan.
Step 2. In a mixing bowl, combine ½ cup of room-temperature unsalted butter with ¼ cup of granulated sugar and 1 tablespoon of lemon zest. Beat these together until the mixture becomes light and fluffy, which should take a few minutes. This serves as the foundation for your crust, helping to create a tender and flavorful base.
Step 3. Add 1 teaspoon of vanilla extract to the buttery mixture, along with 1 cup of gluten-free all-purpose flour and ⅛ teaspoon of kosher salt. Mix until everything is just combined. Be careful not to overmix, as this can lead to a denser crust. You want a dough that holds together but still feels light.
Step 4. Spread the dough evenly into the bottom of your prepared pan, using a spatula to smooth it out. The crust should be about ½ inch thick, providing a solid base for the lemon filling. It’s important that the layer is even to ensure uniform baking.
Step 5. Bake the crust in the preheated oven for about 20 minutes until it’s lightly golden around the edges. Keep an eye on it as it bakes; you want a slight firmness but not an overly hard texture. Once done, remove it from the oven and set it aside while preparing the filling.
Step 6. In a separate bowl, whisk together 3 eggs that are at room temperature with 1 cup of granulated sugar. You want to beat these until the mixture is smooth and fluffy, which should take a minute or two. The eggs are important as they help create a light filling that complements the crust beautifully.
Step 7. Stir in ½ cup of freshly squeezed lemon juice, 1 tablespoon of lemon zest, ½ cup of gluten-free all-purpose flour, and ⅛ teaspoon of kosher salt into the egg mixture. Mix until everything is well combined but be cautious not to overmix; you want to maintain a smooth consistency.
Step 8. Pour the lemon filling over the crust while it’s still warm. Spreading it evenly ensures that every bite has that delightful citrus flavor. It’s normal for the filling to be a bit runny at this point, but it will set nicely as it bakes.
Step 9. Return the pan to the oven and bake for an additional 20 to 25 minutes. You’ll know it’s done when the filling has set but still has a slight jiggle in the center. The edges will look a bit puffed and lightly golden.
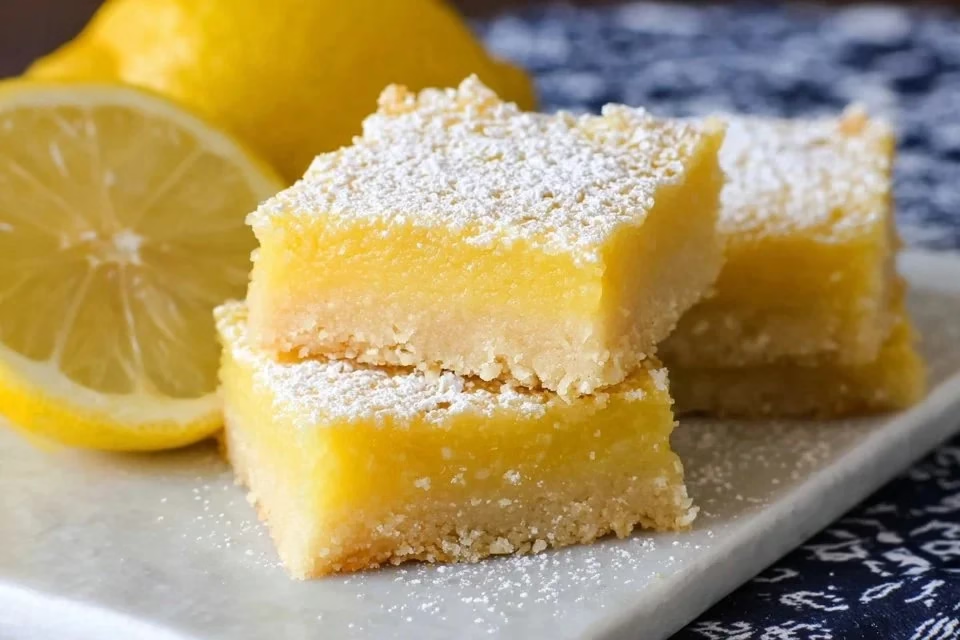
Step 10. Allow the lemon bars to cool completely in the pan. This cooling step is crucial as it helps the bars firm up. Once cooled, you can dust the top with powdered sugar for an elegant finish. This adds just a touch of sweetness to balance the tartness of the lemon.

Serving Suggestions
These lemon bars are wonderfully versatile and can be enjoyed in various settings. They make a lovely breakfast paired with a cup of tea or coffee, offering a bright start to your morning. They also serve well as a refreshing snack during the afternoon, especially for those moments when you crave something sweet. At family dinners, they can be a delightful dessert choice, and leftovers keep well in the fridge, making them a practical addition to your meals throughout the week.
Pro Tips for Best Results
- Make sure your ingredients, especially the eggs and butter, are at room temperature for better mixing and texture.
- When zesting lemons, be careful to only zest the yellow part; the white pith can be bitter.
- Allowing the bars to cool completely before slicing will help them hold their shape better.
- Dust powdered sugar just before serving to prevent it from soaking into the bars.
- Use fresh lemon juice for the best flavor; bottled juice can be less fragrant and vibrant.
- Baking times may vary slightly based on your oven, so keep an eye on the bars as they bake.
Common Mistakes to Avoid
- Using cold ingredients: Cold eggs or butter can lead to a lumpy mixture, affecting the texture. Ensure they’re at room temperature for a smoother batter.
- Overmixing the crust or filling: Overmixing can lead to dense bars. Mix just until combined for a lighter texture.
- Not cooling before cutting: Slicing while warm can cause the bars to crumble. Let them cool entirely to set up properly.
- Underbaking: If the filling is too runny when cut, it means it needs more baking time. Ensure the edges look firm before removing them from the oven.
- Not using gluten-free flour specifically designed for baking: Regular flour won’t provide the same texture and might lead to a disappointing result. Stick to gluten-free blends meant for cakes and pastries.
- Forgetting to dust with powdered sugar: This finishing step not only adds sweetness but also enhances presentation. Make sure to add it before serving.
Variations & Substitutions
While this recipe is fantastic as is, consider a few practical tweaks. You can experiment by adding herbs like thyme or basil to the lemon filling for an unexpected twist. Also, try replacing some lemon juice with citrus juices like lime or orange for variation in flavor. If you prefer a sweeter dessert, add a touch more sugar to the filling to balance the tartness of the lemons.
Storage & Reheating
Once your lemon bars are completely cooled, you can store them at room temperature for up to two days. If you want to keep them longer, refrigerate them for up to a week, which helps maintain their texture. If freezing, wrap them tightly in plastic wrap and place them in an airtight container. To reheat, simply thaw in the fridge overnight, and serve them cold or at room temperature for the best flavor.
Frequently Asked Questions
Can I make this recipe ahead of time?
Yes, these lemon bars can be made a day ahead. Just store them in the refrigerator after they cool completely. This allows the flavors to meld beautifully.
How long does it last in the fridge?
Stored properly, they can last up to a week in the fridge. Ensure they’re covered to prevent drying out or absorbing other odors.
Can I freeze this recipe?
Definitely! Wrap the cooled bars tightly in plastic wrap, and they can be frozen for up to three months. Thaw them in the refrigerator before serving.
What can I substitute for one ingredient?
If you’re out of unsalted butter, you could use margarine, but be mindful that this may alter the flavor slightly. Always choose a gluten-free all-purpose flour blend when making substitutions.
Why didn’t my recipe turn out as expected?
There are several factors that could affect the outcome, including ingredient temperatures, mixing technique, or oven calibration. Making sure to follow the steps carefully usually helps achieve the desired results.
Final Thoughts
Making these lemon bars is a simple yet satisfying experience that leaves you with a delightful treat to enjoy. They are a wonderful balance of sweet and tart, perfect for any occasion. Whether you share them with loved ones or savor them on your own during a quiet moment, these bars are sure to provide a comforting touch to your day. Embrace the joy of baking, and enjoy every slice.

Easy Gluten Free Lemon Bars
Ingredients
For the Crust
- ½ cup unsalted butter, at room temperature Adds richness and moisture
- ¼ cup granulated sugar Provides sweetness and texture
- 1 tbsp lemon zest Enhances citrus flavor
- 1 tsp vanilla extract Adds warmth and depth
- 1 cup gluten-free all-purpose flour Provides structure
- ⅛ tsp kosher salt Balances sweetness
For the Filling
- 3 pcs eggs, at room temperature Binds ingredients
- 1 cup granulated sugar Sweetens the filling
- ½ cup freshly squeezed lemon juice Adds tartness and brightness
- 1 tbsp lemon zest Intensifies lemon flavor
- ½ cup gluten-free all-purpose flour Thickens the filling
- ⅛ tsp kosher salt Enhances flavor
For Garnish
- to taste powdered sugar Adds a sweet finishing touch
Instructions
Preparation
- Preheat your oven to 350°F (175°C) and prepare your 8x8-inch baking pan by greasing it lightly or lining it with parchment paper.
- In a mixing bowl, combine the butter, granulated sugar, and lemon zest. Beat until light and fluffy.
- Add the vanilla extract, gluten-free flour, and kosher salt to the mixture. Mix until just combined.
- Spread the dough evenly into the bottom of the prepared pan, smoothing it out to about ½ inch thick.
- Bake the crust in the preheated oven for 20 minutes until lightly golden.
Filling
- In a separate bowl, whisk together the eggs and granulated sugar until smooth and fluffy.
- Stir in the lemon juice, lemon zest, gluten-free flour, and kosher salt into the egg mixture until well combined.
- Pour the lemon filling over the warm crust, spreading it evenly.
- Return to the oven and bake for an additional 20 to 25 minutes until set but still slightly jiggly in the center.
Cooling and Serving
- Allow the lemon bars to cool completely in the baking pan, then dust with powdered sugar before serving.


