
Making a delightful treat can often be a comforting part of our day. This recipe brings together creamy coconut, rich chocolate, and crunchy macadamia nuts, offering a burst of flavor and texture. Whether enjoyed after a long day, at a weekend gathering, or during quiet moments at home, these bars are a delightful nod to Hawaiian flavors. Their straightforward preparation means that you can share them easily, making any occasion feel special. Let’s step into the kitchen and create these delicious bars together.
Why You’ll Love This Recipe Easy Hawaiian Chocolate Haupia Bars
These bars are simple to prepare, making them a reliable dessert for any occasion. The combination of creamy coconut and semi-sweet chocolate creates a balanced flavor profile that feels both comforting and indulgent. With practical everyday value, this recipe is perfect for those moments when you crave a bit of sweetness without too much fuss.
Kitchen Tools You’ll Need
- Mixing bowls
- Whisk
- Baking dish
- Saucepan
- Measuring cups and spoons
Ingredients
- ½ cup granulated sugar (sweetness)
- 1¾ cups flour (structure)
- 1 cup finely chopped macadamia nuts (crunchy texture)
- ¾ cup butter, melted (moisture and flavor)
- ¾ cup + 3 tablespoons cornstarch (thickening agent)
- ⅔ cup water (liquid)
- 3 cups milk (creaminess)
- 2 – 14 ounce cans coconut milk, full fat (rich coconut flavor)
- ¼ tsp salt (balances sweetness)
- 2 cups sugar (sweetness)
- 1 tablespoon coconut extract (enhances coconut flavor)
- 8 ounces semi-sweet bakers chocolate (richness)
- Garnish: whipped cream or cool whip (creamy topping), shaved chocolate (decorative tex

How to Make Easy Hawaiian Chocolate Haupia Bars
Step 1. Start by preheating your oven. As the oven warms up, prepare your baking dish by greasing it lightly or lining it with parchment paper. This will ensure the bars release easily once baked.
Step 2. In a mixing bowl, combine the flour, granulated sugar, and chopped macadamia nuts. Stir these ingredients together until evenly mixed. This will help distribute the nuts throughout the base of the bars, adding both texture and flavor.
Step 3. Pour the melted butter into the dry mixture. Use a spatula or wooden spoon to mix everything until the ingredients are combined, and the mixture becomes crumbly. You want it to hold together slightly when pressed, which indicates it’s ready for the next step.
Step 4. Press the crumb mixture into the prepared baking dish evenly using your fingers or the back of a measuring cup. Make sure to create a solid base, as this will support the layers above. Look for an even thickness across the bottom.
Step 5. Bake the crust in the preheated oven until lightly golden. Keep an eye on it, as you want just the right color to develop a slight crunch. This initial baking step forms the foundation of your bars and should take about 10 minutes.
Step 6. While the crust bakes, prepare the haupia filling. In a saucepan, combine cornstarch and water, stirring until the cornstarch dissolves completely. This creates a smooth base for the filling, so ensure there are no lumps.
Step 7. Gradually add the milk and coconut milk to the cornstarch mixture in the saucepan. Gently whisk these together over medium-low heat, watching for the mixture to slowly thicken. This process requires patience, as stirring continuously helps prevent lumps and ensures smoothness.
Step 8. Once thickened, stir in the salt, sugar, and coconut extract. These elements will enhance the flavor, balancing the sweetness with a hint of saltiness. Keep mixing until the sugar is fully dissolved, which should only take a few moments.
Step 9. Pour the haupia filling over the pre-baked crust in the baking dish. Use a spatula to spread it evenly, ensuring every corner is filled. This layer will create a contrast in texture and flavor.
Step 10. Melt the semi-sweet chocolate in a bowl. You can do this carefully in the microwave in short bursts or over a double boiler. Once melted, pour this chocolate over the haupia layer, spreading it gently to cover completely.
Step 11. Allow the layers to cool at room temperature before transferring them to the refrigerator. Chilling will help solidify the bars, making them easier to cut. It also allows the flavors to meld beautifully.
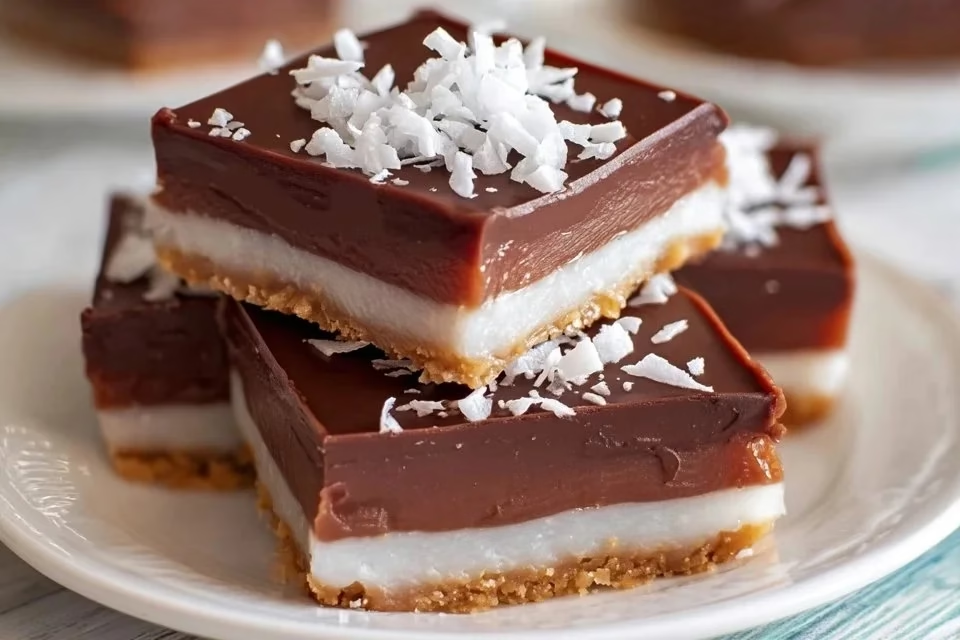
Step 12. Once set, cut the bars into squares or rectangles for serving. If desired, garnish each piece with whipped cream or Cool Whip and some shaved chocolate for an extra touch. This added layer makes for a beautiful presentation.

Serving Suggestions
These bars are versatile and can be enjoyed at various times. For breakfast, they make a delightful pairing with coffee. As a snack, they’re perfect for an afternoon treat, providing a sweet boost. At family meals, set out a platter for everyone to share. And when it comes to leftovers, these bars hold up well in the fridge for a quick dessert option, ensuring you can enjoy them even after the initial bake.
Pro Tips for Best Results
- Ensure that the butter is fully melted before mixing; this helps create a smoother crust.
- Keep the filling whisked continuously as it thickens to prevent lumps from forming.
- Allow the bars to cool completely before cutting; this ensures cleaner slices.
- For added coconut flavor, consider toasting the macadamia nuts before adding them.
- Experiment with layering; you can adjust the thickness of the haupia or chocolate layer according to your preference.
Common Mistakes to Avoid
- Not evenly pressing the crust. If the crust isn’t compact, it may crumble. Press firmly and evenly to ensure it holds together.
- Under or overcooking the crust. Too soft means it can’t support the filling, while overcooked can lead to a dry texture. Aim for a light golden color.
- Failing to cool the layers properly. Cutting too soon can cause the bars to fall apart. Patience is key—let them set completely.
- Skipping the ingredient measurements. Adding too much or too little of the sugar or cornstarch can affect the balance in texture and flavor. Use exact measurements.
- Not whisking the filling constantly. This can lead to a lumpy texture; keep stirring as it thickens to ensure a smooth result.
- Using low-fat coconut milk. This may affect the creaminess of the haupia layer; stick with full-fat for the best taste and consistency.
Variations & Substitutions
For a different flavor twist, consider adding a layer of fresh fruit on top, such as sliced strawberries or mango, before serving. You could also change the type of nuts used for a different crunch; walnuts or pistachios can add a unique flavor. For a minty taste, try adding a few mint leaves as a garnish.
Storage & Reheating
Store the bars in an airtight container at room temperature for a couple of days, if desired. However, they keep best in the refrigerator for about a week. If you decide to freeze them, wrap each piece in plastic wrap and then place them in a freezer-safe container. To reheat, let them thaw in the refrigerator overnight and enjoy at room temperature for optimal texture.
Frequently Asked Questions
Can I make this recipe ahead of time?
Yes, these bars can be prepared a day in advance. In fact, allowing them to chill overnight enhances the flavors and improves the texture.
How long does it last in the fridge?
They will stay fresh for about a week when stored in an airtight container in the refrigerator. This allows you to enjoy them over several days.
Can I freeze this recipe?
Yes, these bars freeze well. Just make sure to wrap them tightly to prevent freezer burn and maintain quality. They can be frozen for up to three months.
What can I substitute for one ingredient?
If you need a substitute for macadamia nuts, try using walnuts or pecans for a different flavor while still adding a crunchy element to the bars.
Why didn’t my recipe turn out as expected?
Issues could arise from varying measurements or not allowing the layers to set. Ensuring accurate measurements and enough chilling time generally results in a successful outcome.
Final Thoughts
Making these Easy Hawaiian Chocolate Haupia Bars is a straightforward process that delivers delightful results. As you create and share them, you’ll find they carry a comforting appeal, perfect for any occasion. Enjoy every bite, knowing you’ve crafted a treat that brings together sweet and savory in a delicious way.

Hawaiian Chocolate Haupia Bars
Ingredients
Crust
- ½ cup granulated sugar sweetness
- 1¾ cups flour structure
- 1 cup finely chopped macadamia nuts crunchy texture
- ¾ cup butter, melted moisture and flavor
Haupia Filling
- ¾ cup cornstarch thickening agent
- ⅔ cup water liquid
- 3 cups milk creaminess
- 2 14 ounce cans coconut milk, full fat rich coconut flavor
- ¼ tsp salt balances sweetness
- 2 cups sugar sweetness
- 1 tbsp coconut extract enhances coconut flavor
Chocolate Layer
- 8 ounces semi-sweet bakers chocolate richness
Garnish
- whipped cream or cool whip creamy topping
- shaved chocolate decorative texture
Instructions
Preparation
- Preheat your oven and prepare your baking dish by greasing it lightly or lining it with parchment paper.
- In a mixing bowl, combine the flour, granulated sugar, and chopped macadamia nuts. Stir until evenly mixed.
- Pour the melted butter into the dry mixture and mix until crumbly.
- Press the crumb mixture into the prepared baking dish evenly.
Baking the Crust
- Bake the crust in the preheated oven until lightly golden, about 10 minutes.
Haupia Filling Preparation
- In a saucepan, combine cornstarch and water, stirring until dissolved.
- Add the milk and coconut milk to the cornstarch mixture, whisking over medium-low heat until the mixture thickens.
- Once thickened, stir in salt, sugar, and coconut extract until fully dissolved.
- Pour the haupia filling over the pre-baked crust.
Chocolate Layer
- Melt the semi-sweet chocolate and pour it over the haupia layer, spreading evenly.
Cooling & Serving
- Allow the bars to cool at room temperature before refrigerating to set.
- Once set, cut into squares or rectangles, garnishing as desired.


