
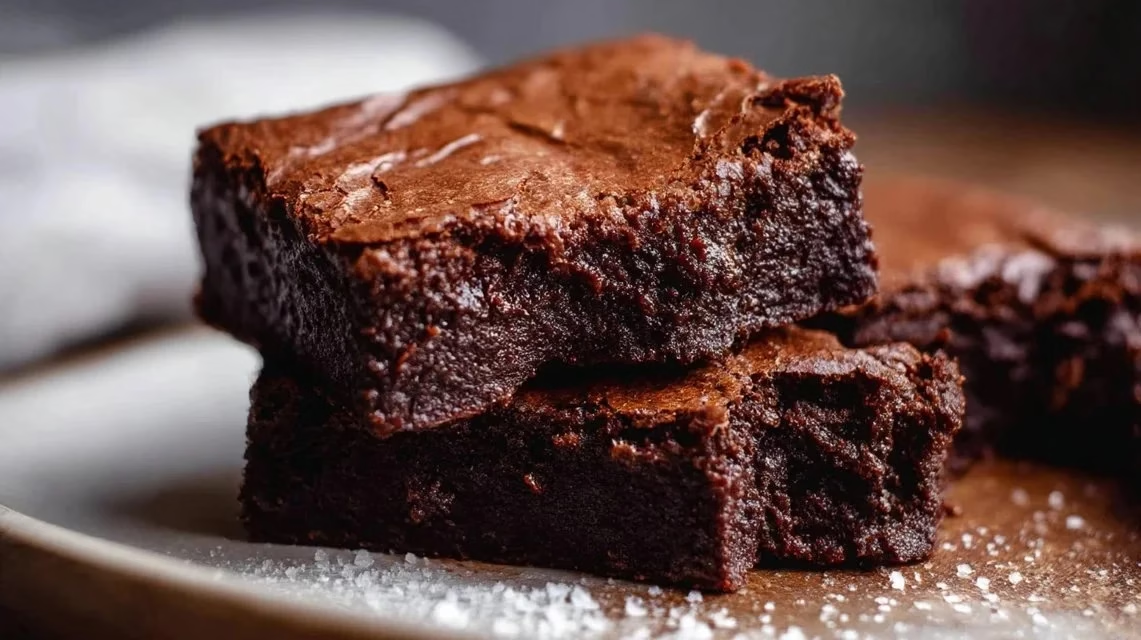
Why You’ll Love This Recipe
These easy sourdough discard brownies are straightforward and reliable, making them perfect for any level of baker. With their rich chocolate flavor and subtle tanginess from the sourdough, they provide a comforting dessert experience. Plus, it’s a practical recipe that helps reduce waste by using sourdough discard, showcasing the versatility of your starter while delivering a delicious treat your family will enjoy.
Kitchen Tools You’ll Need
- Mixing bowl
- Whisk
- Measuring cups and spoons
- Rubber spatula
- Baking dish (8×8 inches)
- Parchment paper (optional)
Ingredients
- 1 cup sourdough discard (moisture and tanginess)
- 1/2 cup unsalted butter (richness and moisture)
- 1 cup granulated sugar (sweetness and texture)
- 2 large eggs (structure and moisture)
- 1 teaspoon vanilla extract (flavor enhancement)
- 1/2 cup all-purpose flour (structure)
- 1/3 cup unsweetened cocoa powder (chocolate flavor)
- 1/4 teaspoon salt (flavor balance)
- 1/2 cup chocolate chips (optional, extra chocolate flavor)
How to Make Easy Sourdough Discard Brownies
Step 1
Preheat your oven to 350°F (175°C) and prepare your baking dish. You can either coat the dish with nonstick spray or line it with parchment paper for easy removal. This step is important because it ensures that the brownies bake evenly and don’t stick to the bottom. Once the oven is preheated, you can move on to the next step.
Step 2
In a mixing bowl, combine the sourdough discard and melted unsalted butter. Stir them together until the mixture is well blended, and the butter is fully incorporated into the sourdough. This blend creates a smooth base, ensuring that your brownies have a rich texture. Make sure there are no lumps before moving to the next step.
Step 3
Add granulated sugar to the sourdough and butter mixture and whisk until fully combined. The sugar will add sweetness, which balances the tangy notes of the sourdough. You should aim for a smooth and glossy mixture. It’s essential to ensure the sugar is well mixed in, as it affects the sweetness and overall texture of the brownies.
Step 4
Incorporate the two large eggs into the mixture, one at a time, mixing well after each addition. The eggs will provide moisture and structure to the brownies. You’ll want the mixture to become smooth and slightly thickened. This step is crucial because it helps bind the ingredients together effectively.
Step 5
Stir in the vanilla extract, mixing it thoroughly into the batter. The vanilla will enhance the overall flavor of the brownies. Make sure it is evenly distributed, as you want that lovely vanilla aroma to blend with the chocolate and sourdough notes. This small step adds a layer of complexity to the brownies.
Step 6
In a separate bowl, whisk together the all-purpose flour, unsweetened cocoa powder, and salt. This step helps to mix the dry ingredients evenly and breaks up any cocoa powder clumps. Each ingredient has a role: the flour provides structure, cocoa gives rich flavor, and salt balances the sweetness. Mixing them beforehand will ensure even distribution when combined with the wet ingredients.
Step 7
Gradually add the dry mixture to the wet mixture, folding gently using a rubber spatula. Do not over-mix; you are looking for a combined texture. There may be some small lumps, which is fine. The goal here is to ensure the dry ingredients are integrated without overworking the batter, as this can affect the texture of the finished brownies.
Step 8
If you’re using chocolate chips, fold them in now. Stir gently to distribute the chocolate chips throughout the batter without deflating it. This adds lovely pockets of melted chocolate in each bite. Once evenly mixed, you’re ready to transfer the batter to the prepared baking dish.
Step 9
Pour the brownie batter into the prepared baking dish, spreading it into an even layer with the spatula. It’s essential to make sure the batter reaches the corners of the dish for even baking. Give the dish a gentle tap on the counter to allow any air bubbles to escape, ensuring a more uniform texture once baked.
Step 10
Bake in the preheated oven for 25 to 30 minutes. Check for doneness by inserting a toothpick in the center; it should come out with a few moist crumbs. The brownies will set further as they cool. Be cautious not to overbake, as this can lead to dry brownies, which defeats the purpose of that rich, fudgy texture.
Step 11
Once done, remove the brownies from the oven and allow them to cool in the dish for about 10 to 15 minutes. This cooling time helps them firm up, making it easier to cut into squares later. The aroma during this time will be delightful, as the chocolate aroma fills your kitchen.
Step 12
After they have cooled slightly, transfer the brownies to a wire rack to cool completely. This step is important to achieve the desired texture and avoid a soggy bottom. Once cooled, feel free to slice them into squares and serve as desired.
Serving Suggestions
These brownies are delightful on their own but can be enjoyed in various ways. They make a great breakfast treat with your morning coffee or tea. For an afternoon pick-me-up, pair them with a glass of milk. They’re also ideal for family meals or gatherings; simply serve on a dessert platter for everyone to enjoy. If you have leftovers, they make for a perfect sweet snack throughout the week.
Pro Tips for Best Results
- Make sure the butter is fully melted before combining with the sourdough for an even blend.
- Whisk eggs separately if you prefer to ensure they are well mixed before adding to the batter.
- Use high-quality cocoa powder for richer chocolate flavor.
- Line your baking dish with parchment paper for easy removal and cleaning.
- Allow brownies to cool fully before slicing to prevent crumbling.
- Store them in an airtight container to maintain freshness.
Common Mistakes to Avoid
- Overmixing the Batter: This can lead to tough brownies. Mix just until combined to keep them fudgy.
- Skipping the Cooling Step: Cutting into warm brownies can lead to a messy, crumbly texture. Always allow them to cool before slicing.
- Not Measuring Ingredients Accurately: Using too much flour or cocoa can alter the texture. Always use measuring cups for consistent results.
- Not Checking for Doneness: Baking too long can dry out the brownies. Stick to toothpick testing to gauge doneness.
- Using Cold Ingredients: Bringing your eggs and butter to room temperature ensures better mixing and incorporation with the sourdough.
- Ignoring the Salt: Salt enhances flavors, so don’t skip it. It helps balance the sweetness of the brownies.
Variations & Substitutions
Feel free to add nuts or swap chocolate chips for white chocolate or caramel chips for a different flavor profile. If you enjoy a fuller flavor, consider adding a tablespoon of coffee or espresso powder to your batter. For a twist, try incorporating a pinch of cinnamon for a warm spice note.
Storage & Reheating
Store brownies at room temperature in an airtight container for up to 3 days. If you need them to last longer, refrigerate them, where they’ll stay fresh for about a week. If frozen, wrap individual brownies in plastic and seal them in a freezer-safe bag; they can last for up to 3 months. To reheat, simply pop them in the microwave for a few seconds to revive that fudgy texture.
Nutrition Information
Nutrition values are estimates and may vary based on ingredients used.
Frequently Asked Questions
- Can I make this recipe ahead of time?
Yes, you can prepare the batter and refrigerate it for up to a day before baking. Just remember that you may need to give it a slight stir if it thickens. - How long does it last in the fridge?
These brownies stay fresh for about a week when stored in an airtight container in the refrigerator. - Can I freeze this recipe?
Absolutely! Once cooled, you can freeze the brownies for up to 3 months. Just ensure they are wrapped well to avoid freezer burn. - What can I substitute for one ingredient?
You can substitute coconut oil for butter if you’re looking for a dairy-free option, while eggs can be replaced with flaxseed meal or applesauce for a vegan version. - Why didn’t my recipe turn out as expected?
Common factors include incorrect ingredient measurements or not properly checking the doneness. Ensure you follow the instructions closely for best results.
Final Thoughts
Making easy sourdough discard brownies is a rewarding experience that transforms extra sourdough into a delicious treat. The recipe is straightforward and approachable, making it perfect for bakers of any skill level. Enjoy them fresh out of the oven or days later; they carry a comforting richness that warms the heart. Remember, even if a batch doesn’t turn out perfectly, the process is a learning experience, and the sweetness of homemade treats makes it all worthwhile.

Easy Sourdough Discard Brownies
Ingredients
Brownie Base
- 1 cup sourdough discard Adds moisture and tanginess
- 1/2 cup unsalted butter Should be melted
- 1 cup granulated sugar Balances the tanginess
- 2 large eggs Provides structure and moisture
- 1 teaspoon vanilla extract Enhances flavor
Dry Ingredients
- 1/2 cup all-purpose flour Provides structure
- 1/3 cup unsweetened cocoa powder Adds rich chocolate flavor
- 1/4 teaspoon salt Balances flavors
Add-ins
- 1/2 cup chocolate chips Optional, for extra chocolate flavor
Instructions
Preparation
- Preheat your oven to 350°F (175°C) and prepare your baking dish by coating it with nonstick spray or lining it with parchment paper.
- In a mixing bowl, combine the sourdough discard and melted unsalted butter until well blended.
Mixing
- Add granulated sugar and whisk until fully combined until the mixture is smooth and glossy.
- Incorporate the eggs one at a time, mixing until the mixture is smooth and slightly thickened.
- Stir in vanilla extract until evenly distributed.
Combining Dry Ingredients
- In a separate bowl, whisk together the flour, cocoa powder, and salt.
- Gradually add the dry mixture to the wet mixture, folding gently with a rubber spatula, avoiding over-mixing.
- Fold in chocolate chips if using.
Baking
- Pour the brownie batter into the prepared baking dish, spreading it evenly.
- Bake the brownies for 25 to 30 minutes, or until a toothpick inserted comes out with a few moist crumbs.
- Allow brownies to cool in the dish for about 10 to 15 minutes before transferring to a wire rack to cool completely.
- Once cooled, slice into squares and serve.


