
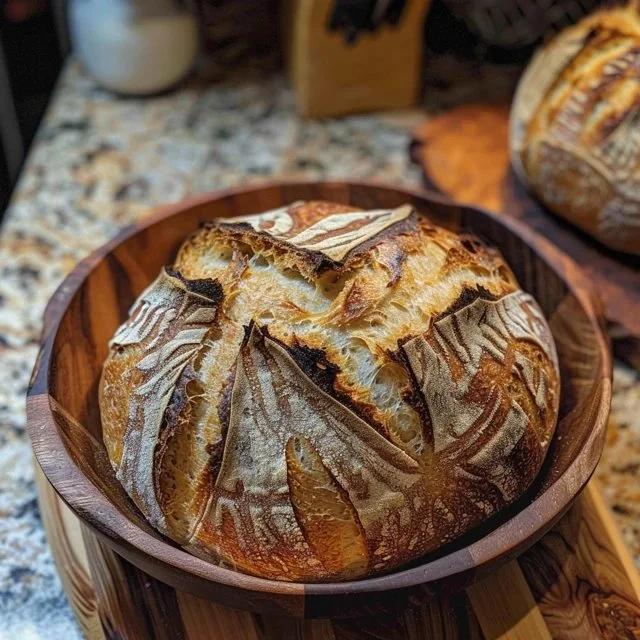
Creating your own bread at home can be a fulfilling experience, bringing warmth to your kitchen on any given day. This recipe for homemade artisan sourdough bread provides a beautiful balance of flavor and texture. Whether it’s during a quiet moment at breakfast or a weekend gathering, the act of baking this bread can be both a comforting routine and a delightful treat for family and friends. There’s something special about cutting into a loaf you’ve crafted yourself. Let’s dive into the process of making your very own sourdough bread.
Why You’ll Love This Homemade Artisan Sourdough Bread Recipe
This homemade artisan sourdough bread recipe is straightforward and reliable, making it perfect for those who enjoy baking. With a deep, balanced flavor, this bread offers comforting nourishment, whether served warm or toasted. The use of both bread and rye flour contributes to a hearty texture that enhances any meal. Plus, its practical nature means you can enjoy it any time without too much effort.
Kitchen Tools You’ll Need
- Mixing bowls
- Kitchen scale
- Spoon or spatula
- Bench scraper
- Proofing basket
- Dutch oven or baking stone
Ingredients
- 50 g active sourdough starter (100% hydration) (provides natural fermentation)
- 20 g bread flour (contributes to the dough structure)
- 5 g rye flour (adds a slight earthiness)
- 25 g water (for leaven) (moisture for fermentation)
- 900 g bread flour (bulk of the dough structure)
- 100 g rye flour (enhances flavor and texture)
- 800 g water (divided) (moisture for dough and leaven)
- 22 g kosher salt (flavor and strengthens gluten)

How to Make Homemade Artisan Sourdough Bread Recipe
Step 1. Begin by preparing the leaven. In a mixing bowl, combine the active sourdough starter, 20 g of bread flour, 5 g of rye flour, and 25 g of water. Mix until it forms a thick paste. Let this mixture ferment for several hours, or until it becomes bubbly and has doubled in size. The leaven should have a pleasant, slightly sour aroma, indicating it’s ready for use.
Step 2. In a large mixing bowl, combine the 900 g of bread flour and 100 g of rye flour. Add 775 g of the water, reserving 25 g for later. Stir until everything is just mixed together; it should appear shaggy and wet. Cover the bowl with a damp cloth and let it rest for approximately 30 minutes. This resting period, often called autolyse, helps to hydrate the flour and begin gluten development, resulting in a smoother dough later on.
Step 3. After the autolyse, add the leaven and the reserved 25 g of water to the flour mixture. Use your hands to mix all the ingredients together until fully incorporated. Once combined, sprinkle the kosher salt over the dough and mix it in thoroughly. Knead the dough slightly in the bowl to ensure even distribution of the salt, which strengthens the dough’s structure.
Step 4. Now, it’s time to begin bulk fermentation. Transfer the dough to a clean, lightly greased bowl. Cover it with a damp cloth or plastic wrap. Allow it to rise at room temperature for about 4 to 5 hours. During this time, occasionally stretch and fold the dough every 30 minutes for the first two hours. This technique helps develop strength and structure in the dough, creating those desirable air pockets.
Step 5. Once the dough has significantly increased in volume and shows bubbles on the surface, it’s ready for shaping. Gently turn it out onto a floured surface. Shape the dough into a round loaf by folding the edges toward the center to create tension on the top. Let it rest for about 20 minutes to relax.
Step 6. After the resting period, flip the dough seam-side up and use your hands to shape it into its final form, creating a taut surface. Place the loaf, seam-side up, into a well-floured proofing basket. Cover it with a damp cloth and let it proof for 1 to 2 hours, or until it has noticeably expanded.
Step 7. Preheat your oven to 450°F approximately 30 minutes before baking. If you’re using a Dutch oven, place it inside the oven to heat up as well. When the bread is ready, carefully flip the loaf onto a piece of parchment paper, seam-side down. Score the top with a sharp knife or razor, which allows the loaf to expand properly during baking.
Step 8. Use the parchment paper to transfer the loaf into the preheated Dutch oven. Cover it with the lid and bake for 30 minutes. After this time, remove the lid to allow the crust to brown. Bake for an additional 15 to 20 minutes, watching for a deep golden color. The loaf should sound hollow when tapped on the bottom, indicating it’s fully baked.
Step 9. Once baked, remove the bread from the Dutch oven and let it cool on a wire rack for at least an hour before slicing. This cooling period allows the interior crumb to set properly, enhancing its texture. Enjoy the rewarding scent of freshly baked sourdough filling your kitchen.

Serving Suggestions
This artisan sourdough bread can be enjoyed in various ways that fit seamlessly into everyday life. Toast a slice for breakfast, topped with a simple spread of butter or your favorite jam. As a snack, it pairs wonderfully with cheese or sliced avocado. For family meals, serve it alongside soups or salads, making it a comforting addition to any table. Leftovers can be used for sandwiches or even transformed into croutons for salads, so there’s little waste.
Pro Tips for Best Results
- Ensure your sourdough starter is active and bubbly before using it to guarantee good rise and flavor.
- Use a kitchen scale for precise measurements, which is key in bread-making for consistent results.
- Be gentle during the stretch and fold process to maintain the dough’s airiness.
- Opt for a longer fermentation at cooler temperatures for more complex flavors in your bread.
- Make sure to properly preheat your Dutch oven; this helps create steam, contributing to a good crust.
- Allowing the bread to cool completely before slicing helps preserve its texture.
Common Mistakes to Avoid
- Not using an active starter: An inactive starter won’t ferment the dough properly, leading to a dense loaf. Always check that your starter is bubbly and has risen before using it.
- Skipping the autolyse step: This phase is crucial for gluten development. Without it, your dough may lack structure and elasticity.
- Overproofing the dough: If left to rise too long, the dough can collapse and won’t hold its shape during baking. Keep an eye on it to judge when it’s ready.
- Not scoring the loaf: Skipping this step can cause the bread to crack unpredictably during baking, affecting shape and appearance. Always score for better results.
- Baking at too low a temperature: The right temperature is essential for a good crust. A well-heated oven ensures adequate steam and oven spring.
- Cutting the bread too soon: Slicing before it has cooled can yield a gummy texture. Patience allows the crumb to set up nicely.
Variations & Substitutions
You can experiment with different hydration levels by adjusting the water content, leading to varied crumb textures. If you have specialty flours, consider adding a small amount to tweak the flavor or nutritional profile. You might add herbs or spices into the dough for unique flavors. Just remember that any changes may influence fermentation times and hydration levels, so keep that in mind as you adapt the recipe.
Storage & Reheating
At room temperature, keep the bread in a paper bag to preserve crustiness for up to 3 days. For longer storage, wrap it tightly in plastic wrap and place it in the refrigerator, where it can last about a week. If you wish to freeze the bread, slice it first for convenience. Wrap the slices tightly and store in an airtight container. To reheat, place slices in a toaster or a warm oven for a few minutes to refresh its texture.
Frequently Asked Questions
Can I make this recipe ahead of time?
Yes, you can prepare the dough and shape it the night before, allowing it to proof in the refrigerator. Just take it out the next day for the final rise before baking.
How long does it last in the fridge?
Stored properly, this sourdough bread can last up to one week in the fridge. Make sure it’s wrapped well to prevent it from drying out.
Can I freeze this recipe?
Absolutely! Freezing is a great way to preserve the bread. Slice it first for easy access and wrap it tightly to prevent freezer burn.
What can I substitute for one ingredient?
If you run out of bread flour, you can use all-purpose flour as an alternative, though this may slightly affect the texture and rise of your bread.
Why didn’t my recipe turn out as expected?
Several factors could influence the outcome: an inactive starter, inaccurate measurements, or incorrect fermentation times might all lead to unexpected results. Checking each step is essential for best results.
Final Thoughts
Making homemade artisan sourdough bread is a fulfilling and enjoyable way to bring fresh, comforting flavors into your home. As you go through the steps of crafting and baking your loaf, you’ll find it transforms not only your meals but your kitchen routine. Enjoy the journey of creating something delicious with simple ingredients and embrace the satisfaction that comes with your own baking.

Artisan Sourdough Bread
Ingredients
For the Leaven
- 50 g active sourdough starter (100% hydration) Provides natural fermentation
- 20 g bread flour Contributes to the dough structure
- 5 g rye flour Adds a slight earthiness
- 25 g water Moisture for fermentation
For the Dough
- 900 g bread flour Bulk of the dough structure
- 100 g rye flour Enhances flavor and texture
- 800 g water (divided) Moisture for dough and leaven
- 22 g kosher salt Flavor and strengthens gluten
Instructions
Preparation of Leaven
- In a mixing bowl, combine the active sourdough starter, 20 g of bread flour, 5 g of rye flour, and 25 g of water. Mix until it forms a thick paste. Let this mixture ferment for several hours, or until it becomes bubbly and has doubled in size.
Autolyse Phase
- In a large mixing bowl, combine the 900 g of bread flour and 100 g of rye flour. Add 775 g of the water, reserving 25 g for later. Stir until everything is just mixed together and let it rest for approximately 30 minutes.
Mixing Dough
- After the autolyse, add the leaven and the reserved 25 g of water to the flour mixture. Use your hands to mix all the ingredients together until fully incorporated.
- Sprinkle the kosher salt over the dough and mix it in thoroughly. Knead the dough slightly in the bowl.
Bulk Fermentation
- Transfer the dough to a clean, lightly greased bowl. Cover it with a damp cloth or plastic wrap and allow it to rise at room temperature for about 4 to 5 hours, stretching and folding the dough every 30 minutes for the first two hours.
Shaping the Loaf
- Once the dough has significantly increased in volume, gently turn it out onto a floured surface and shape it into a round loaf.
- Let it rest for about 20 minutes to relax.
- After resting, flip the dough seam-side up and shape it into its final form. Place it in a well-floured proofing basket and cover it.
Proofing and Baking
- Let it proof for 1 to 2 hours, or until expanded. Preheat your oven to 450°F approximately 30 minutes prior. Transfer the loaf onto parchment paper, score the top, and bake in the Dutch oven.
- Cover and bake for 30 minutes. Remove the lid and bake for an additional 15 to 20 minutes until golden.
Cooling
- Remove the bread from the Dutch oven and let it cool on a wire rack for at least an hour before slicing.


