
Why You’ll Love This Recipe
This recipe for Fudgy Red Velvet Brownies is straightforward and dependable, perfect for both novice and experienced bakers. The combination of flavors offers a comforting balance that feels right at home. With its practical everyday value, you can whip these up at a moment’s notice for any gathering or enjoy them as a special treat for yourself at any time.
Kitchen Tools You’ll Need
- Mixing bowl
- Whisk
- 8-inch square baking pan
- Parchment paper (optional)
- Rubber spatula
Ingredients
- 1 cup all-purpose flour (structure)
- 1/4 cup cocoa powder (flavor)
- 1/2 teaspoon baking powder (leavening agent)
- 1/4 teaspoon salt (enhanced flavor)
- 1/2 cup unsalted butter, melted (moisture)
- 1 cup granulated sugar (sweetness)
- 2 large eggs (binding agent)
- 1 teaspoon vanilla extract (aroma)
- 1 tablespoon red food coloring (color)
- 1/2 cup chocolate chips (optional, texture)
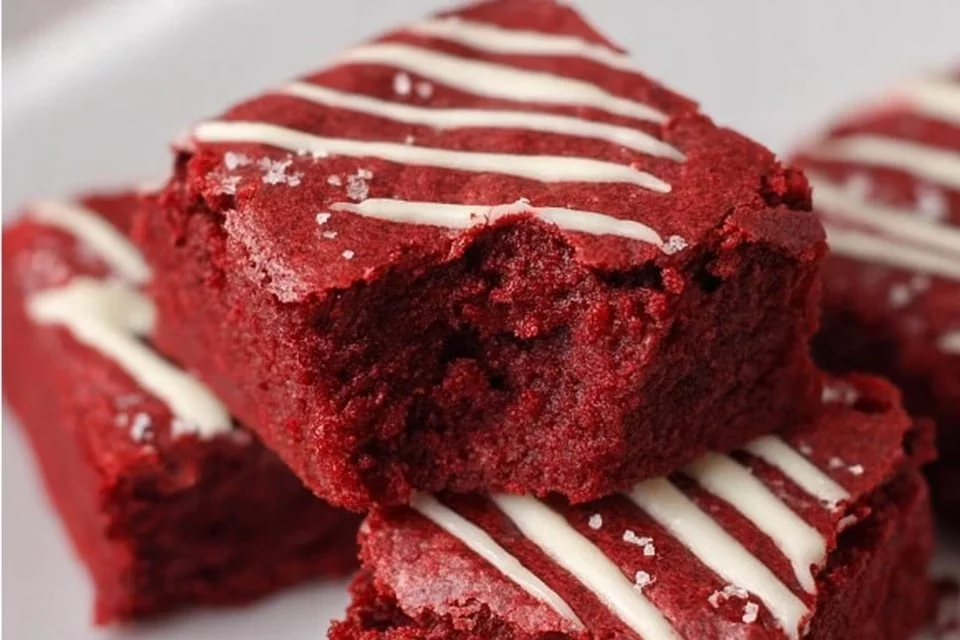
- Cream cheese frosting (for topping, optional)
How to Make Fudgy Red Velvet Brownies
Step 1. Begin by preheating your oven to 350°F (175°C) to ensure it reaches the right temperature for baking your brownies. While the oven heats, gather your ingredients so everything is ready. This helps streamline the process and allows you to focus on mixing the components effectively.
Step 2. In a mixing bowl, whisk together the all-purpose flour, cocoa powder, baking powder, and salt until evenly combined. This step is essential to ensure that the leavening agent is distributed and that the dry ingredients are well mixed, preventing any clumps. Set this mixture aside for later use.
Step 3. In a separate bowl, combine the melted unsalted butter and granulated sugar, stirring until the mixture is smooth and creamy. The warmth of the melted butter helps dissolve the sugar, creating a sweet base for your brownies. This step is complete when the mixture appears glossy and well-blended.
Step 4. Add the eggs, one at a time, to the butter and sugar mixture, whisking well after each addition. This process incorporates air, giving your brownies a lighter texture while also ensuring all ingredients combine thoroughly. You’ll know it’s done when the mixture is pale and smooth.
Step 5. Stir in the vanilla extract and red food coloring, mixing until the color is uniformly distributed and the mixture is vibrant. Pay attention to the consistency; it should be thick but smooth. This will contribute to the brownies’ delightful flavor and eye-catching appearance.
Step 6. Gradually fold in the dry ingredient mixture from Step 2 using a rubber spatula, being careful not to overmix. You want to incorporate the flour mixture until just combined, which helps maintain the fudgy texture of the brownies. It’s okay if some streaks remain.
Step 7. If you’re using chocolate chips, gently fold them into the brownie batter now, distributing them evenly throughout. This optional step adds a rich chocolatey flavor and texture contrast, enhancing the overall experience of the brownies.
Step 8. Line your 8-inch square baking pan with parchment paper if desired, then pour in the brownie batter, smoothing the top with a spatula to ensure it’s even. Make sure to spread the batter to the corners of the pan. This creates a consistent bake and helps the brownies cook evenly.
Step 9. Place the baking pan in the preheated oven and let the brownies bake for 20 to 25 minutes. Check for doneness by inserting a toothpick in the center—if it comes out with a few moist crumbs, they are ready. Keep an eye on them to avoid overbaking.
Step 10. Once baked, remove the brownies from the oven and allow them to cool in the pan for about 10 minutes. After this time, lift them out of the pan using the parchment paper, if used, and transfer to a wire rack to cool completely. This step is important for achieving the right fudgy texture.
Step 11. If you choose to add cream cheese frosting, prepare it while the brownies are cooling. Once the brownies are fully cooled, spread the frosting on top with a spatula for a creamy finish or enjoy them plain. Letting the brownies cool completely prevents the frosting from melting.
Serving Suggestions
Fudgy Red Velvet Brownies can be enjoyed in various settings, whether as a sweet breakfast treat with coffee or as an afternoon snack. They’re ideal for sharing at family gatherings or potluck events. The leftovers, if there are any, make for a delicious dessert that can be enjoyed over the next few days. Pair them with a scoop of vanilla ice cream for a delightful twist!
Pro Tips for Best Results
- Make sure your butter is not too hot when combining with sugar to avoid cooking the eggs.
- Don’t overmix the batter after adding the flour for a fudgier texture.
- Use high-quality cocoa powder for a deeper chocolate flavor.
- Be cautious not to overbake to keep them soft and chewy.
- Allow the brownies to cool completely before frosting for the best texture.
Common Mistakes to Avoid
- Using cold butter. It can lead to uneven mixing and a less fudgy texture. Always melt the butter beforehand.
- Overmixing the batter. This can result in dense brownies instead of the desired fudgy texture. Fold in the dry ingredients just until combined.
- Not checking for doneness. Overbaking can dry out the brownies. Insert a toothpick in the center; it should come out with a few moist crumbs.
- Skipping the cooling time. Cutting into the brownies too soon can make them fall apart. Let them cool in the pan before slicing to maintain their structure.
- Ignoring ingredient temperature. Cold eggs can affect the batter consistency. Use room-temperature eggs for better blending.
- Forgetting the salt. Salt enhances flavor; omitting it can make the brownies taste flat. Always include the salt to improve taste balance.
Variations & Substitutions
Consider adding nuts or swapping the chocolate chips for white chocolate chips for a different flavor. You can also explore various frosting options, like chocolate ganache, for a rich topping. If you’re feeling adventurous, try adding peppermint extract for a refreshing twist.
Storage & Reheating
Store the brownies at room temperature in an airtight container for up to 3 days for optimal freshness. If you prefer longer storage, keep them in the refrigerator for about a week. For freezing, wrap the brownies tightly in plastic wrap and place them in a freezer-safe container for up to 2 months. Reheat by placing individual pieces in the microwave for about 10-15 seconds for a warm, fudgy treat.
Nutrition Information
Nutrition values are estimates and may vary based on ingredients used.
Frequently Asked Questions
Can I make this recipe ahead of time?
Yes, you can prepare the batter in advance and store it in the refrigerator for up to 24 hours before baking. This allows the flavors to meld beautifully.
How long does it last in the fridge?
When stored in an airtight container, the brownies can last about a week in the fridge while retaining their moisture and flavor.
Can I freeze this recipe?
Absolutely! These brownies freeze well. Wrap them tightly in plastic wrap and store them in a freezer-safe container for up to two months.
What can I substitute for one ingredient?
If you don’t have cocoa powder, you could use Dutch-process cocoa. Just keep in mind that it may alter the flavor slightly.
Why didn’t my recipe turn out as expected?
Common reasons include inaccurate measurements or overbaking. Ensure you measure ingredients correctly and watch the baking time closely.
Final Thoughts
Making Fudgy Red Velvet Brownies can be a warm and enjoyable experience, allowing you to create something delicious and comforting for yourself or to share with loved ones. Their rich flavors and vibrant color make them a welcome addition to any occasion. Enjoy the process of baking, and rest assured that this recipe will yield delightful results every time.


