
Why You’ll Love This Recipe
This recipe is straightforward and reliable, ensuring you can whip up a batch whenever a craving hits. The combination of sweet and slightly salty gives a comforting balance of flavors that everyone can enjoy. These Gluten Free S’mores Cookie Bars are practical for everyday snacking and satisfying for family meals, making them a versatile go-to for your kitchen.
Kitchen Tools You’ll Need
- Mixing bowls
- Baking dish (9×9 inch)
- Measuring cups and spoons
- Spoon or spatula for mixing
- Oven
Ingredients
- 1 cup gluten free graham cracker crumbs (crunchy texture)
- 1/2 cup brown sugar (adds moisture and sweetness)
- 1/2 cup butter, melted (provides richness and binds ingredients)
- 1/2 teaspoon vanilla extract (enhances flavor)
- 1 cup mini marshmallows or marshmallow fluff (adds sweetness and gooey texture)
- 1 cup chocolate chips (rich chocolate flavor)
- 1 egg (provides structure)
- 1/2 teaspoon baking powder (helps the bars rise)
- 1/4 teaspoon salt (balances sweetness)
How to Make Gluten Free S’mores Cookie Bars
Step 1. Start by preheating your oven to 350°F. This ensures that your bars will bake evenly and have the right texture. While the oven warms up, gather all the ingredients and mixing bowls, so everything is ready for the next steps.
Step 2. In a mixing bowl, combine the gluten free graham cracker crumbs, brown sugar, melted butter, and vanilla extract. Mix until all ingredients are well-blended. This mixture will serve as the base for your cookie bars, so it should be crumbly yet slightly moist enough to hold together.
Step 3. Once the base mixture is ready, add in the egg and stir until fully incorporated. This addition not only helps bind the ingredients but also adds a little richness. Make sure there are no streaks of egg remaining, and the mixture is smooth.
Step 4. Next, sprinkle in the baking powder and salt, mixing again until everything is combined. The baking powder is essential for helping the bars rise slightly during baking, ensuring they have a lovely texture while preventing them from being too dense.
Step 5. Gently fold in the mini marshmallows and chocolate chips. Be careful during this step to avoid crushing the marshmallows too much; you want to maintain their shape for a delightful texture in the finished bars.
Step 6. Transfer the mixture into a greased 9×9 inch baking dish, spreading it out evenly. Use a spatula to smooth the top, ensuring an even thickness across the surface. This will help the bars cook uniformly and look appealing when served.
Step 7. Bake the bars in the preheated oven for 20-25 minutes, watching for the edges to become golden brown. The middle may seem slightly soft, but it will firm up as it cools. Keep an eye on them to avoid overbaking, which can lead to a dry texture.
Step 8. Once baked, remove the dish from the oven and let it cool completely in the pan on a wire rack. This step is important to set the bars properly, making them easier to cut into squares without falling apart.
Step 9. After the mixture has cooled completely, cut into squares or bars, depending on your preference. Serve them as is, or enjoy a warm bar for an extra treat. The chocolate and marshmallows will be perfectly gooey and delicious!
Serving Suggestions
Gluten Free S’mores Cookie Bars are perfect for a cozy breakfast paired with coffee or tea, a snack for a family movie night, or a delightful treat at a picnic. They can be cut into smaller squares to easily share or satisfy a craving throughout the week. Storing these bars allows for quick grab-and-go options for busy days, or they can serve as a comforting after-dinner dessert when you crave something sweet.
Pro Tips for Best Results
- Ensure that the butter is melted, but not hot, to prevent scrambling the egg.
- Allow the bars to cool completely for clean cutting, achieving neat squares.
- Watch the baking time closely; ovens can vary, and it’s better to underbake slightly than overbake.
- Use high-quality chocolate chips for the best flavor connection with the marshmallows.
- If using marshmallow fluff, spread it evenly in the mixture to ensure every bite contains marshmallow.
- Experiment with mixing in nuts or a sprinkle of cinnamon for added flavor.
Common Mistakes to Avoid
- Overmixing the batter: This can result in tough bars due to the development of gluten. Mix only until combined for a softer texture.
- Not measuring ingredients accurately: Inaccurate measurements can lead to bars that are too dry or too gooey. Use standard measuring cups for best results.
- Using cold butter: Cold butter may result in an uneven mixture that doesn’t blend well. Always use melted butter for proper binding.
- Skipping the cooling step: Cutting the bars when they’re still warm can lead to messiness. Allow them to cool completely for neat and tidy results.
- Not greasing the baking dish: Failing to grease can cause the bars to stick, making removal difficult. Always use non-stick spray or butter to ensure easy release.
- Leaving out the egg or baking powder: Both are essential for texture and rise. Ensure to include these ingredients for the best outcome.
Variations & Substitutions
- Swap mini marshmallows for regular-sized ones for a different texture.
- Mix some peanut butter chips with the chocolate chips for added flavor.
- If you prefer a more decadent treat, drizzle melted chocolate over the top after baking.
- For a nutty flavor, consider adding chopped nuts into the batter along with the chocolate chips.
- Add different flavored extracts like almond or coconut for a unique twist.
Storage & Reheating
To store Gluten Free S’mores Cookie Bars at room temperature, place them in an airtight container for up to three days. For longer storage, keep them in the refrigerator, where they can last for about a week. If you choose to freeze them, wrap individual bars in plastic wrap and then place them in a freezer-safe bag for up to three months. To reheat, simply warm them in the microwave for about 10-15 seconds to enjoy the gooey textures again.
Nutrition Information
Nutrition values are estimates and may vary based on ingredients used.
Frequently Asked Questions
Can I make this recipe ahead of time?
Yes, you can prepare these cookie bars ahead of time. Once baked and cooled, they can be stored in an airtight container for a few days or frozen for longer periods. This makes them a convenient treat for future cravings.
How long does it last in the fridge?
When stored in an airtight container in the refrigerator, Gluten Free S’mores Cookie Bars can last for about a week. They might firm up a bit when chilled but can be easily warmed up for a soft, gooey texture.
Can I freeze this recipe?
Absolutely. These cookie bars freeze nicely. Wrap them in plastic wrap and place them in a freezer-safe bag. They can be frozen for up to three months. When you’re ready to enjoy them, just take out the desired amount and reheat.
What can I substitute for one ingredient?
If you don’t have gluten free graham cracker crumbs, consider using crushed gluten free cookies or almond flour as a base. This will yield a different but still tasty result. Just keep in mind that it may alter the overall flavor slightly.
Why didn’t my recipe turn out as expected?
Common issues like overbaking, incorrect ingredient measurements, or using cold ingredients can affect the final product. Ensure to follow the recipe closely, especially for timing and measuring, to achieve the best result.
Final Thoughts
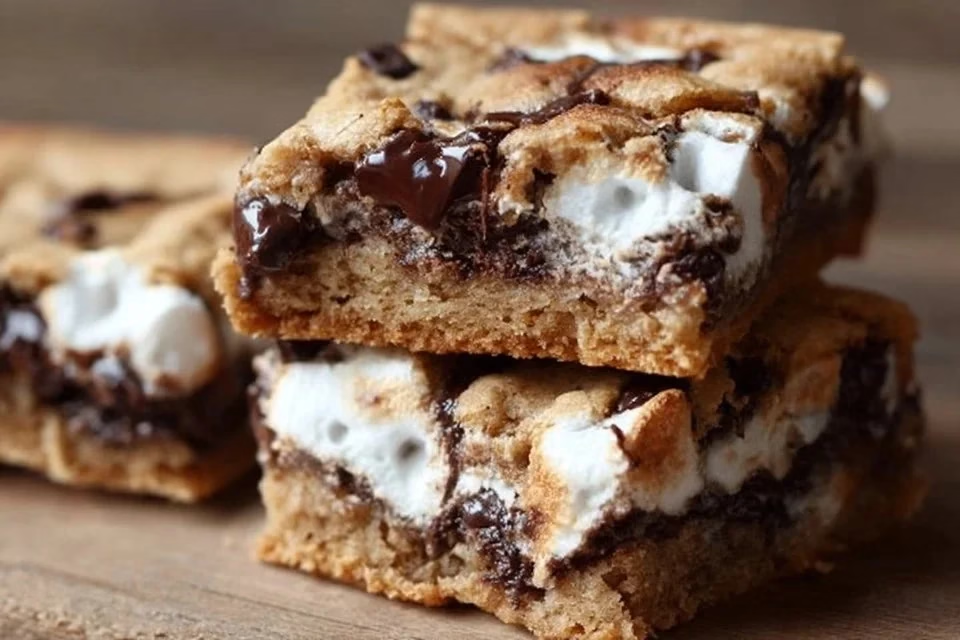
Making Gluten Free S’mores Cookie Bars provides a comforting way to enjoy a classic combination of flavors without the hassle of campfires or the mess of traditional s’mores. They’re easy to share and perfect for a wide range of occasions. By following the steps carefully, anyone can enjoy these delightful bars, filled with melty chocolate and toasted marshmallows, right from their own kitchen. Enjoy the warmth and sweetness that comes with each bite, knowing that this recipe is both simple and satisfying.


