How to Make Red Velvet Cake Mix Better that’s the question that first inspired me, Salma, to experiment in my own kitchen. I’m 32, living in the U.S., and my love for cooking grew from simple curiosity into a true passion. I wasn’t a natural cook, but learning online, testing recipes, and sharing sweet moments with family taught me everything. Red velvet cake quickly became one of my favorites — soft, velvety, and full of color. Now, I love transforming a simple box mix into something bakery-worthy, proving that with a few smart tweaks, anyone can make homemade magic.
Serving Versatility How to Make Red Velvet Cake Mix Better
One of my favorite things about red velvet cake is how versatile it is. Serve it as a classic layered beauty with thick cream cheese frosting for a show-stopping dessert, or bake it into cupcakes for easy sharing. Feeling cozy? Scoop a warm slice into a bowl, drizzle with a little warm chocolate sauce, and top with whipped cream — it’s pure comfort.
If you want a lighter twist, crumble pieces of this cake over Greek yogurt for a breakfast parfait or layer it into mason jars with frosting for a grab-and-go treat. It’s also stunning for holidays; try heart-shaped mini cakes for Valentine’s Day or snowflake decorations for a Christmas red velvet cake moment.
Ingredients (Detailed & Humanized)
1 box red velvet cake mix: the easy base we’ll elevate into bakery-level perfection.
3 large eggs: add richness and structure for a tender crumb.
1 cup buttermilk: deepens flavor and gives that signature tang.
½ cup sour cream: adds moisture and a velvety texture.
½ cup melted butter: replaces oil for richer flavor and softness.
2 tbsp unsweetened cocoa powder: intensifies the chocolate undertone.
1 tsp vanilla extract: enhances warmth and depth.
1 tsp distilled vinegar: keeps the crumb tender and gives that “real” red velvet balance.
Pinch of salt: amplifies sweetness and balances flavors.
Optional — ½ cup mini chocolate chips: for a subtle chocolate surprise in every bite.
Cream cheese frosting: tangy, creamy, and dreamy — the soul of red velvet.
Fresh berries or red velvet crumbs: for an elegant, bakery-worthy finish.
Directions (Step-by-Step Cooking Guide)
- Preheat & prepare. Start by preheating your oven to 350°F. Grease and flour your cake pans, or line them with parchment rounds for easy removal. The smell of warmth and butter will soon fill your kitchen — that’s your sign something delicious is coming.
- Mix the wet ingredients. In a large bowl, whisk together melted butter, eggs, buttermilk, sour cream, vanilla, and vinegar until smooth and glossy. This combo gives your cake richness, tang, and that irresistible velvety texture.
- Combine the dry mix. Pour the red velvet cake mix and cocoa powder into the bowl. Stir gently until no streaks remain. Don’t overmix — a few small lumps are okay. You’ll see the batter turn that signature deep crimson shade, thick and luscious.
- Optional chocolate surprise. If you’re adding mini chocolate chips, fold them in now. They melt slightly as the cake bakes, adding little bursts of chocolatey joy.
- Bake to perfection. Divide the batter evenly between your prepared pans and smooth the tops. Bake for 25–30 minutes, or until a toothpick inserted in the center comes out with a few moist crumbs. Your kitchen will smell like cocoa and sugar heaven.
- Cool with care. Let the cakes rest in their pans for 10 minutes, then turn them out onto wire racks to cool completely. Don’t rush — this step keeps your layers tender and prevents the frosting from melting.
- Whip up the frosting. Beat together softened cream cheese, butter, vanilla, and powdered sugar until silky. It should be smooth, fluffy, and almost impossible not to taste-test.
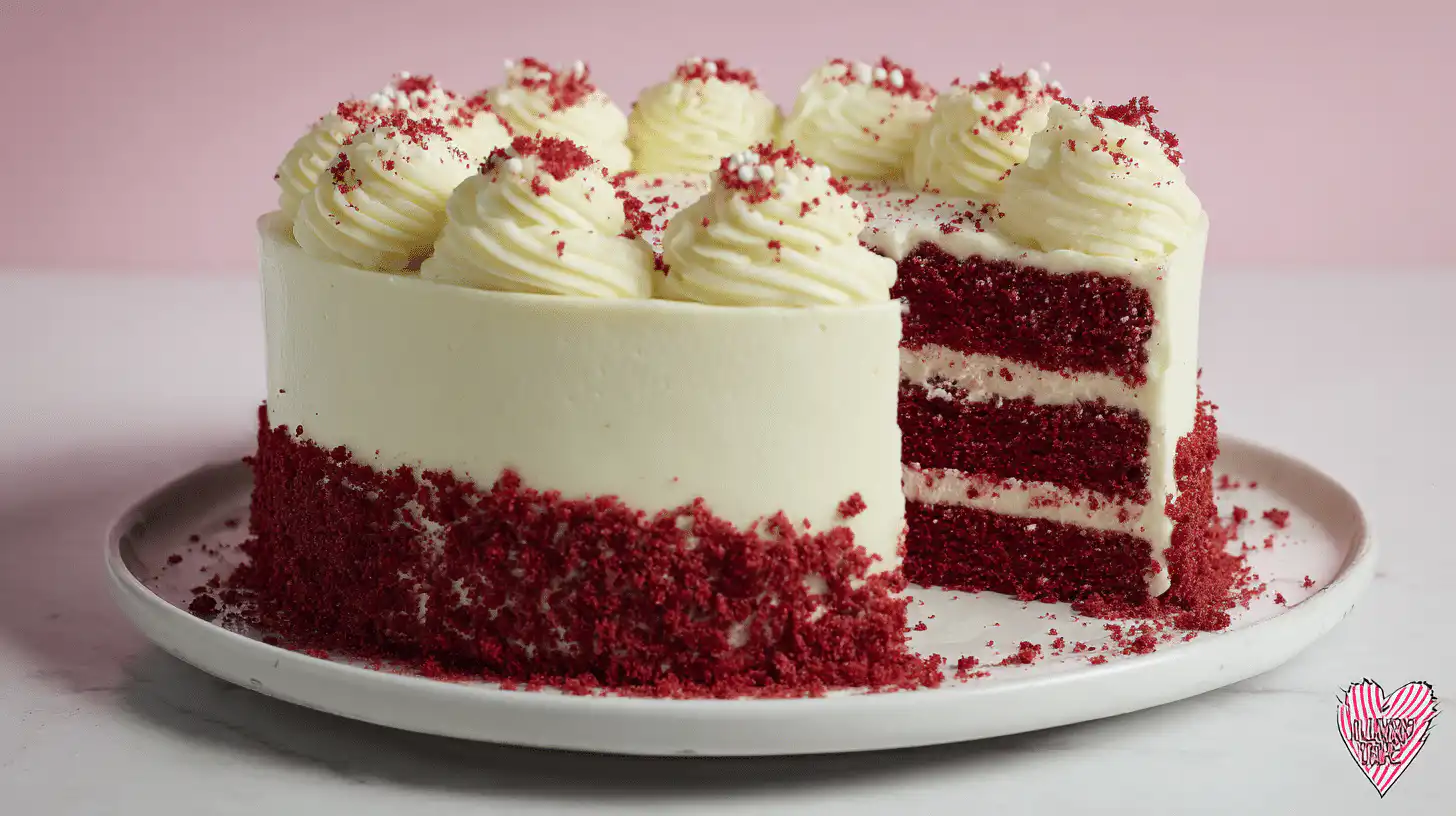
- Frost and decorate. Layer, frost, and smooth the sides. Finish with red velvet crumbs or fresh berries for that perfect “bakery window” look. Slice, serve, and watch everyone’s eyes light up.
Why You’ll Love This Recipe
✅ Quick to make: You’ll have a stunning cake ready in under an hour — no complicated steps.
✅ Budget-friendly: Uses pantry staples with just a few upgrades.
✅ Bakery-style flavor: Rich, tangy, and balanced — just like your favorite café slice.
✅ Moist and tender: Sour cream and buttermilk keep every crumb soft.
✅ Perfect for holidays: A showstopper for Christmas, birthdays, or Valentine’s Day.
✅ Customizable: Works as cupcakes, mini cakes, or even layered trifles.
Cultural or Technique Note
The origins of red velvet cake trace back to the American South, where bakers used vinegar and buttermilk to soften cocoa and enhance its red hue. Before modern food coloring, this “velvet” texture and subtle cocoa flavor symbolized elegance and care. Even today, that same Southern hospitality lives on in every slice — a reminder that simple ingredients, handled with love, can create something unforgettable.
Serving Suggestions
Serve with fresh strawberries or raspberries for a romantic touch.
Crumble leftovers over vanilla ice cream for a quick dessert.
Layer into a glass trifle with cream cheese frosting and whipped cream.
Pair with coffee or a glass of cold milk for the coziest late-night treat.
Pro Tips for Success
Use room-temperature ingredients for a smooth, even batter.
Add a teaspoon of espresso powder for richer chocolate depth.
Sift the cake mix before using to avoid lumps.
Brush cooled layers with simple syrup for extra moisture.
Chill the cake for 20 minutes before frosting for easier assembly.
Always taste your frosting — a pinch of salt can bring it to life.
Common Mistakes to Avoid
⚠️ Overmixing the batter: Leads to dense, tough cake — stir only until combined.
⚠️ Skipping the vinegar: It’s essential for that signature red velvet flavor balance.
⚠️ Using cold ingredients: Causes uneven texture; let everything reach room temp.
⚠️ Overbaking: Check early! Red velvet dries quickly when left too long.
⚠️ Frosting warm cake layers: Wait until they’re fully cool to avoid melting and slipping.
Storage & Reheating
Store leftover cake in an airtight container in the refrigerator for up to 4 days — the flavor actually deepens as it chills. For longer storage, wrap slices tightly in plastic wrap and freeze for up to 2 months. To serve, thaw overnight in the fridge and bring to room temperature before enjoying. If you want that “freshly baked” warmth, microwave individual slices for 10–15 seconds for a soft, melt-in-your-mouth texture.
Frequently Asked Questions (FAQ)
Can I use oil instead of butter? Yes, though butter gives richer flavor. If using oil, go for light olive or vegetable oil for a moist crumb.
How can I make this dairy-free? Swap buttermilk with almond milk plus 1 tsp vinegar, and use dairy-free yogurt instead of sour cream.
Can I turn this into cupcakes? Absolutely! Bake for 18–20 minutes — they’ll be moist and fluffy with golden tops.
How do I make my red velvet cake mix taste like bakery quality? Add buttermilk, melted butter, and an extra spoonful of cocoa powder — it enhances both flavor and texture beautifully.
Can I double the recipe for a bigger cake? Yes, just use two boxes of mix and double the wet ingredients — perfect for parties or weddings.
Closing Paragraph
Cooking isn’t just about following directions — it’s about creating joy. This upgraded red velvet cake mix recipe brings the best of both worlds: the ease of a box and the taste of homemade love. Whether you’re sharing it with family, gifting it to a neighbor, or savoring a slice at midnight, it’s bound to make your day a little sweeter and your kitchen a little warmer.
Final Thoughts
Whenever I make this cake, I’m reminded that the best desserts come from heart, not perfection. It’s amazing what a few simple additions can do to turn an ordinary mix into something extraordinary. I hope this recipe inspires you to slow down, bake something beautiful, and share it with someone you love.

how to make red velvet cake mix better
Equipment
- Mixing Bowls
- Whisk
- Spatula
- Cake Pans
- Oven
- Wire Racks
- Parchment Paper
- Electric Mixer
Ingredients
Cake
- 1 box red velvet cake mix
- 3 large eggs
- 1 cup buttermilk
- 1/2 cup sour cream
- 1/2 cup melted butter
- 2 tbsp unsweetened cocoa powder
- 1 tsp vanilla extract
- 1 tsp distilled vinegar
- 1 pinch salt
- 1/2 cup mini chocolate chips optional
Frosting & Decoration
- cream cheese frosting prepared
- fresh berries or red velvet crumbs for garnish
Instructions
- Preheat oven to 350°F (175°C). Grease and flour your cake pans or line them with parchment rounds.
- In a large bowl, whisk together melted butter, eggs, buttermilk, sour cream, vanilla, and vinegar until smooth.
- Add the red velvet cake mix and cocoa powder. Stir gently until just combined — do not overmix.
- Optional: Fold in mini chocolate chips for added richness.
- Divide batter evenly into prepared pans and smooth the tops. Bake for 25–30 minutes or until a toothpick comes out with moist crumbs.
- Let cakes cool in pans for 10 minutes, then transfer to wire racks to cool completely.
- Make the cream cheese frosting: Beat softened cream cheese, butter, vanilla, and powdered sugar until smooth and fluffy.
- Frost cooled cakes and decorate with red velvet crumbs or fresh berries. Slice and serve.


