Making soft, fluffy sourdough rolls is an experience that brings comfort to any meal. Whether enjoyed during weeknight dinners, shared with friends on weekends, or simply savored in quiet moments, these rolls can fit seamlessly into your routine. Their simple ingredients and the ease of preparation make them a staple you’ll want to return to time and again. Let this recipe guide you through the comforting process of creating these delightful rolls.
Why You’ll Love This Irresistible Soft Fluffy Old Fashioned Sourdough Rolls
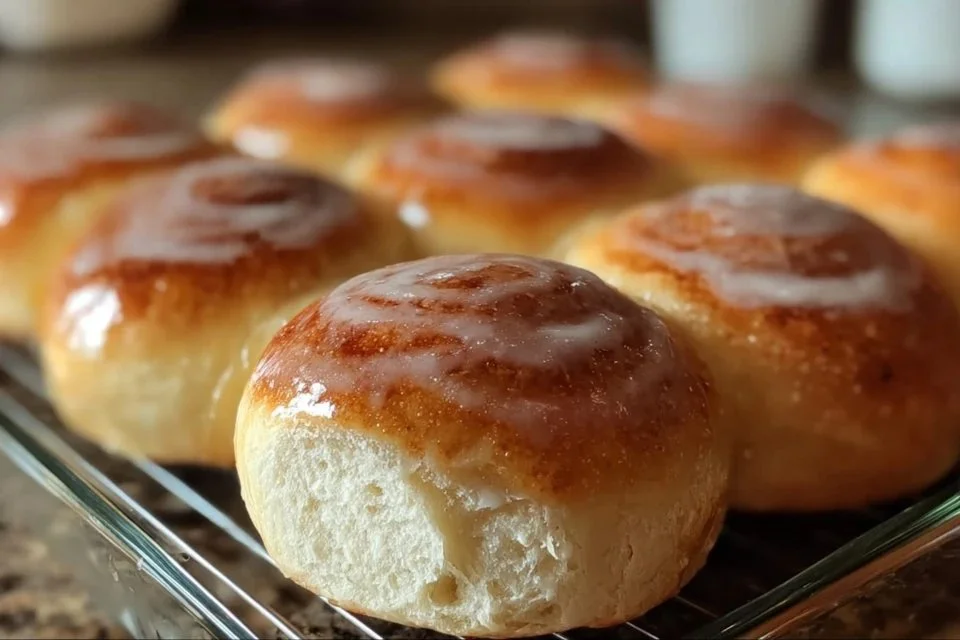
These irresistible sourdough rolls are not just easy to make; they deliver a delightful blend of comfort and balanced flavor. The combination of sourdough discard with sweet cinnamon and buttery goodness strikes a perfect note for everyday meals. You’ll appreciate how straightforward the recipe is, making it an excellent choice for both experienced bakers and those just starting out with sourdough.
Kitchen Tools You’ll Need
- Mixing bowl
- Whisk
- Measuring cups and spoons
- Baking sheet
- Parchment paper
Ingredients
- ¾ cup warm milk (105–110°F)
- 2¼ teaspoons active dry yeast (1 packet)
- ¼ cup granulated sugar
- ½ cup sourdough discard (unfed)
- ¼ cup unsalted butter (melted and slightly cooled)
- 1 large egg (room temperature)
- 3 to 3½ cups all-purpose flour
- 1 teaspoon salt
- ½ cup softened unsalted butter
- ¾ cup brown sugar (light or dark)
- 1½ tablespoons ground cinnamon
- 1 tablespoon flour
- 3 cups powdered sugar
- 4–6 tablespoons milk or cream (to adjust glaze consistency)
- 2 teaspoons vanilla extract
- ¼ teaspoon salt (for glaze)
How to Make Irresistible Soft Fluffy Old Fashioned Sourdough Rolls
Step 1. Begin your roll-making journey by warming the milk until it reaches a temperature of 105 to 110°F. Be sure it’s comfortably warm to the touch, as this will help activate the yeast. Pour the warm milk into a mixing bowl, and sprinkle the active dry yeast over it. Allow the yeast to bloom for about five to ten minutes. You’ll notice small bubbles forming, signaling that the yeast is alive and ready for the next step.
Step 2. Once the yeast is bubbly, add the granulated sugar and sourdough discard to the mixture. Whisk everything together until combined. This creates a smooth base that will feed the yeast, helping the rolls to rise beautifully. The sourdough discard will contribute a gentle tang, enhancing the flavor of the rolls.
Step 3. With the wet ingredients in place, it’s time to add the melted butter and room-temperature egg. Blend these into the mixture until it’s well incorporated. The melted butter adds richness and moisture, while the egg helps bind the ingredients together for a tender roll.
Step 4. Gradually mix in 3 cups of all-purpose flour and the salt. Stir until the mixture starts to come together into a dough. If the dough is still too sticky, incorporate more flour, one tablespoon at a time, until it becomes manageable. The goal is to have a soft yet slightly tacky dough.
Step 5. Once the dough has formed, knead it gently on a floured surface for about five to ten minutes. This step develops gluten, giving the rolls their structure. You’ll know it’s ready when the dough is smooth and elastic, and springs back when poked gently.
Step 6. Place the kneaded dough in a lightly greased bowl, ensuring it’s covered with a clean kitchen towel or plastic wrap. Let the dough rise in a warm spot until it doubles in size, which should take around one to two hours. This step is crucial as it’s where the dough develops its airy quality.
Step 7. When the dough has risen, punch it down gently to release the air. Transfer it to a lightly floured surface and roll it out into a rectangle, about ½ inch thick. This is where you’ll create each roll, so keep the thickness consistent for the best results.
Step 8. In a separate bowl, mix the softened butter, brown sugar, ground cinnamon, and flour until combined. This filling will add a delightful sweetness and warmth to the rolls. Spread this mixture evenly over the surface of the rolled-out dough.
Step 9. Starting from one end, tightly roll the dough into a log. Make sure to roll it as evenly as possible for uniform baking. Once rolled, cut the log into individual pieces, usually about 1 inch thick. Place these cut rolls gently on a prepared baking sheet lined with parchment paper.
Step 10. Cover the rolls again with the kitchen towel and let them rise for another 30 to 45 minutes. This secondary rise allows them to puff up further, resulting in soft and fluffy rolls once baked. Look for an increase in size before moving on to baking.
Step 11. Preheat the oven to 350°F while the rolls are rising. Once they have puffed up nicely, place the baking sheet in the oven. Bake the rolls until they turn a light golden brown, about 20 to 25 minutes. You can check for doneness by tapping the bottom of a roll; it should sound hollow.
Step 12. As the rolls cool, prepare the glaze by combining the powdered sugar, milk or cream (adjusting for desired consistency), vanilla extract, and salt in a bowl. Whisk until smooth. Once the rolls are slightly cool, drizzle this glaze over the top, adding a sweet finishing touch that ties all the flavors together.

Serving Suggestions
These sourdough rolls are incredibly versatile, making them perfect for various occasions. Enjoy them fresh for breakfast alongside butter or jam. They work beautifully as a side for family meals, complementing savory dishes like roasted meats or soups. If you have any leftovers, they can easily be reheated for snacks or toasted with a little butter. Their comforting flavors and soft texture make them a family favorite, whether warm from the oven or enjoyed later.
Pro Tips for Best Results
- Ensure your yeast is fresh and active for the best rise.
- Be mindful not to over-knead the dough, as this can lead to denser rolls.
- Use a kitchen thermometer to maintain the right temperature for your liquids.
- For a richer flavor, consider letting the dough rise in the refrigerator overnight before shaping.
- Resist the urge to skip the second rise; it enhances fluffiness and texture.
Common Mistakes to Avoid
- Not Blooming the Yeast: Skipping the blooming step can result in rolls that don’t rise properly. Always check for bubbles to ensure your yeast is activated.
- Too Much Flour: Adding excessive flour can make the rolls dry. Start with less and only add more as needed to manage stickiness.
- Insufficient Rising Time: Rushing the rising time can yield dense rolls. Allow the dough to double in size as indicated for the best texture.
- Incorrect Oven Temperature: An oven that’s too hot can lead to burnt outsides while the insides remain raw. Use an oven thermometer if you’re unsure.
- Overbaking: Baking rolls too long can dry them out. Look for a golden-brown color and tap the bottom to check for a hollow sound.
- Not Enough Glaze: Skimping on the glaze can leave rolls lacking in sweetness and moisture. Ensure a good drizzle for a perfect finish.
Variations & Substitutions
For a delightful twist, consider adding raisins or chopped nuts to the filling. You might also experiment with different spices, such as nutmeg or cardamom, for a unique flavor profile. If you want a less sweet option, reduce the brown sugar in the filling to balance the flavors according to your taste.
Storage & Reheating
Store any leftover rolls at room temperature in an airtight container for up to two days. If you want to keep them longer, they can be stored in the refrigerator for up to a week. For best results when reheating, place them in a moderate oven to help restore softness. If frozen, wrap them tightly and they can last for up to three months; thaw them overnight before reheating.
Frequently Asked Questions
Can I make this recipe ahead of time?
Yes, you can prepare the dough a day before and let it rise in the refrigerator overnight. This enhances the flavor and makes it even easier to shape and bake when you’re ready.
How long does it last in the fridge?
These rolls can be stored in the refrigerator for up to a week. Make sure to keep them in an airtight container to retain moisture and freshness.
Can I freeze this recipe?
Absolutely! You can freeze the rolls before or after baking. If freezing before baking, shape the rolls, freeze them, and then bake from frozen, adding a few extra minutes to the baking time.
What can I substitute for one ingredient?
If you need to replace the sourdough discard, you can use plain yogurt or buttermilk for moisture and tang, adjusting the other liquid ingredients as necessary.
Why didn’t my recipe turn out as expected?
If your rolls came out dense, it could be due to inactive yeast, too much flour, or not allowing enough rising time. Always double-check yeast freshness and manage your flour carefully for the best results.
Final Thoughts
Making these irresistible soft, fluffy sourdough rolls is a straightforward process that can easily fit into your routine. As you savor the freshly baked rolls, you’ll appreciate their comforting texture and sweet flavor. Each bite becomes a simple pleasure that enhances any meal, inviting you back to the kitchen for more. Enjoy the warmth and joy that comes from baking something truly special.

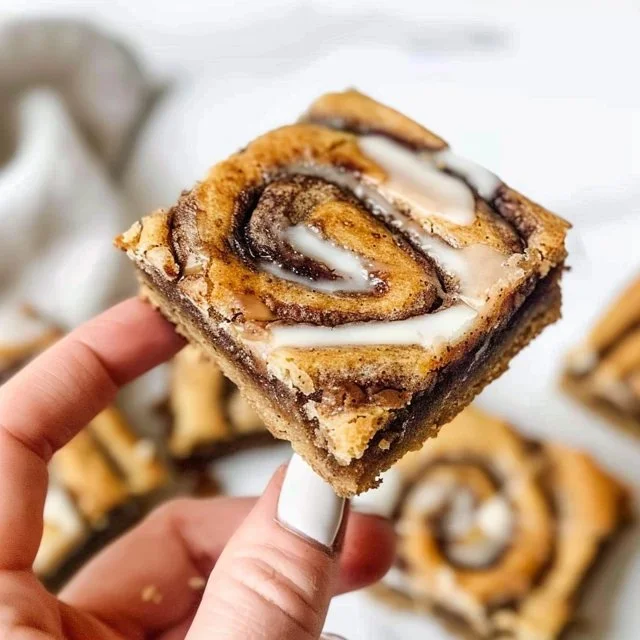
Soft Fluffy Old Fashioned Sourdough Rolls
Ingredients
Dough Ingredients
- ¾ cup warm milk (105–110°F) Warmed to activate yeast.
- 2¼ teaspoons active dry yeast 1 packet.
- ¼ cup granulated sugar
- ½ cup sourdough discard (unfed) Provides flavor.
- ¼ cup unsalted butter (melted and slightly cooled) Adds richness.
- 1 large egg (room temperature) Helps bind ingredients.
- 3 to 3½ cups all-purpose flour Use as needed for dough consistency.
- 1 teaspoon salt
Filling Ingredients
- ½ cup softened unsalted butter
- ¾ cup brown sugar (light or dark)
- 1½ tablespoons ground cinnamon
- 1 tablespoon flour
Glaze Ingredients
- 3 cups powdered sugar
- 4–6 tablespoons milk or cream Adjust for desired consistency.
- 2 teaspoons vanilla extract
- ¼ teaspoon salt For glaze.
Instructions
Preparation
- Warm the milk until it reaches 105 to 110°F. Pour it into a mixing bowl, and sprinkle the yeast on top. Allow it to bloom for about 5-10 minutes.
- Add the granulated sugar and sourdough discard to the yeast mixture. Whisk until combined.
- Mix the melted butter and room-temperature egg into the mixture until well incorporated.
- Gradually mix in the all-purpose flour and salt until the dough starts to come together.
- Knead the dough on a floured surface for about 5-10 minutes until it is smooth and elastic.
- Place the kneaded dough in a greased bowl, cover, and let it rise in a warm spot until it doubles in size, about 1-2 hours.
Shaping & Second Rise
- Punch down the risen dough and roll it out into a rectangle about ½ inch thick.
- Mix the softened butter, brown sugar, ground cinnamon, and flour for the filling. Spread this mixture over the rolled-out dough.
- Roll the dough tightly into a log and cut into 1-inch pieces. Place on a prepared baking sheet.
- Cover the rolls with a kitchen towel and let them rise for another 30-45 minutes.
Baking
- Preheat the oven to 350°F. Bake the rolls for 20-25 minutes until golden brown.
- Prepare the glaze by whisking the powdered sugar, milk or cream, vanilla extract, and salt together until smooth.
- Drizzle the glaze over the slightly cooled rolls.