
Hi, I’m Anna. Cooking has always been my way of connecting with people I care about—it’s where love and food come together. I found this recipe tucked inside an old family cookbook, its pages worn thin, dotted with stains from years of use. The handwriting was soft and familiar, like a quiet voice from the past. As I cooked, the smell filled the kitchen, bringing back memories of slow afternoons and shared meals. It felt comforting, like reopening a piece of home I didn’t know I missed.
Try it it might just bring that old family comfort back to your kitchen.
Why You’ll Love This Recipe
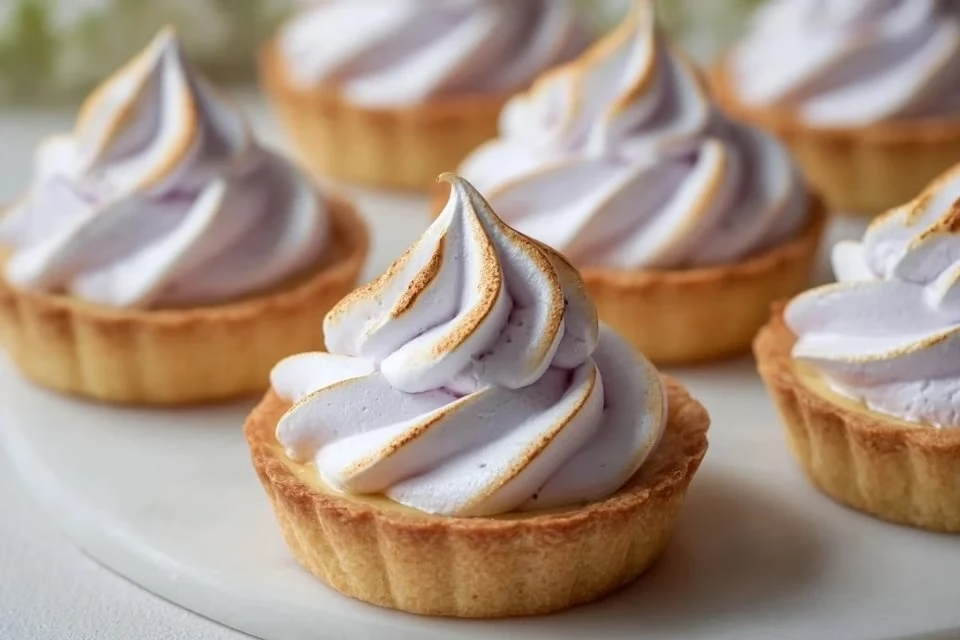
This recipe for mini lemon tarts is a breeze to prepare and yields reliable results every time, perfect for home cooks of any skill level. The balance of vibrant lemon flavor with a touch of sweetness creates a comforting dessert that satisfies cravings without being overwhelming. Their practical nature means they can be enjoyed anytime, whether as an afternoon snack or a light finish to a family meal, making them a valuable addition to your recipe collection.
Kitchen Tools You’ll Need
- Mixing bowl
- Whisk
- Saucepan
- Rubber spatula
- Measuring cups and spoons
- Baking sheet
Ingredients
- 1 premade tart shell (convenience, structure)
- 1 cup lemon juice (tartness, moisture)
- 2/3 cup sugar (sweetness, balance)
- 3 large eggs (richness, binding)
- 1/4 cup unsalted butter (creaminess, richness)
- 1/2 teaspoon vanilla extract (flavor)
- 2 egg whites (lightness, structure)
- 1/2 cup sugar for meringue (sweetness, stability)
- 1/4 teaspoon cream of tartar (stability, texture)
- Food coloring (optional for aesthetics)
How to Make Mini Lemon Tarts
Step 1
Start by preheating your oven to 350°F. It’s essential to ensure that the oven reaches the right temperature before you bake the tarts, as this helps create a uniform cooking environment. Waiting for the oven to warm up adequately will contribute to the overall texture and quality of your tarts. A correctly preheated oven leads to a crisp tart shell that provides the perfect base for the creamy filling.
Step 2
In a medium saucepan, combine the lemon juice and sugar, stirring until the sugar is completely dissolved. Setting the mixture over medium heat, gently bring it to a simmer without boiling. This process helps infuse the sugar with the zesty lemon flavor, creating a smooth mixture. Watching for the sugar to dissolve is crucial, as any granules left can affect the texture of your filling.
Step 3
In a separate bowl, whisk together the eggs until they are well blended and slightly frothy. This step is important because incorporating air into the eggs can lead to a lighter filling. Use a medium whisk or fork, and be mindful of any lumps; they should be minimal for an even consistency in the final mixture. Once you achieve a uniform consistency, you’re ready to incorporate the egg mixture into the lemon and sugar.
Step 4
When the lemon mixture is hot but not boiling, remove it from the heat and slowly stir in the whisked eggs, mixing continuously to prevent the eggs from scrambling. This step ensures that the eggs blend smoothly into the lemon mixture without cooking too fast. The mixture should become a bit thicker as you combine everything, creating a rich, creamy filling that will soon sit in your tart shell.
Step 5
Next, return the pan to low heat and add the unsalted butter, stirring until it melts completely into the filling. This addition adds creaminess and a rich flavor, which balances the tartness of the lemon juice. Make sure to stir continuously to achieve a cohesive filling that thickens slightly. Once you see a glossy finish, you can take it off the heat.
Step 6
Now, stir in the vanilla extract, enhancing the overall flavor profile of the filling. This ingredient brings a warm sweetness that complements the citrus and rounds out the tart’s flavor. Just a quick stir will do. Ensure it’s evenly distributed before moving to the next step, as this slight addition can make a noticeable difference in taste.
Step 7
Pour the creamy lemon filling into your premade tart shell, being careful not to overflow. Use a rubber spatula to spread the filling evenly to the edges, ensuring every bite has the same delicious flavor. The tart shell will hold the filling beautifully, so aim to fill it to just below the top rim of the shell. It’s ready for baking after this final touch.
Step 8
Bake the tart at 350°F for about 20 minutes or until the filling is set but still slightly jiggly in the center. Watch closely as it bakes; the edges should appear firm, while the middle may appear a touch soft. This texture will firm up as the tart cools. The filling’s surface will also develop a slight sheen, indicating it’s ready to be removed from the oven.
Step 9
While the tart cools, prepare the meringue. In a clean mixing bowl, combine the egg whites with the cream of tartar. Beat them using a whisk or electric mixer, starting on low speed and gradually increasing to high. This step incorporates air into the egg whites, which is essential for achieving the fluffy peak desired in meringue. Continue beating until soft peaks form, which is key to a light, airy topping.
Step 10
Once the soft peaks form, gradually add the 1/2 cup of sugar, a tablespoon at a time, while continuing to beat the mixture. This gradual addition allows for better incorporation and stability. The meringue will become glossy while holding stiff peaks as you mix. It’s ready when you can turn the bowl upside down without any of the meringue falling out.
Step 11
Spread the meringue evenly over the cooled lemon filling, ensuring it reaches the edges to prevent shrinkage during baking. Use a rubber spatula or the back of a spoon to create beautiful peaks and swirls if desired. This matting technique adds an appealing texture to the presentation. Plus, ensuring meringue edges touch the crust helps keep the filling enclosed.
Step 12
Bake the tart again at 350°F for about 10-15 minutes or until the meringue is lightly browned. Keep a close eye on it during baking; the goal is to achieve a golden color without burning the meringue. This step firm up the meringue while adding a pleasing aesthetic. Once browned, take it out and allow it to cool completely before slicing and serving.
Step 13
Once the tart has completely cooled, you can optionally add food coloring to the meringue for an extra decorative touch. Use a clean toothpick or small spatula to swirl in the food coloring carefully. This is entirely optional but can make your mini lemon tarts quite visually appealing, especially for special occasions.
Step 14
When ready to serve, slice the tart into small pieces with a sharp knife. A clean cut will show the beautiful layers of the creamy lemon filling and fluffy meringue. These tarts are best enjoyed fresh; however, they can also be stored properly if desired. Place them on a serving plate and enjoy the satisfaction of your homemade treat.
Step 15
Serve the mini lemon tarts chilled or at room temperature, depending on your preference. They make for a delightful dessert after dinner or a refreshing snack during warm afternoons. A dollop of whipped cream or a sprinkle of zest can further enhance the experience, but they shine beautifully on their own with that bright lemon flavor.
Serving Suggestions
Mini lemon tarts make a wonderful addition to breakfast spreads alongside coffee or tea. They can serve as an elegant snack, perfect for afternoon gatherings or light refreshment on warm days. Additionally, they are a great choice to conclude family meals, offering a refreshing contrast to heavier dishes and enjoyable for all ages. They also make lovely leftovers that can be savored over the next few days, bringing a bright touch to any day.
Pro Tips for Best Results
- Allow the tart to cool completely before cutting to achieve cleaner slices.
- Always use fresh lemon juice for the best flavor and brightness.
- Whisk the egg whites to the correct consistency before adding the sugar for stable meringue.
- Keep an eye on the meringue while it’s browning to prevent burning.
- If the meringue weeps (forms liquid), it may mean the egg whites weren’t beaten properly.
- Don’t skip the cream of tartar; it adds stability to your meringue.
Common Mistakes to Avoid
- Not Preheating the Oven: Failing to preheat can lead to uneven cooking. Always allow your oven to reach the desired temperature to ensure your tarts cook consistently.
- Overbeating Egg Whites: Beating egg whites too much can lead to a dry and grainy texture. Stop mixing when you reach stiff peaks for the best meringue consistency.
- Ignoring Cooling Time: Cutting the tart before it cools can result in a messy presentation. Allow it to cool completely for better slicing and presentation.
- Using Bottled Lemon Juice: Bottled juice lacks the fresh, vibrant flavor essential for this recipe. Always opt for fresh lemons to achieve the best taste in your tarts.
- Skipping the Cream of Tartar: This ingredient is crucial for stabilizing the egg whites. Omitting it can lead to a meringue that disintegrates or weeps.
- Baking Too Long: Overbaking the tart or meringue can dry them out. Keep an eye on the baking process for the best texture and appearance.
Variations & Substitutions
- You can switch up the citrus and use lime juice or orange juice for a different flavor profile while following the same recipe.
- For an added twist, consider incorporating zest from the lemons into the filling for extra flavor.
- Chocolate lovers can drizzle melted chocolate over the cooled tarts or incorporate cocoa powder into the meringue for a fun flavor twist.
- To make the tarts more decadent, experiment by folding crushed berries or other fruits into the filling before pouring it into the shell.
Storage & Reheating
Mini lemon tarts can be stored at room temperature for a few hours, but it is best to refrigerate them if you’re planning to keep them longer. Place the cooled tarts in an airtight container in the fridge for up to three days. Freezing isn’t ideal due to the texture of the meringue, which can separate upon thawing. Reheat them gently in a warm oven if necessary, but this is typically unnecessary, as they are best enjoyed chilled or at room temperature.
Nutrition Information
Nutrition values are estimates and may vary based on ingredients used.
Frequently Asked Questions
- Can I make this recipe ahead of time? Yes, you can prepare the tart shell and lemon filling a day in advance. Bake the tarts and add the meringue shortly before serving for the best texture and flavor.
- How long does it last in the fridge? Mini lemon tarts can be kept in the refrigerator for 2 to 3 days. Ensure they are covered or stored in an airtight container to maintain freshness.
- Can I freeze this recipe? Freezing mini lemon tarts is not recommended, especially due to the meringue. The texture can be compromised when thawed. It’s best to enjoy them fresh.
- What can I substitute for one ingredient? Instead of butter, you could use a plant-based alternative like coconut oil for a different flavor, while still maintaining a rich filling.
- Why didn’t my recipe turn out as expected? A common reason is not following the recipe closely, especially regarding temperature and ingredients. Ensure everything, especially egg whites and lemon juice, is fresh and measured accurately for the best results.
Final Thoughts
Making mini lemon tarts can be a rewarding and wholesome experience. The refreshing, tangy flavor encapsulated in a crunchy shell balanced with a fluffy meringue makes this dessert truly delightful. It’s an approachable recipe that yields a little piece of joy that can brighten any day. Whether shared with friends or savored alone, these tarts are sure to satisfy, providing the comforts of home-baked goodness.
Mini Lemon Tarts
Ingredients
For the Tart
- 1 premade tart shell 1 premade tart shell Convenience, structure
For the Lemon Filling
- 1 cup 1 cup lemon juice Tartness, moisture
- 2/3 cup 2/3 cup sugar Sweetness, balance
- 3 large 3 large eggs Richness, binding
- 1/4 cup 1/4 cup unsalted butter Creaminess, richness
- 1/2 teaspoon 1/2 teaspoon vanilla extract Flavor
For the Meringue
- 2 large 2 egg whites Lightness, structure
- 1/2 cup 1/2 cup sugar for meringue Sweetness, stability
- 1/4 teaspoon 1/4 teaspoon cream of tartar Stability, texture
- Food coloring Optional for aesthetics
Instructions
Preparation
- Preheat your oven to 350°F.
- In a medium saucepan, combine the lemon juice and sugar, stirring until dissolved. Gently bring to a simmer without boiling.
- In a separate bowl, whisk together the eggs until well blended and slightly frothy.
Combining Ingredients
- Remove the lemon mixture from heat and slowly stir in the whisked eggs, mixing continuously to prevent scrambling.
- Return to low heat and add the unsalted butter, stirring until melted completely.
- Stir in the vanilla extract.
Baking the Tarts
- Pour the lemon filling into the premade tart shell, being careful not to overflow.
- Bake at 350°F for about 20 minutes until the filling is set but still slightly jiggly in the center.
- While the tart cools, prepare the meringue. In a clean bowl, combine egg whites and cream of tartar. Beat until soft peaks form.
- Gradually add the 1/2 cup of sugar while continuing to beat until glossy with stiff peaks.
- Spread meringue over the cooled lemon filling, ensuring it touches the edges.
- Bake again at 350°F for 10-15 minutes until meringue is lightly browned.
Serving
- Allow the tart to cool completely before cutting.
- Slice into small pieces with a sharp knife and serve either chilled or at room temperature.


