
There’s something special about creating a simple dessert that instantly brings comfort. These no-bake cheesecakes are perfect for those weeknight cravings or weekend gatherings where you want to offer something a little indulgent without much fuss. With their creamy texture and a hint of sweetness, they also fit nicely into quiet moments at home. The ease of preparation makes them a go-to recipe that invites everyone to savor each bite.
Why You’ll Love This Recipe No Bake Mini Biscoff Cheesecakes
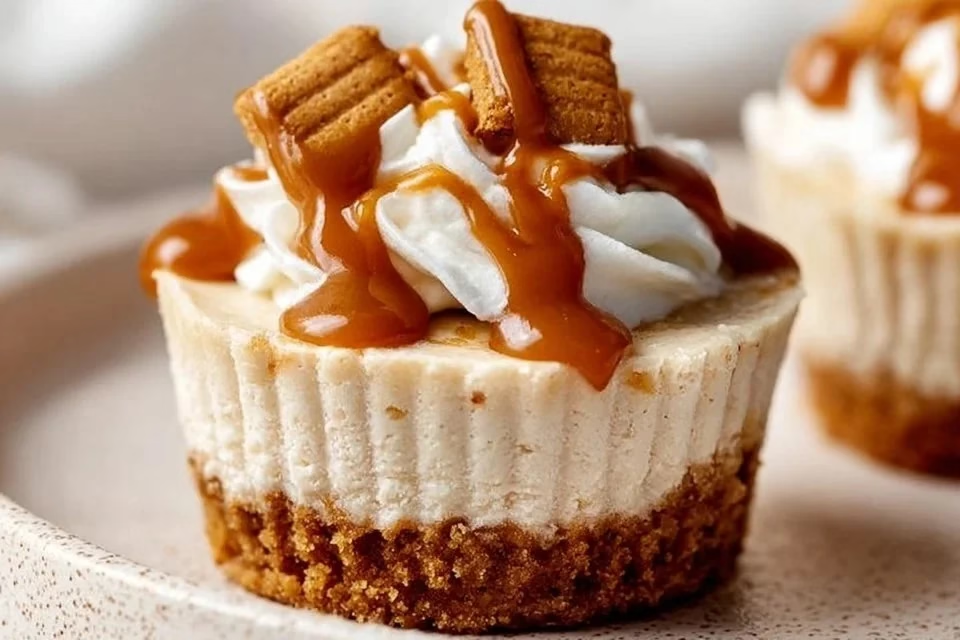
These no bake mini Biscoff cheesecakes are wonderfully easy to make and reliably delicious. The combination of creamy cheesecake filling and the unique flavor of Biscoff cookie spread creates a comforting balance. Their practical nature makes them suitable for any occasion, whether it’s a family meal or a sweet treat after dinner.
Kitchen Tools You’ll Need
- Mixing bowls
- Electric mixer
- Measuring cups
- Spoon or spatula
- Serving cups or small jars
Ingredients
- 8 oz cream cheese, softened (for a smooth, creamy texture)
- 1/2 cup powdered sugar (to sweeten without grittiness)
- 1 teaspoon vanilla extract (for depth of flavor)
- 1 cup heavy whipping cream (for richness and volume)
- 1 cup Biscoff cookie spread (for a distinctive, spiced flavor)
- 12 Biscoff cookies, crushed (for crust and added texture)
- Additional Biscoff cookies for topping (for decoration and crunch)
How to Make No Bake Mini Biscoff Cheesecakes
Step 1. Start by preparing your mixing bowl. Place the softened cream cheese and powdered sugar in it. Using an electric mixer, beat them together until the mixture is smooth and well combined, which should take a couple of minutes. Look for a creamy consistency without lumps, indicating that it’s ready for the next step.
Step 2. Add in the vanilla extract and Biscoff cookie spread into the cream cheese mixture. Mix again with the electric mixer until everything is blended evenly. You’ll notice a lovely, caramel-like flavor combining with the creaminess, which is a good sign that it’s well mixed.
Step 3. In a separate bowl, pour the heavy whipping cream. With your electric mixer, whip it until it forms stiff peaks. This usually takes a few minutes. You’ll know it’s done when the cream holds its shape firmly and doesn’t collapse back down.
Step 4. Gently fold the whipped cream into the cream cheese mixture using a spatula. This is important: do it slowly to maintain the airy texture of the cream. Aim for a smooth blend without any streaks, which will help the mini cheesecakes stay light and fluffy.
Step 5. Take the crushed Biscoff cookies and fold them into the cheesecake mixture carefully. This adds a nice crunch and ensures the cookie flavor is evenly distributed. It should look well mixed but still have bits of cookie throughout for texture.
Step 6. Divide the cheesecake filling into serving cups or small jars, smoothing the tops for a nice finish. You can use a spoon or spatula for this. Make sure the portions are even and filled just below the rim, as they will expand slightly when chilled.
Step 7. Chill the cheesecakes in the refrigerator for at least four hours or overnight if you have the time. This allows them to set properly and enhances the flavor. They should be firm to the touch when ready, ensuring a delightful consistency.
Step 8. Before serving, top each mini cheesecake with an additional Biscoff cookie for a decorative touch. This not only looks nice but also adds extra flavor and crunch to each bite.

Serving Suggestions
These mini Biscoff cheesecakes are perfect for various occasions. Serve them as a delightful breakfast treat paired with coffee or tea. They also make for a satisfying snack or dessert at family meals, providing a sweet finish. If you have any leftovers, they can be kept in the refrigerator for a day or two, maintaining their creamy texture for enjoyment later on.
Pro Tips for Best Results
- Ensure your cream cheese is fully softened to avoid lumps in the filling.
- Whip the cream until stiff peaks form to keep the cheesecake light.
- When folding ingredients, use a gentle hand to maintain volume.
- Divide the filling evenly to ensure consistent serving sizes.
- Chill thoroughly for best flavor and texture.
- Don’t skip the extra cookie on top – it enhances both flavor and presentation.
Common Mistakes to Avoid
- Using cold cream cheese: It can lead to lumps in your mixture. Make sure to let it soften at room temperature before starting.
- Overmixing the whipped cream: This can cause it to lose its lightness, making for a denser cheesecake. Stop mixing once you see stiff peaks.
- Not chilling long enough: If you don’t let the cheesecakes chill, they may not set properly, leading to a runny texture. Aim for at least four hours in the fridge.
- Skipping the cookie topping: Not adding a cookie garnish can make the desserts less visually appealing. It’s a simple step that adds both flavor and charm.
- Not measuring accurately: Ingredients should be measured precisely to ensure the best taste and texture. Use proper measuring tools for accuracy.
- Rushing the folding process: Folding too aggressively can deflate the whipped cream. Take your time to combine ingredients gently and carefully.
Variations & Substitutions
While this recipe shines with its original flavors, you could experiment by adding different toppings, like chocolate shavings or fruit. Alternatively, try using different cookie spreads if desired for a change in flavor profile. Just be mindful of how those alterations may affect the overall balance of the dessert.
Storage & Reheating
You can store these mini cheesecakes in the refrigerator for up to three days in an airtight container. They are best enjoyed cold but can also be left at room temperature for about 30 minutes before serving if preferred. Freezing is not recommended, as it may affect the creamy texture of the cheesecake. Preferably, consume them fresh for the best experience.
Frequently Asked Questions
Can I make this recipe ahead of time?
Yes, these mini cheesecakes are perfect for making ahead of time. You can prepare them a day or two in advance and store them in the refrigerator, which can enhance their flavor.
How long does it last in the fridge?
These cheesecakes can last up to three days in the refrigerator when stored properly in an airtight container. Enjoy them before they lose their freshness.
Can I freeze this recipe?
Freezing is not recommended for these cheesecakes, as it may negatively impact the light and creamy texture once thawed. It’s best to enjoy them fresh.
What can I substitute for one ingredient?
While the ingredients in this recipe are quite specific for the desired flavor and texture, you could consider using other sweet cookie spreads if you need an alternative. Just be aware that it may change the overall flavor.
Why didn’t my recipe turn out as expected?
Common issues such as not chilling long enough, under-mixing or over-mixing could lead to disappointing results. Follow the instructions carefully for the best outcome.
Final Thoughts
Making these no bake mini Biscoff cheesecakes is an enjoyable process, allowing you to create a sweet yet simple treat that everyone will love. Each bite delivers a balance of creamy and crunchy, making it a delightful addition to any occasion. There’s comfort in sharing something homemade, and these cheesecakes are sure to bring smiles. Enjoy the process and the delicious result.

No Bake Mini Biscoff Cheesecakes
Ingredients
Cheesecake Filling
- 8 oz cream cheese, softened for a smooth, creamy texture
- 1/2 cup powdered sugar to sweeten without grittiness
- 1 teaspoon vanilla extract for depth of flavor
- 1 cup heavy whipping cream for richness and volume
- 1 cup Biscoff cookie spread for a distinctive, spiced flavor
Crust and Topping
- 12 pieces Biscoff cookies, crushed for crust and added texture
- additional pieces Biscoff cookies for topping for decoration and crunch
Instructions
Preparation
- Place the softened cream cheese and powdered sugar in a mixing bowl. Using an electric mixer, beat them together until smooth and well combined.
- Add the vanilla extract and Biscoff cookie spread to the cream cheese mixture and mix again until everything is blended evenly.
- In a separate bowl, whip the heavy whipping cream until stiff peaks form.
- Gently fold the whipped cream into the cream cheese mixture using a spatula until smooth.
- Fold the crushed Biscoff cookies into the cheesecake mixture carefully.
Assembly
- Divide the cheesecake filling into serving cups or small jars, smoothing the tops.
- Chill the cheesecakes in the refrigerator for at least four hours or overnight.
- Before serving, top each mini cheesecake with an additional Biscoff cookie.


