
Red Velvet Birthday Cake healthy has always held a special place in my heart. I’m Anna Isam, and here in the U.S., baking this cake reminds me why I fell in love with cooking — it’s about creating joy from simple ingredients. This red velvet cake recipe easy version combines that classic cocoa flavor with a light, tangy cream cheese frosting, perfect for any celebration. Whether you’re planning a minimalist red velvet decorated cake or a charming small birthday cake, this recipe brings warmth, nostalgia, and just the right touch of elegance to your table — because every birthday deserves a little red magic.
Serving Versatility Red Velvet Birthday Cake healthy
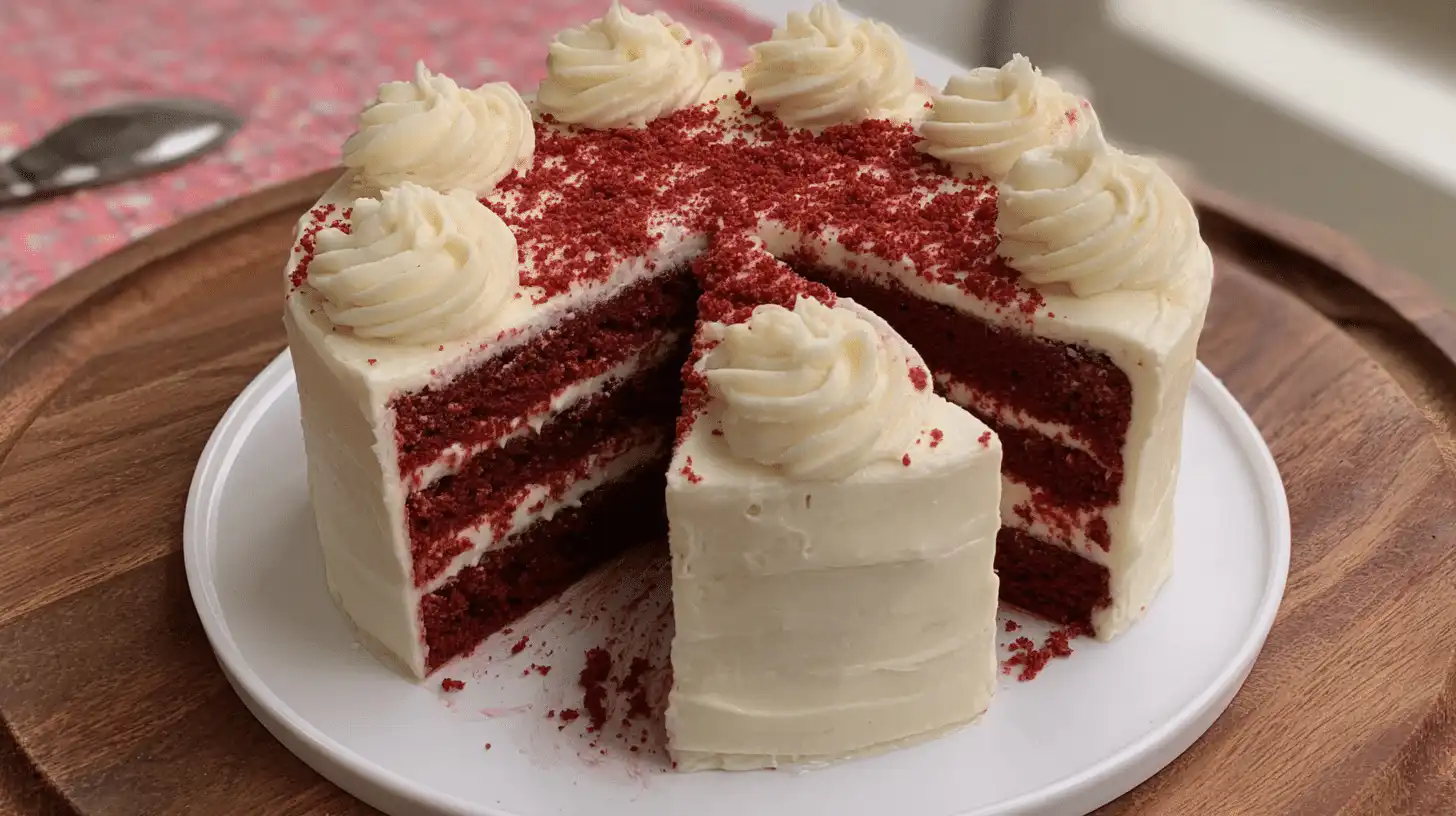
One of my favorite things about this cake is its versatility. Serve it tall and proud with elegant frosting swirls for a classic birthday centerpiece, or go minimal with a sleek “naked cake” look — just a thin coat of frosting and a sprinkle of crumbs for that red velvet cake aesthetic.
You can also bake it into small birthday cakes or cupcakes for individual servings — perfect for parties or office celebrations. For something creative, try layering it with fresh strawberries and a ribbon of cream cheese frosting between each layer — a sweet nod to red velvet decorated cake ideas that feel festive yet timeless.
Ingredients (Detailed & Humanized)
For the Cake
3 cups all-purpose flour: gives the cake its soft, tender crumb and perfect structure — not too dense, not too airy.
2 cups granulated sugar: sweetens just enough without overpowering the delicate cocoa notes.
3 tablespoons unsweetened cocoa powder: adds that subtle chocolate depth we love in every classic Red Velvet Birthday Cake.
1 ½ teaspoons baking soda: ensures a gentle, even rise for fluffy layers.
½ teaspoon baking powder: helps the cake stay light and soft, never heavy.
1 ¼ teaspoons salt: brings out the cocoa flavor and balances the sweetness beautifully.
3 large eggs: bind everything together, adding richness and stability to the crumb.
1 ½ cups vegetable oil: keeps the texture incredibly moist and tender, even days later.
1 ½ cups buttermilk: gives that signature tang and soft, velvety texture that makes red velvet irresistible.
½ cup sour cream: adds moisture and a subtle creamy note without making it heavy.
2 tablespoons red food coloring: for that deep, striking red hue that makes every slice feel like a celebration.
1 tablespoon vanilla extract: a warm aromatic touch that enhances both the cake and the frosting.
1 ½ teaspoons white vinegar: the secret to that perfect lift and smooth texture — it reacts with the baking soda to give the cake its “velvet” finish.
For the Frosting
2 (8-ounce) packages cream cheese: smooth, tangy, and luxurious — the heart of every red velvet decorated cake.
1 cup powdered sugar: brings gentle sweetness and helps achieve that silky-smooth consistency.
½ cup butter, softened: adds richness and helps the frosting whip up beautifully light and airy.
1 teaspoon vanilla extract: ties the whole flavor profile together with warmth and depth.
Pinch of salt: balances sweetness perfectly, making every bite more flavorful.
This combination of simple, wholesome ingredients creates a red velvet cake recipe easy enough for beginners yet elegant enough for special occasions. Whether you’re crafting a small birthday cake or a grand layered showpiece, these ingredients guarantee a moist, flavorful, and unforgettable red velvet cake aesthetic.
Directions (Step-by-Step Cooking Guide)
- Preheat and Prep: Start by preheating your oven to 350°F. Grease and flour two 9-inch round pans. You’ll want that golden edge that slides right out of the pan — so be generous with your prep.
- Combine Dry Ingredients: In a large bowl, whisk together flour, cocoa powder, baking soda, baking powder, salt, and sugar. The cocoa should just tint the flour brown — that’s the sign of a balanced red velvet base.
- Mix the Wet Ingredients: In another bowl, whisk the eggs until smooth. Add the oil, buttermilk, sour cream, red food coloring, vanilla, and vinegar. The batter should turn a rich, deep red that feels festive just to look at.
- Bring It All Together: Slowly add your dry ingredients into the wet, whisking gently. Don’t overmix — that’s the secret to keeping your cake tender. Stop as soon as the last streak of flour disappears.
- Bake: Divide the batter evenly between pans and bake for about 35–40 minutes, or until a toothpick comes out clean. Your kitchen will smell of cocoa and warmth — like a bakery in full swing.
- Cool and Frost: Let the layers cool for 10 minutes in the pans before transferring them to a wire rack. Cool completely before frosting — patience here rewards you with perfect texture.
- Make the Frosting: Beat the cream cheese and butter until fluffy, then gradually add sugar, vanilla, and a pinch of salt. Whip until smooth and glossy — it should spread like velvet.
- Assemble: Layer the cakes with frosting in between, then spread a thick, creamy coat all around. Smooth the edges for an elegant look, or go rustic with swoops and swirls.
Why You’ll Love This Recipe
✅ Quick to make: Ready in under two hours from start to finish.
✅ Budget-friendly: Uses simple ingredients you already have at home.
✅ Cozy, homemade flavor: That nostalgic blend of cocoa and cream.
✅ Nutritious balance: Buttermilk and sour cream keep it moist, not greasy.
✅ Great for meal prep: Stays fresh and soft for days in the fridge.
✅ Family-approved: Loved by kids, grandparents, and everyone in between.
Cultural or Technique Note
Red velvet cake has Southern roots, once considered a luxury dessert during the early 1900s. Its rich color and smooth texture were seen as symbols of celebration. Traditionally, it was paired with ermine frosting — but today, cream cheese frosting gives it that modern tang people love. This version bridges both worlds: deeply Southern at heart, yet timeless in taste.
Serving Suggestions
Serve with fresh berries for a refreshing contrast.
Top with chocolate curls or edible gold dust for a minimalist birthday bolo red velvet style.
Turn into cupcakes for a party-friendly red velvet cake idea.
Layer with whipped cream and raspberries for a dreamy anniversary cake.
Pro Tips for Success
Use room-temperature ingredients — they mix more smoothly.
Don’t skip the vinegar — it gives that signature velvety texture.
Chill your cake before frosting — it prevents crumbs from spreading.
Sift the dry ingredients — this keeps your crumb light and airy.
Add extra red color if needed — it deepens after baking.
For a minimalist bday cake, frost thinly and add a few white chocolate curls.
Common Mistakes to Avoid
⚠️ Overmixing the batter: This can make the cake dense. Mix until just combined.
⚠️ Using cold ingredients: It can cause uneven mixing and affect rise.
⚠️ Skipping the cooling time: Frosting a warm cake leads to melting. Wait until fully cooled.
⚠️ Too much food coloring: It can make the flavor bitter. Measure carefully.
⚠️ Overbaking: Check at 35 minutes — you want moist, not dry.
Storage & Reheating
Store leftover cake in an airtight container in the fridge for up to 4 days — it stays incredibly moist. For longer storage, wrap slices tightly and freeze for up to 2 months. To enjoy again, thaw in the fridge overnight and bring to room temperature before serving. Avoid microwaving — let it warm naturally for the best texture.
Frequently Asked Questions (FAQ)
Can I use butter instead of oil?
Yes, but oil keeps the cake more moist. If you prefer a buttery flavor, use half butter and half oil.
Can I make it dairy-free?
Absolutely! Substitute buttermilk with almond milk plus a teaspoon of vinegar, and use vegan cream cheese.
What if I want a smaller cake?
Cut the recipe in half for a small birthday cake version — perfect for 4–6 servings.
Can I make it ahead?
Yes! Bake the layers a day before, wrap tightly, and frost before serving. The flavor deepens overnight.
How can I make it extra festive?
Add edible pearls or a satin ribbon for a ribbon cake look that feels special yet simple.
Closing Paragraph
Baking this Red Velvet Birthday Cake healthy isn’t just about making dessert — it’s about creating a moment that feels personal and joyful. Each slice brings a touch of nostalgia, a whisper of cocoa, and the satisfaction of something homemade with love. Whether you’re celebrating a milestone or just craving something beautiful, this cake is your sweet invitation to slow down and savor.
Final Thoughts
Whenever I bake this red velvet cake, I’m reminded that simple, heartfelt food is the most special of all. It doesn’t need to be perfect — it just needs to be made with love. The smile when you cut that first slice is worth every moment. Follow me on Pinterest for more cozy, quick, and nostalgic recipes.

Red Velvet Birthday Cake healthy
Equipment
- 2 9-inch Cake Pans
- Mixing Bowls
- Electric Mixer
- Cooling Rack
Ingredients
Cake
- 3 cups all-purpose flour sifted
- 2 cups granulated sugar
- 3 tbsp unsweetened cocoa powder
- 1.5 tsp baking soda
- 0.5 tsp baking powder
- 1.25 tsp salt
- 3 large eggs
- 1.5 cups vegetable oil
- 1.5 cups buttermilk
- 0.5 cup sour cream
- 2 tbsp red food coloring
- 1 tbsp vanilla extract
- 1.5 tsp white vinegar
Cream Cheese Frosting
- 16 oz cream cheese softened
- 0.5 cup unsalted butter softened
- 1 cup powdered sugar
- 1 tsp vanilla extract
- Pinch of salt
Instructions
- Preheat oven to 350°F (175°C). Grease and flour two 9-inch round cake pans.
- In a large bowl, whisk together flour, sugar, cocoa powder, baking soda, baking powder, and salt.
- In another bowl, whisk eggs, then add oil, buttermilk, sour cream, food coloring, vanilla, and vinegar. Mix until well combined.
- Gradually mix dry ingredients into wet, stirring until just combined. Do not overmix.
- Divide batter evenly between pans. Bake 35–40 minutes or until a toothpick comes out clean. Cool in pans 10 minutes, then transfer to wire racks.
- Make the frosting: Beat cream cheese and butter until fluffy. Add powdered sugar, vanilla, and salt. Beat until smooth.
- Once cakes are completely cool, frost with cream cheese frosting. Decorate as desired.


