After a long day, few things are as comforting as a slice of homemade bread. Traditional Irish soda bread is a straightforward, hearty loaf that brings warmth to any kitchen. It’s perfect for weeknight dinners, weekend brunches, or a cozy gathering with family and friends. The rhythmic act of mixing and kneading creates a simple yet delightful experience. With its inviting aroma and comforting texture, this bread invites you to create your own cherished moments in the kitchen.
Why You’ll Love This Recipe Traditional Irish Soda Bread
This recipe shines with its ease and reliability, making it great for bakers of all levels. The balanced flavors provide a comforting backdrop to meals. With its practical everyday value, traditional Irish soda bread can accompany a variety of dishes or be enjoyed on its own. It’s straightforward to prepare, giving you the satisfaction of home baking without spending hours in the kitchen.
Kitchen Tools You’ll Need
- Mixing bowl
- Wooden spoon or spatula
- Baking sheet
- Parchment paper (optional)
Ingredients
- 4 cups all-purpose flour (provides structure)
- 1 teaspoon baking soda (allows the bread to rise)
- 1 teaspoon salt (enhances flavor)
- 1 3/4 cups buttermilk (adds moisture and tenderness)

How to Make Traditional Irish Soda Bread
Step 1. Begin by preheating your oven to a suitable temperature. This initial step is key, ensuring that your soda bread bakes evenly. A well-heated oven promotes a nice rise and creates a golden crust on your bread. Make sure your oven rack is placed in the center.
Step 2. In a large mixing bowl, combine the flour, baking soda, and salt. Use a wooden spoon or spatula to gently mix these dry ingredients together. This ensures even distribution of the baking soda and salt, which are crucial for the right texture and flavor. You want a uniform blend that is free of lumps.
Step 3. Gradually pour in the buttermilk while stirring the dry ingredients. It’s best to do this slowly to avoid any lumps forming. The mixture will start to come together, transforming into a shaggy dough. At this point, you’re looking for a wet, cohesive texture that holds together but is not overly sticky.
Step 4. Once the dough comes together, turn it out onto a clean, floured surface. Knead it gently for just a minute, enough to bring it into a cohesive ball. Avoid over-kneading, as you want to keep the bread light and tender. The dough should feel slightly tacky but should hold its shape.
Step 5. Shape the dough into a round loaf, about 1 to 2 inches thick. As you shape it, a lightly floured surface helps maintain texture. This step allows the bread to develop its classic round shape. It’s also where you can pat it gently to smooth the surface, ensuring it will rise beautifully in the oven.
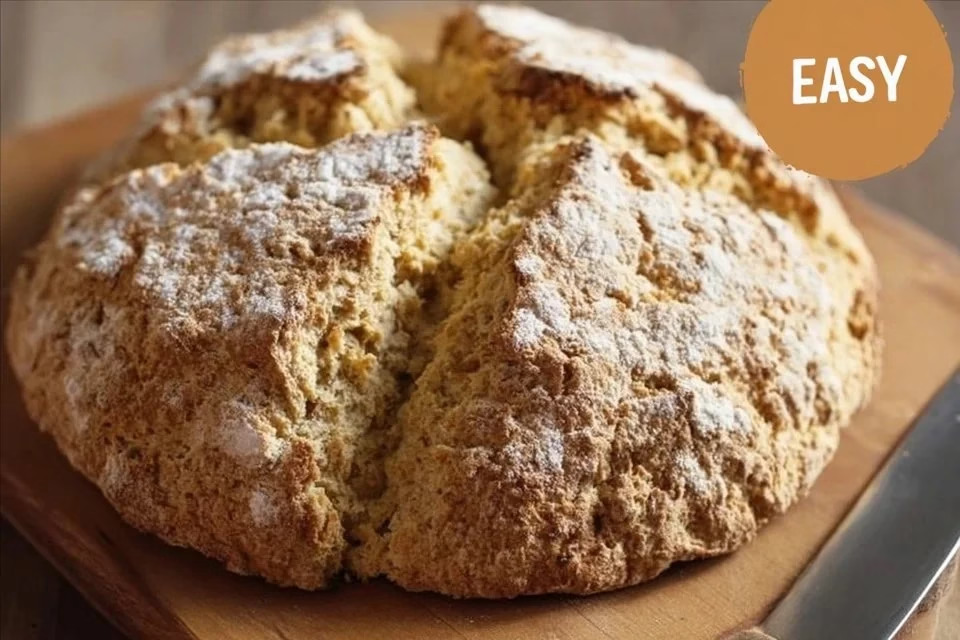
Step 6. Transfer the shaped loaf onto a baking sheet lined with parchment paper, if desired. This keeps the bread from sticking and makes for easy cleanup. At this point, you can also take a sharp knife and cut a deep cross into the top of the dough. This traditional scoring helps the bread expand while baking.
Step 7. Bake the soda bread in the preheated oven until it turns a lovely golden brown and sounds hollow when tapped on the bottom. This visual cue assures you that the inside is fully cooked. The baking process brings out the wonderful aroma, filling your kitchen with a welcoming scent.
Step 8. After baking, remove the bread from the oven and let it cool on a wire rack. This cooling period allows the texture to settle and prevents the bottom from becoming soggy. The exterior will remain crisp while the interior stays soft. It’s best enjoyed while still warm.

Serving Suggestions
This traditional Irish soda bread can be enjoyed in various ways. It makes a wonderful breakfast paired with butter and jam, or served alongside eggs for a hearty meal. At lunchtime, it can serve as the perfect companion to soups and salads, adding a nice texture contrast. For snacks, a slice with a bit of cheese is delightful. Any leftovers can easily be used for toast or sandwiches, showcasing its versatility.
Pro Tips for Best Results
- Handle the dough gently: Overworking the dough can lead to a tough texture.
- Use fresh ingredients: Check that your baking soda is active for the best rise.
- Adjust the buttermilk if needed: Depending on your flour’s absorbency, you might need a bit more or less liquid.
- Let it cool slightly before slicing: This helps maintain the structure of the bread for a better texture.
- Experiment with different flours: Whole wheat or spelt flour can add unique flavors and textures.
- Don’t skip scoring the top: This helps the bread expand while baking, creating a better crust.
Common Mistakes to Avoid
- Over-kneading the dough: This can lead to a tough bread. Knead just until combined for the best texture.
- Using expired baking soda: Old baking soda won’t help the bread rise. Always check the date for best results.
- Not scoring the dough: Skipping this step can result in a dense loaf. Proper scoring allows even expansion as it bakes.
- Using cold buttermilk: Cold ingredients can affect rising. Bring buttermilk to room temperature for better results.
- Ignoring the cooling time: Cutting the bread while still hot can make it gummy. Let it cool for optimal texture.
- Substituting without understanding: Changing the flour or liquid without adjusting the ratios can impact the outcome. Stick to the recipe for consistent results.
Variations & Substitutions
Feel free to add your own touch to this bread. Incorporating herbs like rosemary or thyme can provide an inviting flavor. You can also fold in raisins or caraway seeds for a traditional twist. Keep in mind that each variation will slightly alter the flavor and texture, so adjust your expectations accordingly.
Storage & Reheating
Store your soda bread at room temperature in a bread box or wrapped in a towel for up to three days. For longer storage, place it in the refrigerator for about a week, though it may dry out slightly. If you want to keep it for an extended period, slice the bread and freeze it in a sealed bag. To reheat, simply pop a slice in the toaster or wrap it in foil and warm it in the oven to retain the crust’s crispiness.
Frequently Asked Questions
Can I make this recipe ahead of time?
Yes, you can prepare the dough in advance and shape it. However, it’s best to bake it fresh when you’re ready to enjoy. The bread is best served warm.
How long does it last in the fridge?
In the refrigerator, traditional Irish soda bread can last about a week. Just be sure to store it in an airtight container to maintain moisture.
Can I freeze this recipe?
Absolutely. Once cooled, wrap the bread tightly in foil or plastic wrap and place it in a freezer bag. It will keep well for several months; just thaw and reheat when you’re ready to enjoy it.
What can I substitute for one ingredient?
If you need to replace buttermilk, a mixture of milk with a bit of vinegar or lemon juice can replicate its tangy flavor and moisture.
Why didn’t my recipe turn out as expected?
Common reasons include expired baking soda, incorrect measurements, or over-kneading the dough. Each step is important for achieving the right texture and rise.
Final Thoughts
Making traditional Irish soda bread is a gratifying experience, and the aroma as it bakes fills your home with warmth. It’s a simple yet fulfilling recipe that encourages creativity and comfort. As you slice into your fresh loaf, you’ll bring a bit of homemade goodness to your table, perfect for sharing or enjoying on your own.

Traditional Irish Soda Bread
Ingredients
Main ingredients
- 4 cups all-purpose flour provides structure
- 1 teaspoon baking soda allows the bread to rise
- 1 teaspoon salt enhances flavor
- 1 3/4 cups buttermilk adds moisture and tenderness
Instructions
Preparation
- Preheat your oven to 425°F (220°C) and place your oven rack in the center.
- In a large mixing bowl, combine the flour, baking soda, and salt. Mix with a wooden spoon or spatula until uniformly blended.
- Gradually pour in the buttermilk while stirring. Mix until the dough comes together into a shaggy texture.
- Turn the dough onto a floured surface and knead gently for about a minute to form a cohesive ball.
- Shape the dough into a round loaf, about 1 to 2 inches thick. Pat it gently to smooth the surface.
- Transfer the loaf onto a baking sheet lined with parchment paper. Cut a deep cross into the top of the dough.
Baking
- Bake the bread in the preheated oven for 25-30 minutes or until golden brown and sounds hollow when tapped at the bottom.
- Remove the bread from the oven and let it cool on a wire rack before slicing.


