There’s something comforting about making a treat that doesn’t require turning on the oven. This recipe combines familiar flavors and ingredients into delicious little bites that are perfect for any occasion. Whether it’s a cozy weeknight, a casual weekend gathering, or just a quiet moment to yourself, these truffles are easy to whip up and simple to enjoy. They bring a bit of sweetness to your day, making them a delightful go-to treat whenever a craving strikes.
Why You’ll Love This Easy No Bake Cake Batter Truffles
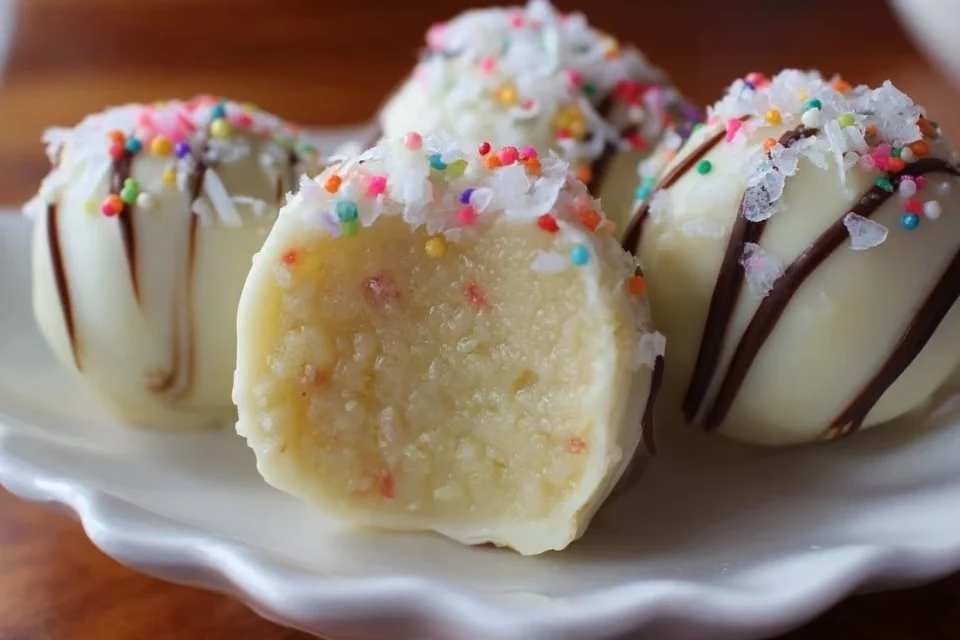
The ease and reliability of these Easy No Bake Cake Batter Truffles make them a wonderful addition to your dessert repertoire. The balanced flavor of vanilla and the comforting texture offer a familiar taste that feels just right. With practical everyday value, you can quickly prepare these truffles for snacks or gatherings, making them a versatile treat that never disappoints.
Kitchen Tools You’ll Need
- Mixing bowl
- Rubber spatula or spoon
- Baking sheet
- Parchment paper (optional)
- Microwave-safe bowl
Ingredients
- 1-1/2 cup flour (adds structure)
- 1 cup yellow cake mix (enhances flavor and sweetness)
- 1/2 cup unsalted butter, softened (provides moisture and richness)
- 1/2 cup white sugar (sweetens and helps bind ingredients)
- 1 teaspoon vanilla extract (adds flavor)
- 1/8 teaspoon salt (balances sweetness)
- 3-4 Tablespoons milk (adjusts texture)
- 2 Tablespoons sprinkles (adds color and fun)
- 16 oz. (8 squares) almond bark or vanilla flavored coating (for coating and sweetness)
- Additional sprinkles for coating (for visual appeal)
- Pop sticks (for dipping)

How to Make Easy No Bake Cake Batter Truffles
Step 1. Begin by mixing the flour and yellow cake mix together in a mixing bowl. This will create the base of your truffles. Make sure to combine them thoroughly to avoid clumps, which could affect the texture of the finished truffles. The mixture should appear uniform in color and consistency.
Step 2. In a separate bowl, cream the softened unsalted butter and white sugar together until the mixture is light and fluffy. This process helps to incorporate air into the batter, contributing to a softer texture. Keep mixing until you can see a light and creamy consistency, which usually takes a couple of minutes.
Step 3. Add the vanilla extract and salt to the butter-sugar mixture, mixing until well combined. The vanilla brings out the sweetness and adds warmth to the flavor. The salt works to enhance the sweetness, so make sure both are evenly distributed throughout the mixture.
Step 4. Gradually add the flour mixture to the butter mixture. Do this in parts, mixing until each addition is just incorporated. This ensures that the dry ingredients blend well without over-mixing. Stop as soon as you no longer see dry flour.
Step 5. Stir in the milk, one tablespoon at a time, until the mixture reaches a dough-like consistency. This helps to bind everything together while keeping it rich and creamy. The truffle mixture should be soft but hold together well without being overly sticky.
Step 6. Fold in the sprinkles gently, ensuring they are evenly distributed throughout the dough without breaking them. These little bits of color will add a fun visual element to your truffles, making them more inviting.
Step 7. Using your hands, scoop out small portions of the dough and roll them into balls about one inch in diameter. Make sure to handle them gently to keep them from becoming overly dense. Place them on a baking sheet lined with parchment paper or directly on the surface for easy cleanup.
Step 8. Once all the dough has been rolled into balls, place the baking sheet in the refrigerator for about 30 minutes to set the truffles. This cooling time helps them firm up, making them easier to coat.
Step 9. While the truffles chill, melt the almond bark or vanilla-flavored coating in a microwave-safe bowl. Heat in small increments, stirring after each time to prevent burning. When fully melted, it should be smooth and pourable.
Step 10. Dip each chilled truffle into the melted coating using a pop stick, making sure to cover it completely. Allow any excess coating to drip off before placing them back onto the baking sheet. The coating will provide a sweet, crunchy shell that complements the inside perfectly.
Step 11. Immediately sprinkle additional sprinkles over the coated truffles while the coating is still wet. This adds extra color and texture. You can be generous with them to make the truffles even more festive.
Step 12. Let the coated truffles sit at room temperature until the coating is set. Once the coating has hardened, your truffles are ready to enjoy. They can be served immediately or stored for later.

Serving Suggestions
These Easy No Bake Cake Batter Truffles make for a simple yet delightful treat at any time of day. They can serve as a fun breakfast option when paired with coffee, acting as a sweet start to the morning. As a snack, they are perfect for satisfying a mid-day craving or offering a bite-sized treat after lunch. Families will appreciate these truffles during family meals or packed in lunchboxes for a little surprise. Any leftovers can be stored easily for a later time, letting you enjoy them at your convenience.
Pro Tips for Best Results
- Make sure the butter is softened but not melted for the right texture.
- Chill the truffles thoroughly before coating to help them retain their shape.
- Be careful not to over-melt the coating in the microwave to prevent burning.
- Use a spoon or fork to help with dipping if the truffles are difficult to manage.
- Allow the truffles to sit until the coating is fully set for the best texture.
- Experiment with different types of sprinkles for varied appearance and texture.
Common Mistakes to Avoid
- Not Chilling the Dough: If you skip chilling the dough, the truffles may lose their shape when coated. Always chill for at least 30 minutes.
- Using Melted Butter Instead of Softened: Melted butter can lead to a greasy texture. Always use softened butter for optimal consistency.
- Overmixing the Dough: Overmixing can lead to dense truffles. Mix just until combined to keep them light.
- Skimping on Sprinkles: Less sprinkles can result in a less visually attractive treat. Don’t be afraid to use more for a festive touch.
- Not Allowing the Coating to Set: If consumed too soon, the coating may be messy and soft. Allow it to set fully for the best experience.
- Using Too Much Milk: Adding too much milk can make the dough too wet. Gradually add milk and watch for the right consistency.
Variations & Substitutions
Feel free to customize your truffles by using different flavored cake mixes, such as chocolate or funfetti, to change the taste. You can also experiment with various coatings, like dark chocolate or colorful chocolate melts, for a unique twist. Adding chopped nuts or other toppings can introduce different textures, enhancing the final presentation.
Storage & Reheating
These truffles can be stored at room temperature in an airtight container for a couple of days. For longer storage, keep them in the refrigerator, where they’ll last up to a week. If you want to keep them even longer, consider freezing them. When ready to enjoy frozen truffles, simply allow them to thaw at room temperature for about 15-20 minutes to maintain their texture.
Frequently Asked Questions
Can I make this recipe ahead of time?
Yes, you can prepare these truffles ahead of time. Just store them in the refrigerator after coating to keep them fresh. They can be made a day or two in advance, making them a convenient option for gatherings.
How long does it last in the fridge?
When stored properly in an airtight container, these truffles can last about a week in the refrigerator. Just make sure to keep them sealed to maintain their freshness and flavor.
Can I freeze this recipe?
Absolutely! The truffles can be frozen for up to three months. Just wrap them well to prevent freezer burn, and thaw them at room temperature when you’re ready to enjoy.
What can I substitute for one ingredient?
If you need to replace the almond bark, you could use a different chocolate coating or even white chocolate. Just ensure it melts smoothly for dipping.
Why didn’t my recipe turn out as expected?
If the truffles didn’t hold together or were too crumbly, it could be due to not enough moisture. Adjusting the milk gradually can help achieve the right consistency for your specific mixture.
Final Thoughts
Making Easy No Bake Cake Batter Truffles is a straightforward process that results in a delightful treat you can enjoy any time. With comforting flavors and a fun, colorful presentation, they are a treat that fits into various occasions. Keep this recipe handy for when you’re looking for something simple, satisfying, and sweet to share or enjoy on your own, bringing a touch of joy to everyday moments.

Easy No Bake Cake Batter Truffles
Ingredients
Truffle Base
- 1.5 cup flour adds structure
- 1 cup yellow cake mix enhances flavor and sweetness
- 0.5 cup unsalted butter, softened provides moisture and richness
- 0.5 cup white sugar sweetens and helps bind ingredients
- 1 teaspoon vanilla extract adds flavor
- 1/8 teaspoon salt balances sweetness
- 3-4 Tablespoons milk adjusts texture
- 2 Tablespoons sprinkles adds color and fun
Coating
- 16 oz. almond bark or vanilla flavored coating for coating and sweetness
- additional sprinkles for coating for visual appeal
Tools
- pop sticks for dipping
Instructions
Preparation
- Mix the flour and yellow cake mix together in a mixing bowl.
- In a separate bowl, cream the softened unsalted butter and white sugar together until light and fluffy.
- Add the vanilla extract and salt to the butter-sugar mixture, mixing until well combined.
- Gradually add the flour mixture to the butter mixture, mixing until just incorporated.
- Stir in the milk, one tablespoon at a time, until reaching a dough-like consistency.
- Fold in the sprinkles gently, ensuring they are evenly distributed.
Forming and Chilling
- Scoop out small portions of dough and roll them into balls about one inch in diameter.
- Place the rolling balls on a baking sheet lined with parchment paper.
- Refrigerate the truffles for about 30 minutes to firm up.
Coating
- Melt the almond bark or vanilla-flavored coating in a microwave-safe bowl.
- Dip each chilled truffle into the melted coating using a pop stick, covering completely.
- Allow excess coating to drip off before placing them back on the baking sheet.
- Sprinkle additional sprinkles over the coated truffles while the coating is still wet.
- Let the coated truffles sit at room temperature until the coating is set.


