There’s something comforting about making bread at home. The process can be fulfilling, whether it’s during a quiet morning or part of a weekend project. This easy sourdough bread recipe invites you to experience the simple pleasure of baking from scratch. It’s perfect for sharing with others during gatherings or enjoying a warm slice after a long day. As the aroma fills your kitchen, you’ll appreciate the simplicity and the results that the process yields. Let’s dive into this hands-on adventure together.
Why You’ll Love This Recipe Easy Sourdough Bread for Beginners
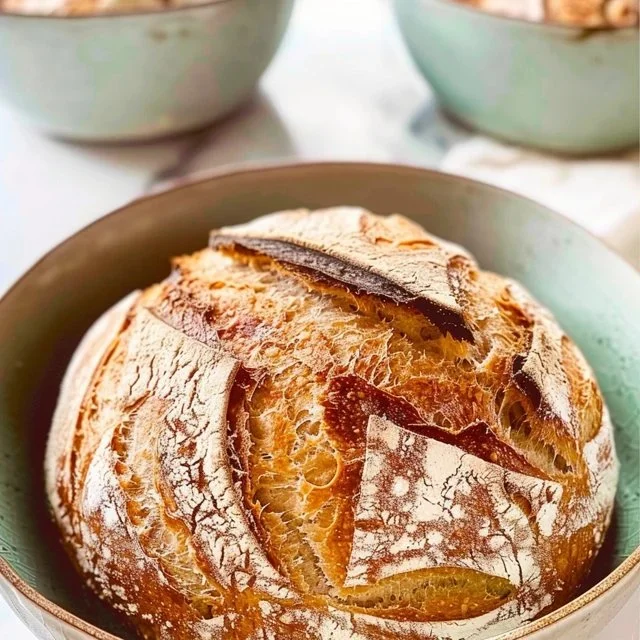
This recipe delivers on ease and reliability, making it suitable for beginner bakers. The sourdough starter creates a distinctive flavor, while the bread flour contributes to a satisfying texture. You can feel good about the practical everyday value of this bread, whether you’re enjoying a slice for breakfast, a snack, or as part of a family meal.
Kitchen Tools You’ll Need
- Mixing bowl
- Dough scraper
- Clean kitchen towel
- Baking sheet or stone
- Parchment paper (optional)
Ingredients
- ¼ cup sourdough starter (65 grams) (provides leavening and a tangy flavor)
- 1 ⅔ cups filtered or spring water (350 grams) (adds moisture)
- 4 ¼ cups bread flour (500 grams) (provides structure and chew)
- 2 teaspoons fine salt (9 grams) (enhances flavor)

How to Make Easy Sourdough Bread for Beginners
Step 1. In a large mixing bowl, combine the sourdough starter with the filtered or spring water, stirring until the starter is completely dissolved. This initial blending is important, as it ensures the starter disperses evenly throughout the mixture, contributing to the dough’s lift and flavor. Watch for a consistent mixture without clumps, signaling that it’s ready for the next ingredient.
Step 2. Gradually add the bread flour and fine salt to the bowl, mixing until a rough dough forms. This step incorporates the dry ingredients into the wet mixture, creating a shaggy consistency. You want to ensure all the flour is hydrated, so continue mixing until no dry bits remain. The dough will feel cohesive yet slightly sticky, which is a good sign.
Step 3. Cover the bowl with a clean kitchen towel and let the dough rest for about 30 minutes. This autolyse phase allows the flour to fully hydrate and begin developing gluten. The dough will start to feel smoother and more elastic once it has rested. You can tell it’s ready for the next step by its consistency, which should look less shaggy and more unified.
Step 4. After resting, use your hands to fold the dough in the bowl, pulling it from the edges toward the center. This gentle folding will help strengthen the dough by developing gluten. Do this for about 5 to 10 folds around the bowl, and you’ll notice it becoming smoother and more elastic. The texture will change as it becomes easier to handle.
Step 5. Cover the bowl again with the towel and let the dough rise at room temperature for 4 to 6 hours, or until it has doubled in size. Keep an eye on it—the dough should look puffy and airy when it’s ready. You may also see bubbles on the surface, which indicates it’s fermenting properly. A good rise is key to achieving that desired bread structure.
Step 6. Once the dough has risen, carefully turn it out onto a lightly floured surface. Gently shape it into a round loaf by tucking the edges into the center. This shaping creates surface tension that helps the bread hold its shape during baking. Aim for a smooth exterior; it will help develop a nice crust in the oven.
Step 7. Place the shaped loaf on a piece of parchment paper or a baking sheet. If using parchment, dust it lightly with flour to prevent sticking. Cover the dough with the towel again and let it rise for another 30 minutes to an hour until slightly puffy. This final proofing will enhance the texture and crumb of the bread.
Step 8. Preheat your oven while the dough proofs to ensure a hot environment for baking. Ideally, an oven setting of around 450°F is optimal for achieving a crusty exterior. You want to soak in the warmth during this time, and when ready, your oven will be prepped for a lovely bake.
Step 9. After the second rise, carefully transfer the dough (on the parchment, if using) into the preheated oven. Bake for about 25 to 30 minutes, or until the bread is golden brown and sounds hollow when tapped on the bottom. Look for a rich golden color and a firm outer crust; the visual cues are essential for knowing it’s complete.
Step 10. Remove the bread from the oven and let it cool on a wire rack for at least 30 minutes before slicing. This resting period allows the crumb structure to set. You’ll notice the texture changing slightly as it cools; patience is key for enjoying the best flavor and texture when you finally slice into it.

Serving Suggestions
This sourdough bread is wonderfully versatile. Enjoy it warm for breakfast, perhaps with a smear of butter or your favorite jam. It also makes a delightful afternoon snack, paired with cheeses or spreads. For family meals, consider using thick slices for sandwiches, enhancing simple ingredients with its flavorful base. If you have leftovers, they can easily be toasted or used for croutons or breadcrumbs, minimizing waste and maximizing enjoyment.
Pro Tips for Best Results
- Ensure your sourdough starter is active and bubbly before beginning.
- Use a kitchen scale for accurate measurements; baking is precise.
- For a better crust, place a pan of water in the oven during baking to create steam.
- Allow the bread to cool completely before slicing for best texture.
- Experiment with rise times based on the ambient temperature of your kitchen; warmer conditions speed up fermentation.
Common Mistakes to Avoid
Making bread can involve some trial and error. Here are some common pitfalls:
- Not using an active starter: An inactive starter may not provide enough leavening. Always feed it before use to ensure it’s bubbly and ready.
- Skipping the autolyse step: Omitting this phase can result in a denser bread as the gluten won’t develop adequately. Allowing the flour to rest helps improve structure.
- Underproofing: Rushing through the proofing stages may lead to a denser loaf. Ensure your dough has visibly risen before baking.
- Overworking the dough: Kneading too much can make it tough. Gently folding is sufficient for developing gluten without overdoing it.
- Incorrect oven temperature: Baking at too low of a temperature can prevent a good crust from forming. Make sure the oven is preheated and at the right temperature.
- Slicing too early: Cutting into the bread while it’s still warm can make it gummy. Let it cool completely for the best texture.
Variations & Substitutions
For those looking to experiment, consider slightly adjusting the proportions of flour or water depending on the humidity in your kitchen. You can also incorporate whole wheat flour for added flavor and nutrition; just be mindful that this may alter the dough’s hydration. Feel free to add spices or herbs, which can bring a new dimension to the flavor without changing the base recipe.
Storage & Reheating
Once cooled, store your sourdough bread at room temperature in a paper bag or loosely wrapped in a kitchen towel to maintain its crust. If you need to keep it longer, slice it and freeze the pieces in an airtight bag. To reheat, simply toast the slices or warm them in the oven for a few minutes to revive the texture.
Frequently Asked Questions
Can I make this recipe ahead of time?
Yes, you can prepare the dough and let it rise in the refrigerator for a slower fermentation overnight. It will develop more flavor during this extended time.
How long does it last in the fridge?
Sourdough bread is best enjoyed within a few days. If stored in the fridge, it can last about a week, but the texture may change.
Can I freeze this recipe?
Absolutely, sourdough bread freezes well. Just slice it beforehand, and store in an airtight bag to keep it fresh.
What can I substitute for one ingredient?
If you can’t find bread flour, all-purpose flour can be a viable substitute, though it may yield a slightly softer texture.
Why didn’t my recipe turn out as expected?
Several factors can influence the outcome, including starter activity, proofing times, and oven temperature. Keep a close eye on these elements for the best chances of success.
Final Thoughts
Making your own sourdough bread can be deeply rewarding. It’s a straightforward process that allows you to connect with the ingredients and enjoy a comforting result. The lovely aroma and satisfying texture of fresh bread invite you to savor it in many ways. Remember, even if your first loaf doesn’t turn out perfectly, each attempt brings you closer to mastering this basic yet beautiful recipe. Enjoy the journey of baking and the simple pleasure of a warm slice at the end.

Sourdough Bread
Ingredients
Dough Ingredients
- ¼ cup sourdough starter (65 grams) provides leavening and a tangy flavor
- 1 ⅔ cups filtered or spring water (350 grams) adds moisture
- 4 ¼ cups bread flour (500 grams) provides structure and chew
- 2 teaspoons fine salt (9 grams) enhances flavor
Instructions
Preparation
- In a large mixing bowl, combine the sourdough starter with the filtered or spring water, stirring until the starter is completely dissolved.
- Gradually add the bread flour and fine salt to the bowl, mixing until a rough dough forms.
- Cover the bowl with a clean kitchen towel and let the dough rest for about 30 minutes.
- After resting, gently fold the dough in the bowl for about 5 to 10 folds.
- Cover the bowl again with the towel and let the dough rise at room temperature for 4 to 6 hours, or until it has doubled in size.
Shaping
- Once the dough has risen, carefully turn it out onto a lightly floured surface and shape it into a round loaf.
- Place the shaped loaf on a piece of parchment paper or a baking sheet, cover with a towel, and let it rise for another 30 minutes to an hour.
Baking
- Preheat your oven to around 450°F.
- Transfer the dough into the preheated oven and bake for about 25 to 30 minutes, or until golden brown.
- Remove the bread from the oven and let it cool on a wire rack for at least 30 minutes before slicing.


