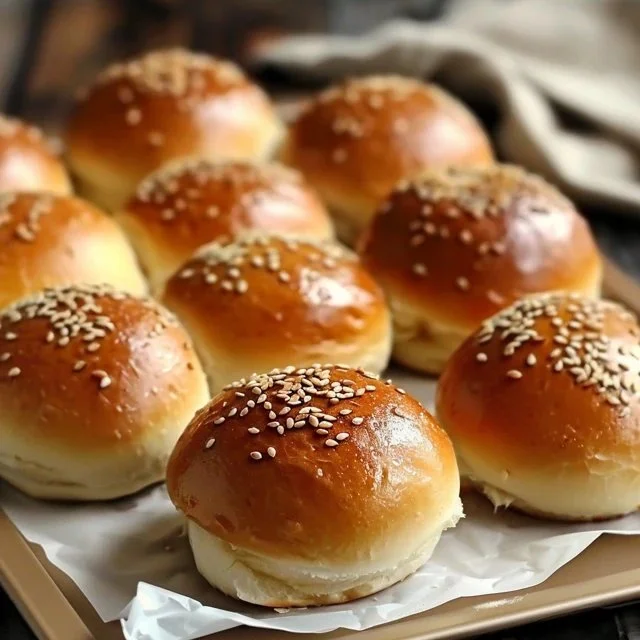
On a busy weeknight or during a weekend gathering, there’s something incredibly satisfying about making your own burger buns. These buns provide a comforting, soft texture and a hint of tang from sourdough. They’re perfect for family meals, BBQs, or even quiet moments at home with a simple burger in hand. Making them is straightforward, allowing you to enjoy both the process and the reward. Let’s dive into this gentle cooking adventure.
Why You’ll Love This Recipe Soft Sourdough Burger Buns
This recipe is all about ease and reliability. You’ll appreciate how straightforward it is to create comforting burger buns with balanced flavor. The unique contribution of sourdough discard makes each bite a little more special, offering everyday value perfect for meals any night of the week.
Kitchen Tools You’ll Need
- Mixing bowl
- Whisk
- Measuring cups
- Measuring spoons
- Baking sheet
- Parchment paper
- Kitchen towel
Ingredients
- 2.5 cups all-purpose flour (provides structure)
- 1 cup sourdough discard (adds moisture and tang)
- 0.5 cup warm milk (enhances texture and flavor)
- 2 tablespoons honey (adds sweetness and helps browning)
- 3 tablespoons unsalted butter (contributes richness)
- 1 large egg (helps bind the mixture)
- 1 teaspoon salt (balances flavors)
- 2 teaspoons instant yeast (aids in rising)
- 1 tablespoon sesame seeds (optional, for topping)

How to Make Soft Sourdough Burger Buns
Step 1. In a large mixing bowl, combine the warm milk and honey, stirring gently until the honey fully dissolves. The warmth of the milk helps to activate the honey, ensuring it blends smoothly into the mixture. Be sure to check that there are no clumps remaining in the bowl, as a smooth mixture sets a good stage for the yeast.
Step 2. Add the sourdough discard and the egg to the bowl, whisking everything together until well combined. You want a homogenous mixture, which will contribute to the overall moisture and texture of the buns. The egg will help bind your ingredients together, while the sourdough discard brings a pleasant tanginess.
Step 3. In a separate bowl, whisk together the flour, salt, and instant yeast. This step ensures that the yeast and salt are evenly distributed, preventing any clumping. Paying attention to this detail helps achieve even rising and flavor in the finished buns.
Step 4. Gradually add the dry mixture to the wet mixture, stirring with a wooden spoon or spatula. Take care to combine everything thoroughly but don’t overmix. The dough will start to come together and should feel somewhat sticky at this stage. This balance of ingredients is key to ensuring a soft and tender bun.
Step 5. Once the dough is mostly combined, add the softened unsalted butter. Incorporate it into the dough until fully mixed in. The butter will enrich the dough, enhancing both flavor and texture. Keep kneading until the dough is smooth and elastic, which usually takes a few minutes.
Step 6. Cover the bowl with a kitchen towel and let the dough rise in a warm spot until it doubles in size, which might take about 1-2 hours. This step is crucial for developing the texture and lightness of the buns. You’ll know it’s ready when it has noticeably expanded.
Step 7. After rising, gently punch down the dough to release the gas bubbles. This will help you shape the buns effectively. Turn it out onto a lightly floured surface and divide the dough into equal portions, depending on your desired bun size.
Step 8. Shape each portion into a smooth ball and place them on a lined baking sheet. Make sure to leave space between each bun, as they will expand during baking. Their smooth surface helps achieve a lovely round shape, which will look inviting once baked.
Step 9. Cover the shaped buns with the kitchen towel again and let them rise for about 30-45 minutes, until puffy. This secondary rise is essential for achieving a soft bun texture. Look for the dough to feel airy and light to the touch.
Step 10. Preheat your oven while the buns are rising, setting it to a moderate temperature to prepare for baking. This ensures that the buns start to bake evenly right away. Once the second rise is complete, the buns will be ready to go into the oven.
Step 11. Optionally, sprinkle sesame seeds over the tops of the risen buns for a little extra flavor and visual appeal. This step can be skipped if you prefer simpler buns. The seeds will add a pleasant crunch and mild flavor when baked.
Step 12. Bake the buns in the preheated oven until they are golden brown, providing a warm aroma as they cook. You’ll want to keep an eye on them to ensure they don’t overbake, as they can become dry. The color should be a lovely golden hue when they are ready to be taken out.
Step 13. Once baked, remove the buns from the oven and let them cool on a wire rack. Cooling them properly is important for maintaining their soft texture. Allow the heat to escape so they don’t become soggy, creating a nice outer crust.

Serving Suggestions
These soft sourdough burger buns shine at any meal. They’re perfect for casual family dinners featuring juicy burgers and fresh toppings. Try them toasted for breakfast with a little butter and jam, or use them for sandwiches filled with your favorite ingredients. Leftovers hold up well, making them a great snack option with a little cheese or deli meats in between.
Pro Tips for Best Results
- Ensure the milk is warm, not hot, to preserve the yeast’s effectiveness.
- Be gentle while shaping the dough to maintain its airy texture.
- Monitor the buns closely during baking to catch them at the perfect golden color.
- Allow sufficient time for the dough to rise for the best texture.
- Don’t skip the second rise, as it greatly improves the bun’s softness.
- Store buns in a sealed bag to maintain freshness without becoming too dry.
Common Mistakes to Avoid
- Using cold milk can hinder yeast activation, leading to slow rising. Always use warm milk to kickstart the process.
- Overkneading can make buns dense instead of light. Mix just until smooth for the right texture.
- Not letting the dough rise long enough may result in a heavy bun. Make sure it doubles in size before shaping.
- Baking at too high a temperature can cause the outsides to brown too quickly while leaving the insides undercooked. Stick to the recommended temperature for even baking.
- Forgetting to cover the shaped dough can lead to a dry exterior. Always use a towel or plastic wrap to trap moisture.
- Skipping the cooling step can make the buns gummy inside. Allow them to cool on a rack for best results.
Variations & Substitutions
For a flavor twist, consider adding herbs or spices to the dough for a burst of taste. If you prefer a sweeter bun, increase the honey slightly. Alternatively, for a richer flavor, you could use half whole wheat flour, but keep in mind the texture will slightly change.
Storage & Reheating
Store the buns in a sealed bag at room temperature for 2-3 days. For longer preservation, refrigerate for up to a week. You can freeze the buns for up to three months; just wrap them tightly in plastic wrap, then in aluminum foil. To reheat, place them in a 350°F oven for about 10-15 minutes to restore their softness.
Frequently Asked Questions
Can I make this recipe ahead of time?
Yes, you can prepare the dough in advance. After the first rise, you can shape the buns and refrigerate them overnight before allowing them to come to room temperature and continue the second rise.
How long does it last in the fridge?
These buns can be kept in the refrigerator for about a week when stored properly in a sealed bag to maintain freshness and moisture.
Can I freeze this recipe?
Absolutely! The buns can be frozen after baking and cooling. Just wrap them tightly and put them in the freezer. Thaw at room temperature or reheat in the oven when ready to use.
What can I substitute for one ingredient?
If you don’t have honey, you can use granulated sugar or maple syrup for a similar level of sweetness. The general sweetness level remains essential for batch consistency.
Why didn’t my recipe turn out as expected?
Common issues include using cold ingredients, which can affect yeast activation, or not allowing enough rise time. Always ensure the dough doubles before shaping and that your ovens are at the right temperature.
Final Thoughts
Making soft sourdough burger buns is a simple process that offers both an enjoyable activity and a rewarding result. The mild tang and softness of these buns will elevate any meal you pair them with. Experiment with them, trust the process, and enjoy the lovely flavors they bring to your kitchen. Your next burger night just might be your best one yet.

Soft Sourdough Burger Buns
Ingredients
Dough Ingredients
- 2.5 cups all-purpose flour provides structure
- 1 cup sourdough discard adds moisture and tang
- 0.5 cup warm milk enhances texture and flavor
- 2 tablespoons honey adds sweetness and helps browning
- 3 tablespoons unsalted butter contributes richness
- 1 large egg helps bind the mixture
- 1 teaspoon salt balances flavors
- 2 teaspoons instant yeast aids in rising
- 1 tablespoon sesame seeds optional, for topping
Instructions
Preparation
- In a large mixing bowl, combine the warm milk and honey, stirring gently until the honey fully dissolves.
- Add the sourdough discard and the egg to the bowl, whisking everything together until well combined.
- In a separate bowl, whisk together the flour, salt, and instant yeast.
- Gradually add the dry mixture to the wet mixture, stirring with a wooden spoon or spatula until combined.
- Once the dough is mostly combined, add the softened unsalted butter and knead until smooth and elastic.
Rising
- Cover the bowl with a kitchen towel and let the dough rise in a warm spot until doubled in size, about 1-2 hours.
- After rising, gently punch down the dough and turn it out onto a lightly floured surface. Divide into equal portions.
- Shape each portion into a smooth ball and place them on a lined baking sheet, leaving space between each bun.
- Cover the shaped buns with the kitchen towel and let them rise for about 30-45 minutes until puffy.
Baking
- Preheat your oven to a moderate temperature during the second rise.
- Optionally, sprinkle sesame seeds over the tops of the risen buns.
- Bake the buns in the preheated oven until they are golden brown, keeping an eye on them to prevent overbaking.
- Once baked, remove the buns from the oven and let them cool on a wire rack.


