There’s a quiet satisfaction that comes from preparing something simple yet delightful in the kitchen. Homemade lemon bars are one of those comforting treats that fit perfectly into both ordinary evenings and special gatherings alike. They bring a refreshing, bright flavor that can elevate any moment, whether you’re enjoying them during a leisurely weekend afternoon or sharing them with friends after dinner. With their buttery base and zesty topping, these gluten-free lemon bars are not only practical but are sure to please a crowd. Let’s dive into this straightforward recipe and savor the delightful simplicity of baking.
Why You’ll Love This The Best Gluten-Free Lemon Bar Recipe You’ll Ever Make
This recipe stands out for its ease and reliability, making it a go-to option for any home cook. The balanced flavors of sweet and tart provide a lovely comfort, while the gluten-free lemon bars are perfect for those who prefer or need gluten-free options. They serve as a delicious treat for everyday moments, whether you’re sharing them at a family meal or enjoying a slice as a snack.
Kitchen Tools You’ll Need
- Mixing bowls
- Whisk
- Baking dish
- Measuring cups and spoons
- Rubber spatula
Ingredients
- 1 1/3 cups gluten-free flour blend (provides structure)
- 1/4 cup granulated sugar (adds sweetness)
- 1/2 cup softened butter (creates a tender texture)
- 3 large eggs (binds ingredients)
- 1 cup granulated sugar (sweetens filling)
- 3 Tbsps gluten-free flour blend (thickens filling)
- 2-3 lemons, zest and juice (imparts bright flavor)
- 2 Tbsp powdered sugar (for dusting)

How to Make The Best Gluten-Free Lemon Bar Recipe You’ll Ever Make
Step 1. Begin by preheating your oven to the appropriate temperature. It’s best to have it ready so you can bake the lemon bars as soon as the batter is mixed.
Step 2. In a mixing bowl, combine the gluten-free flour blend and the 1/4 cup of granulated sugar. Stir these dry ingredients together to ensure they are evenly distributed before adding any wet ingredients.
Step 3. Next, incorporate the softened butter into the flour and sugar mixture. You can do this by using a fork or your fingers to work the butter into the dry ingredients until the mixture resembles coarse crumbs, which will help form a crumbly crust.
Step 4. Once your crust mixture looks right, press it evenly into the bottom of your prepared baking dish. This layer should be firm but not overly compact, so you’ll have a tender base after baking.
Step 5. Place the baking dish with the crust into the preheated oven. Bake it just until it is lightly golden, which should take a bit of time. The color change will let you know it’s ready for the next step.
Step 6. While the crust bakes, prepare the filling by cracking the three large eggs into a clean mixing bowl. Whisk them thoroughly until they are well blended and slightly frothy, which will help contribute to a light texture in the final bars.
Step 7. To the whisked eggs, add the 1 cup of granulated sugar and the 3 tablespoons of gluten-free flour blend. Mix these in until fully incorporated, ensuring there are no lumps, as a smooth consistency will result in a better texture.
Step 8. After mixing the eggs, sugar, and flour, juice and zest the lemons. You’ll want to gather the juice from about 2-3 lemons, which will bring a lovely brightness to the bars, and add it to your egg mixture along with the zest.
Step 9. Blend the lemon juice and zest into the filling mixture. Ensure everything is mixed together nicely. The brightness of the lemon flavor offers a refreshing contrast to the sweetness in the bars.
Step 10. Once the crust is baked and cooled slightly, pour the lemon filling over the warm crust. Spread it evenly to ensure that every bite has that delicious tart flavor.
Step 11. Return the baking dish to the oven to allow the filling to set. You’ll know it’s done when it appears slightly firm around the edges but still has a little jiggle in the center.
Step 12. After baking, take the dish out of the oven and let it sit until it cools at room temperature. This step is vital as it allows the filling to firm up further so it will cut nicely.
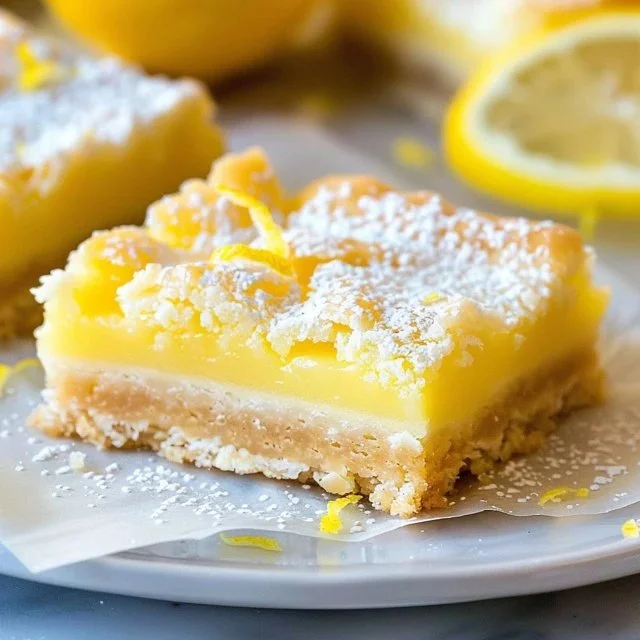
Step 13. Once the lemon bars are cool, dust the top with powdered sugar for an elegant finish. The sugar provides a nice contrast to the tartness of the lemon and adds a touch of sweetness.
Step 14. Finally, cut the cooled bars into squares or rectangles, eliminating any crumbling, and serve them on a platter.

Serving Suggestions
These gluten-free lemon bars are incredibly versatile when it comes to serving. Enjoy them as a delightful breakfast alongside coffee or tea, or keep them on hand for a quick snack during the day. They can also be a nice addition to family meals or gatherings, providing a refreshing dessert option that everyone will appreciate. If you happen to have some leftovers, they store well for a few days, making them perfect for enjoying later.
Pro Tips for Best Results
- Make sure to measure the gluten-free flour blend properly for the best results; scooping directly from the bag can lead to inaccuracies.
- Let the butter soften at room temperature for even mixing and better texture.
- Always whip the eggs until fluffy for a lighter filling.
- Allow the lemon bars to cool completely for cleaner cuts and a firmer texture.
- Feel free to adjust the lemon juice for personal taste — more juice for tangy flavor, or less for sweetness.
- For an added twist, consider serving with fresh berries for a lovely contrast.
Common Mistakes to Avoid
- Using a different type of flour: Substituting regular flour for a gluten-free blend can affect both texture and flavor. Stick to gluten-free flour blends for best results.
- Not measuring ingredients precisely: Baking is a science, and inaccurate measurements can lead to unexpected textures. Use proper measuring cups for dry and wet ingredients.
- Overmixing the filling: Excessive mixing can introduce air bubbles, leading to a spongy texture after baking. Mix until just combined.
- Underbaking the crust: A barely set crust can lead to a soggy lemon bar. Bake until it is lightly golden for the best base.
- Skipping the cooling step: Cutting warm lemon bars will cause them to lose their shape. Letting them cool completely helps maintain their structure.
- Not zesting enough lemons: The zest enhances the flavor significantly. Don’t skip this; it adds that distinctive bright note.
Variations & Substitutions
For those looking to mix things up, consider adding a handful of fresh berries into the lemon filling for a fruity twist. You could also experiment with the type of citrus, such as using lime juice and zest for a different flavor profile. Another option is to incorporate a dash of vanilla extract to the filling for a subtle richness.
Storage & Reheating
These gluten-free lemon bars can be stored at room temperature for a day or two in an airtight container. For longer storage, it’s best to keep them in the refrigerator, where they will last about a week. If you need to freeze them, wrap the cut bars tightly in plastic wrap followed by aluminum foil, and they can last a couple of months. When reheating, simply allow them to come to room temperature, as this helps preserve their texture.
Frequently Asked Questions
Can I make this recipe ahead of time?
Yes, these lemon bars can be made a day or two in advance. Just store them in the refrigerator once they’ve cooled completely to maintain freshness.
How long does it last in the fridge?
When stored properly in an airtight container, these lemon bars can last in the refrigerator for up to a week. Just make sure they’re fully cooled before storing.
Can I freeze this recipe?
Absolutely! You can freeze the lemon bars for up to two months. Just make sure to wrap them tightly so they don’t get freezer burn.
What can I substitute for one ingredient?
If you need to replace the gluten-free flour blend, you could try a different gluten-free blend meant for baking, but avoid regular flour if you’re looking to keep it gluten-free.
Why didn’t my recipe turn out as expected?
Common issues may arise from inaccurate ingredient measurements, underbaking, or not allowing it to cool sufficiently. Pay attention to the steps for the best results.
Final Thoughts
Making gluten-free lemon bars is a comforting and achievable project that can bring a bit of joy to your day. With their delightful mix of textures and flavors, these bars are a wonderful way to enjoy a gluten-free treat that everyone can appreciate. The process is straightforward, offering a satisfying experience from start to finish. So, whether you’re treating yourself or sharing with loved ones, know that these lemon bars will add a little brightness to your day.

Gluten-Free Lemon Bars
Ingredients
Crust Ingredients
- 1 1/3 cups gluten-free flour blend provides structure
- 1/4 cup granulated sugar adds sweetness
- 1/2 cup softened butter creates a tender texture
Filling Ingredients
- 3 large eggs binds ingredients
- 1 cup granulated sugar sweetens filling
- 3 Tbsp gluten-free flour blend thickens filling
- 2-3 lemons zest and juice imparts bright flavor
- 2 Tbsp powdered sugar for dusting
Instructions
Preparation
- Preheat your oven to 350°F (175°C).
- In a mixing bowl, combine the gluten-free flour blend and 1/4 cup of granulated sugar.
- Incorporate the softened butter into the flour and sugar mixture until it resembles coarse crumbs.
- Press the crumbly mixture evenly into the bottom of your prepared baking dish.
- Bake the crust in the preheated oven until lightly golden.
Filling
- Whisk the eggs in a clean mixing bowl until blended and frothy.
- Add 1 cup of granulated sugar and 3 tablespoons of gluten-free flour blend to the eggs, mixing until fully combined.
- Zest and juice the lemons, adding them to the egg mixture.
- Blend all filling ingredients until well mixed.
- Once the crust is baked and slightly cooled, pour the lemon filling over it.
- Return to the oven and bake until the filling is slightly firm around the edges.
- Let the lemon bars cool at room temperature before cutting them into squares.
- Dust the top with powdered sugar before serving.


