There’s something comforting about a freshly baked pan of fudgy brownies. They can bring a satisfying end to a long day, or they can be a delightful treat on a slow weekend morning. These brownies are perfect for gatherings or simply to enjoy during quiet moments at home. Their rich, buttery flavor and soft texture make them an indulgent choice that’s both simple and rewarding. Let’s dive into this easy and comforting recipe.
Why You’ll Love This Brown Butter Fudgy Brownies
This recipe combines ease with a reliably delightful outcome, offering fudgy texture and a well-balanced flavor. The rich brown butter adds depth, while the chocolate provides a comforting sweetness that feels familiar and satisfying. Whether it’s for a family meal or an afternoon treat, these Brown Butter Fudgy Brownies deliver practical everyday value that you’ll find yourself reaching for again and again.
Kitchen Tools You’ll Need
- Medium saucepot
- Whisk
- Large mixing bowl
- 8×8 inch baking pan
- Parchment paper
Ingredients
- 10 tablespoons (150g) unsalted butter, cut into 10 slices (adds richness)
- 6 ounces (170g) chopped semi-sweet chocolate, good quality (provides a deep chocolate flavor)
- ¾ cup (150g) granulated sugar (adds sweetness and moisture)
- ½ cup (100g) packed brown sugar, light or dark (enhances moisture and flavor)
- 3 large eggs, at room temperature (binds ingredients and adds structure)
- 1 teaspoon pure vanilla extract (adds depth of flavor)
- ½ cup (45g) unsweetened cocoa powder (adds chocolate flavor and richness)
- ½ cup (65g) all-purpose flour, spoon and leveled (provides structure)
- ¼ teaspoon salt (enhances flavors)
- 1 cup (170g) semi-sweet chocolate chips or chunks (optional – adds texture and richness)
- Flaky sea salt (optional – for topping, enhances flavors)
How to Make Brown Butter Fudgy Brownies
Step 1. Preheat your oven to 350°F. Greasing the pan helps prevent the brownies from sticking, while the parchment paper provides easy lifting once they are baked. Leaving some paper hanging over the sides will make it easier to remove them from the pan later for cutting.
Step 2. In a medium saucepan, melt the butter over medium heat, stirring until it becomes golden brown. Watch closely as it melts, as it can quickly go from melted to burnt. The butter will develop a nutty aroma and a deep golden color, signifying that it’s ready.
Step 3. Once the butter is browned, whisk in the chopped semi-sweet chocolate until it melts completely and the mixture is smooth. This combination will create a rich base for your brownies. The melted chocolate should integrate fully without any lumps remaining.
Step 4. In a large bowl, combine both sugars and the eggs. Whisk the mixture together until the sugars are fully dissolved, creating a uniform mixture. This step incorporates air into the eggs while also ensuring that the sugars are evenly distributed throughout the brownie batter.
Step 5. Add in the vanilla extract, cocoa powder, and the brown butter-chocolate mixture. Whisk again until everything is combined well. The batter should look smooth and glossy, reflecting the rich chocolate mixture you’ve just incorporated.
Step 6. Slowly add the flour and salt to the mixture. Use a spatula or spoon to mix until just combined; you want to be cautious not to overmix. The batter should come together without any dry flour spots, but it can still be slightly lumpy due to the chocolate.
Step 7. If you’re using chocolate chips or chunks, gently fold them into the batter now. This addition gives the brownies an extra bit of indulgence, enhancing the overall chocolate flavor and texture.
Step 8. Pour the batter into the prepared 8×8 inch pan, spreading it evenly to ensure consistent baking. The batter will be thick, so take your time to smooth it out.
Step 9. Bake in the preheated oven for 25-30 minutes. The brownies are done when they are no longer shiny on the surface, and a skewer inserted into the center comes out with fudgy crumbs. Keep an eye on them, as overbaking can lead to a drier texture.
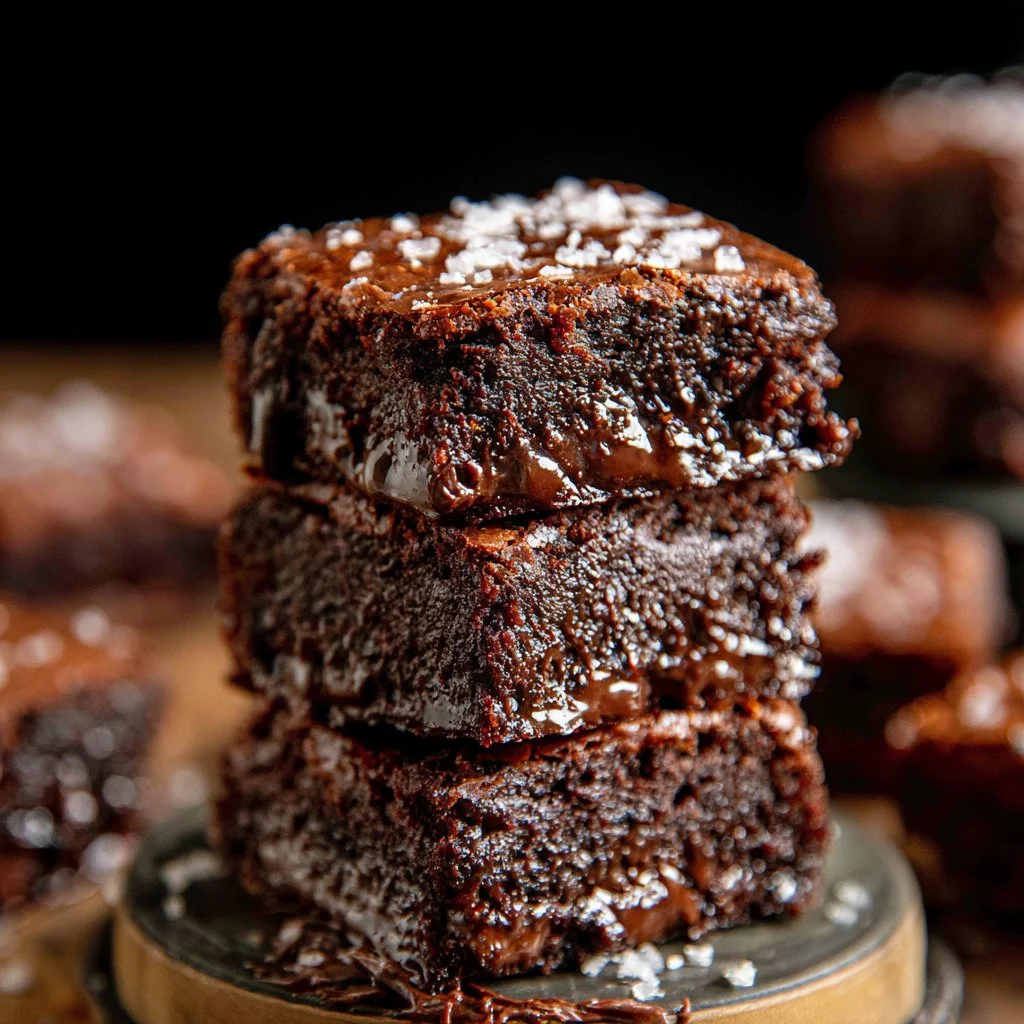
Step 10. After baking, allow the brownies to cool completely in the pan. Once cooled, use the overhanging parchment to lift them out for cutting. This helps maintain their shape and avoids sticking to the pan. Optionally, you can sprinkle flaky sea salt on top before slicing for an extra flavor boost.

Serving Suggestions
These brownies are versatile and can be enjoyed in various ways. They make for a delightful breakfast treat when paired with coffee or milk. For snacks, they can simply be served alongside fruit or a scoop of ice cream. If you have leftovers, they’re great for family meals, served warm or at room temperature. You can also wrap them up for a sweet addition to school lunches or picnics.
Pro Tips for Best Results
- Make sure to whisk the sugars with the eggs thoroughly until dissolved to ensure a smooth batter.
- Watch the butter closely while it’s browning; if it goes too far, it can burn, affecting the final flavor.
- Using room temperature eggs makes for a better emulsion in the batter, leading to fudgier brownies.
- Don’t overmix after adding the flour; this keeps the texture tender.
- For fudgier brownies, slightly underbake them, as they continue to cook in the residual heat.
- Let the brownies cool completely if you want clean cuts; warm brownies may be too gooey to slice properly.
Common Mistakes to Avoid
- Not greasing the pan properly: If you don’t grease and line your baking pan, the brownies can stick. This makes it difficult to remove them without tearing, resulting in a messy appearance and frustrating experience.
- Overbaking the brownies: Brownies that are overbaked will turn dry and cakey instead of fudgy. Keep an eye on them and do the skewer test to check for doneness.
- Using cold eggs: Cold eggs can prevent proper mixing and result in a dense texture. Always use eggs at room temperature for the best results.
- Skipping the browning butter step: Browning the butter enhances the flavor, adding nutty notes. Skipping this step means losing out on flavor depth.
- Not measuring ingredients accurately: Using too much or too little flour can greatly affect the brownies’ texture. Always spoon and level flour instead of scooping directly from the bag.
- Cooling too quickly: Cutting into brownies while they’re still warm can lead to a messy result. Allow them to cool completely for the best texture when slicing.
Variations & Substitutions
For a twist on the classic, you can add nuts such as walnuts or pecans for added crunch. If preferred, swirl in a layer of peanut butter or cream cheese for a unique flavor combination. You might consider using dark chocolate instead of semi-sweet for a richer taste, though keep in mind this will change the flavor profile slightly.
Storage & Reheating
Store brownies at room temperature in an airtight container for up to 3 days. If you need longer storage, refrigerate them, where they can last for about a week. If freezing, wrap them tightly in plastic wrap and place in a freezer-safe container. They can be frozen for up to three months. To reheat, gentle warming in the microwave or a short time in the oven can help restore some of their original fudginess.
Nutrition Information
Calories: 263
Total Fat: 12g
Saturated Fat: 7g
Carbohydrates: 37g
Fiber: 2g
Sugar: 22g
Protein: 3g
Sodium: 60mg
Frequently Asked Questions
Can I make this recipe ahead of time?
Yes, these brownies can be made a day or two ahead. Let them cool completely before storing in an airtight container at room temperature, and they will hold up very well.
How long does it last in the fridge?
When stored properly in an airtight container, brownies can last about a week in the refrigerator. Just be sure they are cooled completely before storing to retain their texture.
Can I freeze this recipe?
Absolutely! These brownies freeze well. Wrap them tightly in plastic wrap and then place them in a freezer-safe container. They can be frozen for up to three months.
What can I substitute for one ingredient?
If you need to replace the unsalted butter, you can use the same amount of coconut oil for a slight twist in flavor. However, this will change the taste slightly.
Why didn’t my recipe turn out as expected?
Common issues often stem from inaccurate measuring, such as too much flour, or overbaking.
Final Thoughts
Making these Brown Butter Fudgy Brownies can be a simple yet rewarding experience, filling your kitchen with warm, inviting aromas. Enjoying a square or two can bring comfort and satisfaction. It’s a recipe that balances ease with rich flavors, making it a go-to for many moments. You’ll find that this recipe offers reliability, resulting in fudgy, delicious brownies time and time again.

Brown Butter Fudgy Brownies
Ingredients
Main Ingredients
- 10 tablespoons unsalted butter, cut into 10 slices Adds richness
- 6 ounces chopped semi-sweet chocolate, good quality Provides a deep chocolate flavor
- ¾ cup granulated sugar Adds sweetness and moisture
- ½ cup packed brown sugar, light or dark Enhances moisture and flavor
- 3 large eggs, at room temperature Binds ingredients and adds structure
- 1 teaspoon pure vanilla extract Adds depth of flavor
- ½ cup unsweetened cocoa powder Adds chocolate flavor and richness
- ½ cup all-purpose flour, spoon and leveled Provides structure
- ¼ teaspoon salt Enhances flavors
- 1 cup semi-sweet chocolate chips or chunks Optional - adds texture and richness
- to taste flaky sea salt Optional - for topping, enhances flavors
Instructions
Preparation
- Preheat your oven to 350°F. Grease the pan and line with parchment paper.
- In a medium saucepan, melt the butter over medium heat until golden brown, stirring continuously.
- Once browned, whisk in the chopped semi-sweet chocolate until smooth.
- In a large bowl, combine both sugars and eggs, whisk until the sugars are dissolved.
- Add vanilla extract, cocoa powder, and the brown butter-chocolate mixture, whisk until well combined.
- Slowly add flour and salt, mixing until just combined.
- Gently fold in chocolate chips or chunks if using.
- Pour the batter into the prepared pan, spreading evenly.
- Bake for 25-30 minutes or until a skewer comes out with fudgy crumbs.
- Allow to cool completely in the pan before lifting out and slicing.


