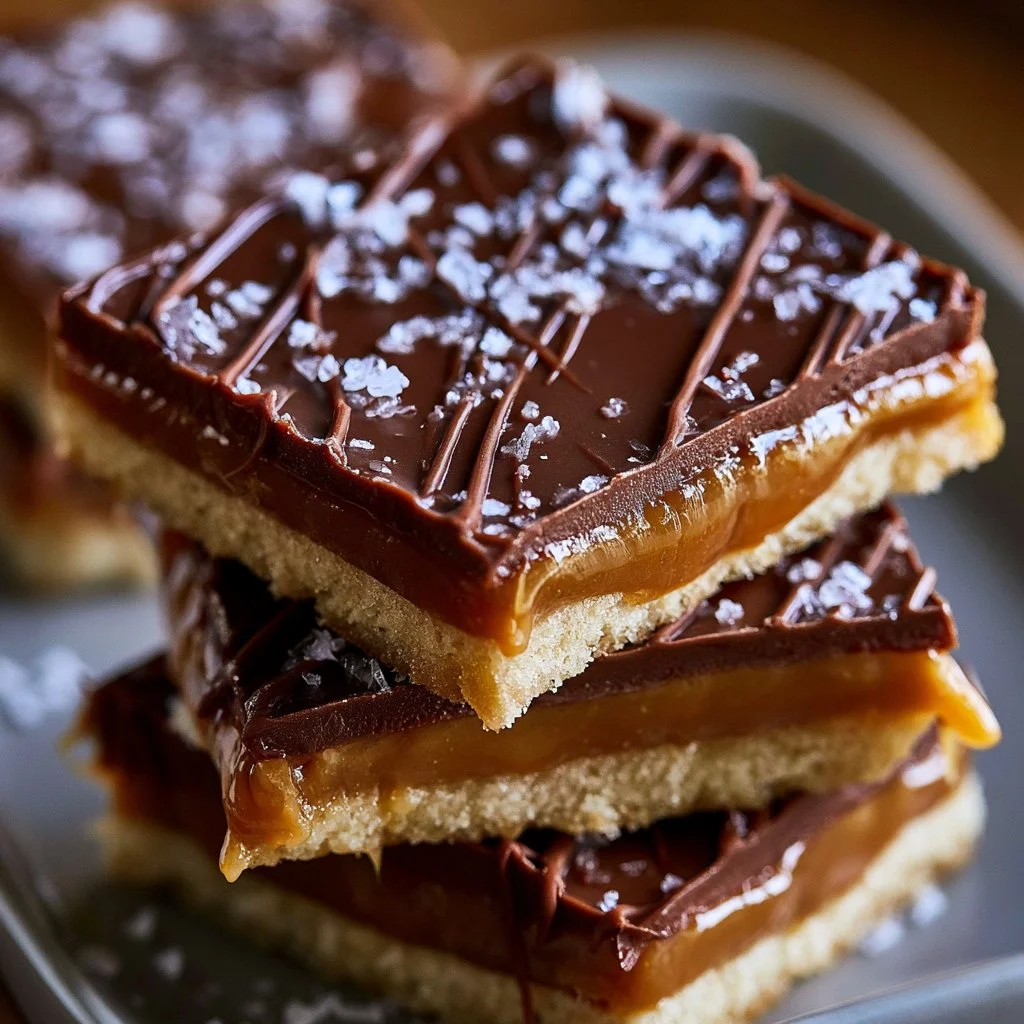
Sometimes, the simplest recipes bring the most joy, especially when they’re perfect for winding down after a long day or sharing during weekend gatherings. These bars blend the crispiness of Club crackers with a rich caramel layer, creating a delightful sweet and salty balance. Whether it’s a cozy evening snack or a treat for guests, this recipe is all about comfort and ease, inviting everyone in to enjoy a homemade delight.
Why You’ll Love This Sweet And Salty Salt River Bars
With a straightforward process, these bars offer both ease and reliability. The combination of sweet and salty elements creates a comforting treat that satisfies cravings. Their practicality makes them a great choice for everyday moments, whether you’re preparing for family meals or indulging in a quiet snack. These Sweet And Salty Salt River Bars are sure to become a favorite.
Kitchen Tools You’ll Need
- 9×13 inch pan
- Parchment paper
- Nonstick spray
- Heavy-bottomed pan
- Heat-resistant spatula
Ingredients
- 90 Club crackers (crisp base)
- 1 cup salted butter (adds moisture and richness)
- 2 cups packed light brown sugar (provides sweetness and a hint of caramel flavor)
- 1 cup graham cracker crumbs (contributes to texture and sweetness)
- 3/4 cup heavy cream (adds creaminess and moisture)
- 1 1/2 cups milk chocolate chips (for a sweet, smooth layer)
- 1/2 cup butterscotch chips (adds a bit of richness and flavor)
- 1/2 cup creamy peanut butter (brings richness and a nutty flavor)
- Maldon sea salt for finishing (enhances the sweet and salty contrast)
How to Make Sweet And Salty Salt River Bars
Step 1. Begin by lining a 9×13 inch pan with parchment paper, making sure to spray it lightly with nonstick spray to prevent sticking. This ensures the bars can be easily removed later. The parchment also helps create a clean edge for cutting once they’re chilled.
Step 2. Arrange a layer of Club crackers in the bottom of the prepared pan. Make sure to cover the entire surface to create a solid foundation for the bars. This crunchy base will provide a textural contrast to the soft and creamy layers to come.
Step 3. In a heavy-bottomed pan, melt the salted butter over medium heat, stirring occasionally until it is completely liquid. Once melted, add the packed light brown sugar, graham cracker crumbs, and heavy cream. Stir these ingredients together to create a smooth mixture, and watch as it begins to bubble gently, indicating that it’s cooking and combining well.
Step 4. Allow the mixture to come to a boil, and continue stirring for about seven minutes. The mixture will thicken and darken slightly, transitioning into a rich caramel-like texture. Keep an eye on it to avoid burning, stirring consistently for an even cook.
Step 5. Once boiling for the allotted time, pour half of the caramel mixture over the layered crackers. Use a spatula to spread it evenly, ensuring every cracker gets coated. This will help the layers adhere and create a cohesive bar once set.
Step 6. Add another layer of Club crackers on top of the caramel mixture, pressing them down gently. Pour the remaining caramel mixture over this layer, making sure to cover it completely. Finally, add one more layer of crackers on top, creating a sturdy layered structure.
Step 7. Chill the assembled bars in the refrigerator for at least one hour. This helps the layers firm up and meld together. You’ll know they’re ready when the caramel feels set to the touch and the bars hold their shape when gently pressed.
Step 8. After chilling, melt the milk chocolate chips, butterscotch chips, and creamy peanut butter together in a microwave-safe bowl using short intervals. Stir after each interval until the mixture is smooth and glossy. This will create a rich and decadent topping for the bars.
Step 9. Pour the melted chocolate mixture over the cooled bars, spreading it evenly to cover the top fully. This layer adds a wonderful creamy texture and enhances the overall flavor of the bars.
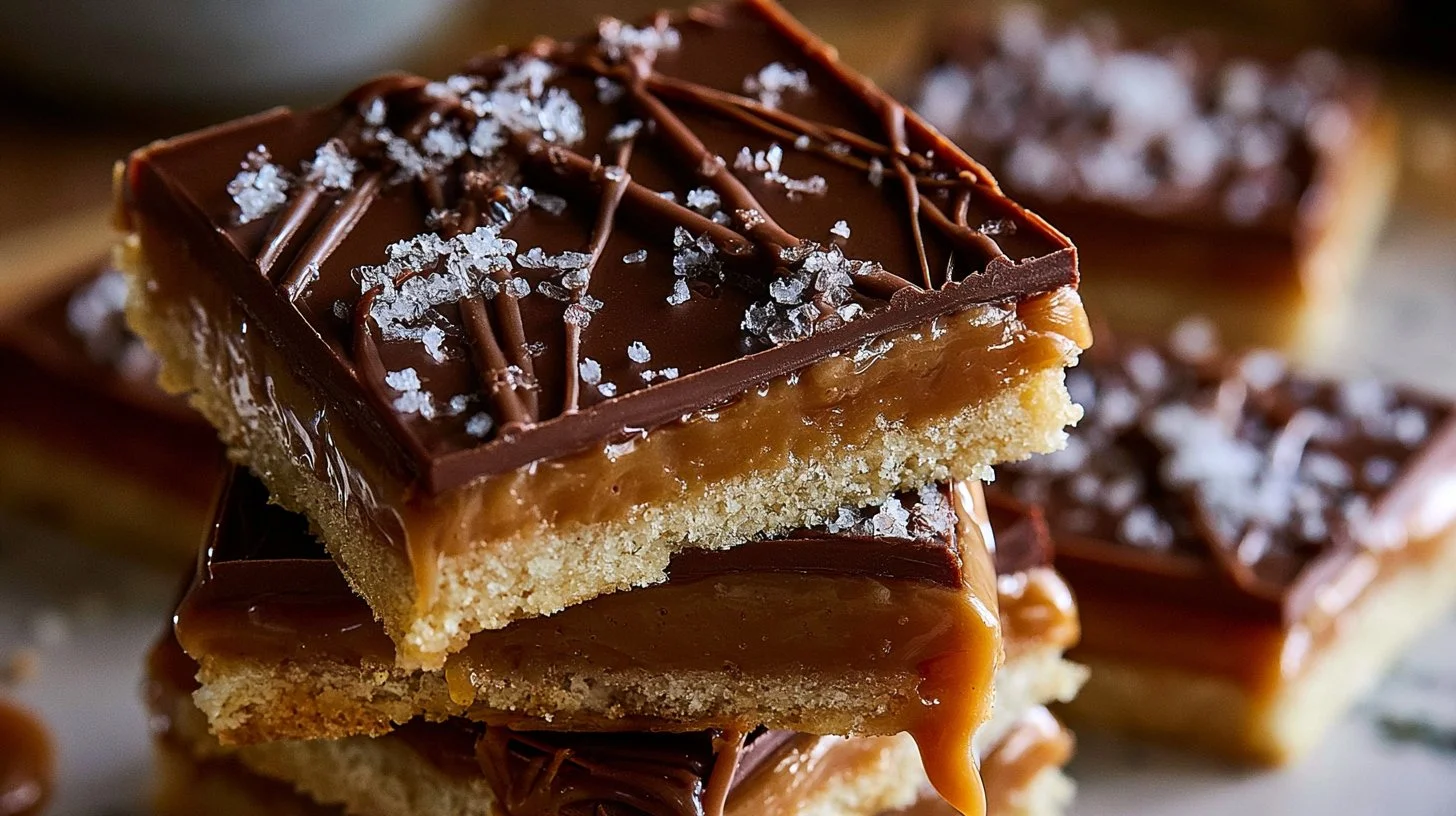
Step 10. Finish by sprinkling Maldon sea salt over the top. This step adds a delightful contrast, balancing the sweetness of the chocolate with a burst of salty flavor. Return the bars to the refrigerator and chill again to allow the chocolate to set completely.
Step 11. Once thoroughly chilled and set, it’s time to cut the bars into squares. The chilled bars will hold their shape well, making it easier to get clean, even cuts, resulting in perfectly portioned treats for everyone to enjoy.
Serving Suggestions
These Sweet And Salty Salt River Bars are incredibly versatile and can be enjoyed at various occasions. They make a delightful breakfast paired with a cup of coffee, or serve them as a sweet snack during the day. They shine at family meals or gatherings, offering an easy, crowd-pleasing dessert. If you have leftovers, they store well for a few days in the refrigerator, making them a convenient treat for later.
Pro Tips for Best Results
- Be patient while cooking the caramel: Stir consistently to ensure it thickens properly without burning.
- Cool the bars completely in the fridge for best texture: This allows the layers to firm up, resulting in better cuts.
- Use a sharp knife for cutting: This ensures neat squares without tearing the bars.
- Let the chocolate mixture come to a gentle melt: This will avoid seizing and create a smooth topping.
- Adjust sea salt to taste: You can sprinkle more or less, depending on your preference for saltiness.
- Consider layering flavors: Feel free to adjust the balance of chips if you prefer one flavor over the others.
Common Mistakes to Avoid
- Rushing the caramel cooking time: If cooked too quickly, it can burn and result in a grainy texture; always keep an eye on it.
- Not chilling the bars long enough: Skipping the chilling time can lead to a messy cut; ensure they are well set.
- Using too much nonstick spray: Applying too much can make the bars greasy; a light coating is sufficient.
- Not spreading the caramel evenly: An uneven layer can cause some areas to be too chewy or even too hard; smooth it out carefully.
- Ignoring the temperature while melting chocolate: If melted too quickly, it may seize, impacting the topping; use low intervals and stir frequently.
- Not using enough crackers: If you run short on crackers, the layers can be unstable; always use the recommended amount for structure.
Variations & Substitutions
Feel free to mix up the types of chocolate used if desired or explore other nut butters for a different flavor profile. For a touch of extra crunch, consider adding chopped nuts or crispy rice cereal to the caramel mixture. You can also try layering different types of flavored chips to personalize the bars.
Storage & Reheating
Store these bars covered at room temperature for a day or two, or in the refrigerator for up to a week to maintain freshness. If you prefer, you can freeze them for longer storage; just ensure they are wrapped tightly. For best results, thaw in the refrigerator before serving, as reheating isn’t typically necessary; they should remain deliciously firm and soft at room temperature.
Frequently Asked Questions
Can I make this recipe ahead of time?
Yes, you can prepare these bars a day or two in advance. Just be sure to store them properly in the fridge to keep them fresh. They actually benefit from sitting for a little while, allowing the flavors to meld together.
How long does it last in the fridge?
These bars can last about a week in the refrigerator when stored in an airtight container. Just keep in mind that the texture may slightly change over time as they sit, but they should still taste delicious.
Can I freeze this recipe?
Absolutely! You can freeze these bars for up to three months. Be sure to wrap them tightly in plastic wrap or store them in an airtight container to prevent freezer burn. Thaw them in the fridge when you’re ready to enjoy.
What can I substitute for one ingredient?
If you’re looking to switch things up, you can replace the creamy peanut butter with another nut or seed butter, depending on your preference or dietary needs. The texture and flavor will vary slightly, but it will still be delicious.
Why didn’t my recipe turn out as expected?
If the bars didn’t set properly, it could be due to not cooking the caramel long enough or not chilling them adequately. Ensuring even cooking times and proper chilling are key to achieving the right texture in these bars.
Final Thoughts
Making Sweet And Salty Salt River Bars is a rewarding experience, blending familiar ingredients into something wonderfully satisfying. The balance of sweet chocolate, salty peanut butter, and a crisp cracker base creates a comforting treat that’s perfect for any occasion. Enjoy the simplicity of this recipe, and may it bring warmth and delight to your kitchen.
Sweet And Salty Salt River Bars
Ingredients
Base and Caramel Mixture
- 90 crackers Club crackers Crisp base
- 1 cup salted butter Adds moisture and richness
- 2 cups packed light brown sugar Provides sweetness and a hint of caramel flavor
- 1 cup graham cracker crumbs Contributes to texture and sweetness
- 3/4 cup heavy cream Adds creaminess and moisture
Chocolate and Topping
- 1 1/2 cups milk chocolate chips For a sweet, smooth layer
- 1/2 cup butterscotch chips Adds a bit of richness and flavor
- 1/2 cup creamy peanut butter Brings richness and a nutty flavor
- to taste Maldon sea salt For finishing, enhances the sweet and salty contrast
Instructions
Preparation
- Line a 9×13 inch pan with parchment paper and lightly coat with nonstick spray.
- Arrange a layer of Club crackers in the bottom of the prepared pan.
Cooking the Caramel
- In a heavy-bottomed pan, melt the salted butter over medium heat, stirring occasionally.
- Add the light brown sugar, graham cracker crumbs, and heavy cream, stirring to combine.
- Allow the mixture to come to a boil, stirring for about seven minutes until thickened.
- Pour half of the caramel mixture over the layered crackers and spread it evenly.
- Add another layer of crackers on top and cover with the remaining caramel mixture.
- Finish with one more layer of crackers on top.
Chilling
- Chill the assembled bars in the refrigerator for at least one hour.
Finishing Touches
- Melt the milk chocolate chips, butterscotch chips, and creamy peanut butter together.
- Pour the melted chocolate mixture over the cooled bars and spread it evenly.
- Sprinkle Maldon sea salt over the top and chill again to set the chocolate.
- Once set, cut the bars into squares.