Why You’ll Love This Recipe
This gluten-free chocolate chip cookie recipe stands out for its simplicity and delicious results. It’s easy to follow, making it approachable for cooks of all skill levels. The balanced flavor combines the sweetness of chocolate with the depth of brown sugar, providing a comforting treat. Plus, the cookies hold up well, making them a reliable option for everyday enjoyment.
Kitchen Tools You’ll Need
- Mixing bowls
- Measuring cups and spoons
- Baking sheet
- Parchment paper
- Whisk or electric mixer
Ingredients
- 1 cup gluten-free flour blend (structure)
- 1/2 teaspoon baking soda (leavening agent)
- 1/4 teaspoon salt (enhances flavor)
- 1/2 cup unsalted butter, softened (moisture and richness)
- 1/2 cup brown sugar (moisture and depth of flavor)
- 1/4 cup granulated sugar (sweetness)
- 1 teaspoon vanilla extract (aroma and flavor)
- 1 large egg (binding agent)
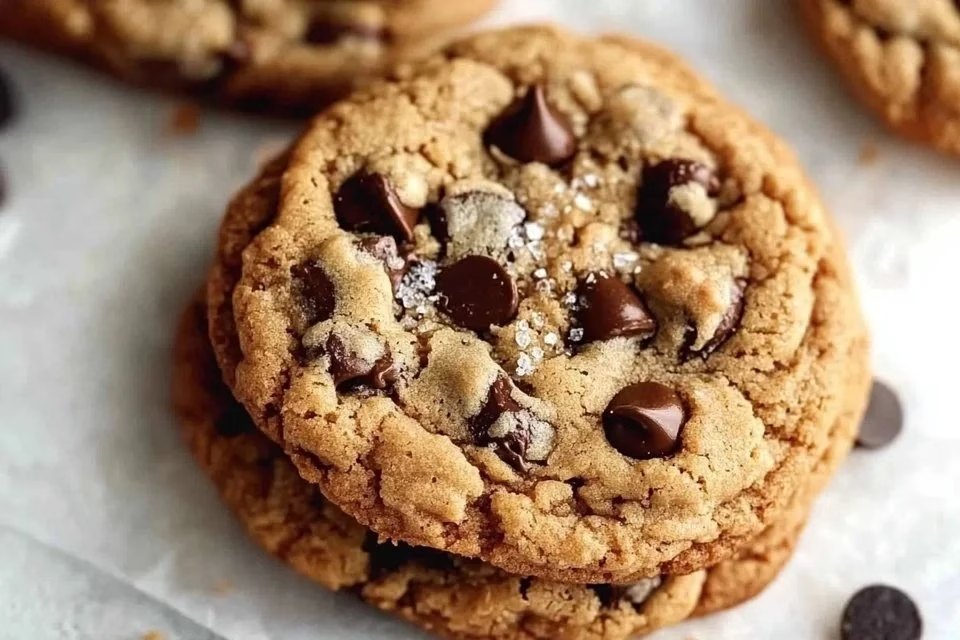
- 1 cup chocolate chips (sweetness and texture)
How to Make Gluten-Free Chocolate Chip Cookies
Step 1. Start by preheating your oven to 350°F (175°C). This ensures that the cookies bake evenly and develop a nice golden color. You want the oven to be fully heated before you place your cookie dough inside, which allows for optimal rise and texture. A preheated oven is essential for achieving that classic, chewy cookie consistency.
Step 2. In a bowl, combine the gluten-free flour blend, baking soda, and salt. Mixing these dry ingredients thoroughly helps distribute the baking soda evenly, which is important for leavening. Look for a consistent blend, which will help the cookie dough rise properly during baking. This step ensures that you avoid any clumps of baking soda or salt in your cookies.
Step 3. In a separate large bowl, cream the softened unsalted butter, brown sugar, and granulated sugar together until the mixture is light and fluffy. You can use a whisk or an electric mixer for this. The creaming process incorporates air into the butter, which contributes to the cookies’ texture. Make sure the mixture appears pale and fluffy for best results.
Step 4. Add the vanilla extract and the large egg to the creamed mixture. Beat these ingredients together until they are well combined. This will ensure the flavors meld, and the egg will help with the cookie dough’s structure. Look for a smooth and cohesive mixture that is free of lumps for the best flavor integration.
Step 5. Gradually incorporate the dry flour mixture into the wet ingredients. Mix just until combined, being careful not to overwork the dough. Overmixing can lead to tough cookies because it develops the gluten too much, even in gluten-free recipes. It’s okay if there are a few flour streaks remaining; they will blend in with the next step.
Step 6. Fold in the chocolate chips with a spatula until they are evenly distributed throughout the dough. Make sure the chocolate is well mixed in, as this contributes a lovely sweetness and texture to each cookie. Be gentle while folding to maintain the dough’s fluffy texture, ensuring that every cookie has chocolate in every bite.
Step 7. Line a baking sheet with parchment paper for easy cleanup. Use a cookie scoop or spoon to drop dough onto the prepared baking sheet, spacing them about 2 inches apart. This spacing allows the cookies room to expand as they bake. Keep an eye on the size of each mound to ensure uniform baking.
Step 8. Bake the cookies in the preheated oven for 10 to 12 minutes or until the edges are set and the tops appear slightly golden. Watch for the cookies to start browning around the edges, as this indicates they are ready. They may seem soft in the center, but they will firm up as they cool.
Step 9. Once baked, remove the cookies from the oven and let them cool on the baking sheet for about 5 minutes. This cooling time helps them set, making it easier to transfer them without falling apart. If they look a bit doughy, it’s okay; they will continue to cook slightly from the residual heat.
Step 10. After cooling, transfer the cookies to a wire rack to cool completely. This final step allows air to circulate around the cookies, preventing them from becoming soggy. You’ll want to make sure they are completely cool before storing them to maintain their texture and freshness.
Serving Suggestions
These gluten-free chocolate chip cookies offer versatile serving options. They’re perfect for breakfast, paired with a cup of coffee or tea. Keep them on hand for after-school snacks that satisfy both kids and adults on busy afternoons. They also shine as a sweet ending to family meals or as a contribution to potlucks and gatherings. Leftovers can be stored in an airtight container for a few days, maintaining their appeal.
Pro Tips for Best Results
- Use room temperature butter for easier creaming and better texture.
- Avoid overmixing the dough to keep cookies tender.
- Ensure the baking soda is fresh for the best rise.
- Adjust the baking time slightly based on your oven’s performance.
- Allow cookies to cool completely for best storage results.
Common Mistakes to Avoid
- Using cold butter: Cold butter doesn’t cream well, leading to dense cookies. Let it soften at room temperature first to achieve the right texture.
- Overmixing the dough: This can lead to tough cookies by developing gluten. Mix just until combined after adding the dry ingredients.
- Not measuring ingredients accurately: Inaccurate measurements can change the dough’s consistency. Use the spoon-and-level method for dry ingredients to ensure precision.
- Skipping the cooling step on the baking sheet: Moving cookies too soon can cause them to break. Give them a few minutes to set before transferring them to cool completely.
- Omitting salt: Salt enhances the flavor of the cookies. Even in sweet treats, it’s essential for balancing taste; don’t skip it.
- Baking on an unprepared sheet: Always use parchment paper or a silicone mat to prevent sticking and ensure even baking. This will help maintain cookie shape and prevent mess.
Variations & Substitutions
For a twist on these cookies, consider adding chopped nuts or coconut flakes for extra texture. You can also experiment with different types of chocolate chips, like dark or white chocolate, to enhance the flavor. If you prefer smaller cookies, scoop out smaller portions of dough, adjusting the bake time accordingly.
Storage & Reheating
Store these cookies at room temperature in an airtight container for up to five days. If you’d like to extend their shelf life, you can refrigerate them, where they will last about a week. For longer storage, freeze the cookies in an airtight bag or container for up to three months. When you’re ready to enjoy them again, simply thaw at room temperature. To revive their texture, heat in the microwave for a few seconds.
Nutrition Information
Nutrition values are estimates and may vary based on ingredients used.
Frequently Asked Questions
Can I make this recipe ahead of time?
Yes, you can prepare the dough in advance. Once mixed, cover it and store in the refrigerator for up to 48 hours. This allows for even better flavor development.
How long does it last in the fridge?
These cookies can last in the refrigerator for about a week when stored in an airtight container. Make sure they are completely cooled before storing to keep their texture.
Can I freeze this recipe?
Absolutely. You can freeze the cookies for up to three months. They can be frozen either baked or as dough, allowing for flexibility whenever you want fresh cookies.
What can I substitute for one ingredient?
For the butter, you can use coconut oil for a different flavor. However, ensure it is soft and not melted to maintain the right dough consistency.
Why didn’t my recipe turn out as expected?
Common issues include not measuring ingredients correctly or overmixing the dough. Different oven temperatures and humidity can also play a role, so keep an eye on your cookies while baking.
Final Thoughts
Making gluten-free chocolate chip cookies is a rewarding experience that fills your home with warmth and the smell of freshly baked treats. They bring comfort and joy, perfect for sharing with family or indulging in quietly. Each bite is a reminder that delightful cookies don’t have to forfeit flavor or texture to be gluten-free. Rest assured that following these steps will yield delicious results, nurturing your love for home baking.
Gluten-Free Chocolate Chip Cookies
Ingredients
Dry Ingredients
- 1 cup gluten-free flour blend provides structure
- 1/2 teaspoon baking soda leavening agent
- 1/4 teaspoon salt enhances flavor
Wet Ingredients
- 1/2 cup unsalted butter, softened moisture and richness
- 1/2 cup brown sugar moisture and depth of flavor
- 1/4 cup granulated sugar sweetness
- 1 teaspoon vanilla extract aroma and flavor
- 1 large egg binding agent
Add-ins
- 1 cup chocolate chips sweetness and texture
Instructions
Preparation
- Preheat your oven to 350°F (175°C).
- In a bowl, combine the gluten-free flour blend, baking soda, and salt.
- In a separate large bowl, cream the softened unsalted butter, brown sugar, and granulated sugar together until light and fluffy.
- Add the vanilla extract and egg, then beat until well combined.
- Gradually incorporate the dry flour mixture into the wet ingredients until just combined.
- Fold in the chocolate chips until evenly distributed.
Baking
- Line a baking sheet with parchment paper and scoop the dough onto it, spacing about 2 inches apart.
- Bake for 10 to 12 minutes until the edges are set and tops are slightly golden.
- Let the cookies cool on the baking sheet for about 5 minutes before transferring to a wire rack to cool completely.


