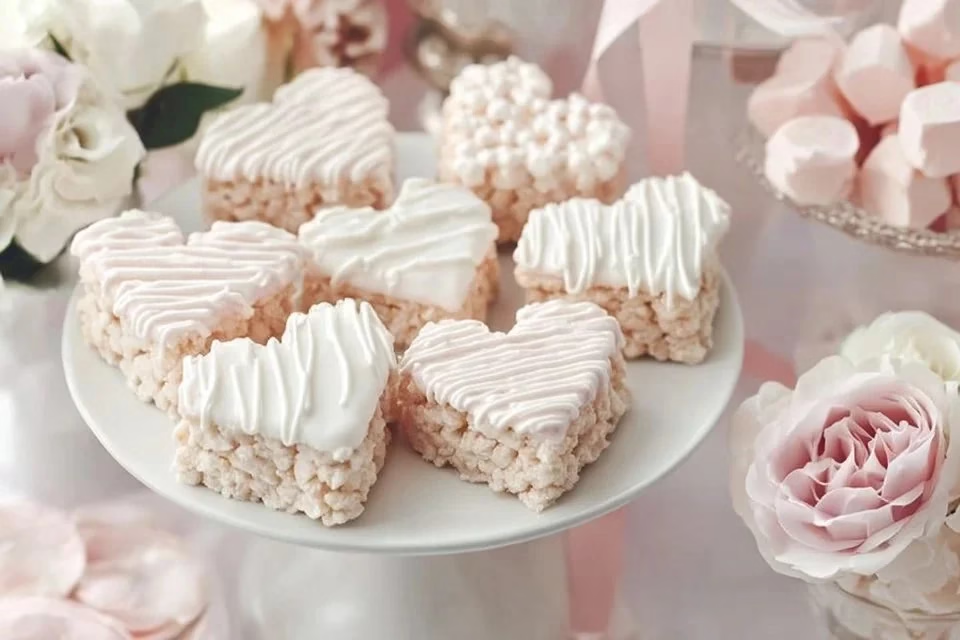
Why You’ll Love This bridal shower desserts
This recipe provides simplicity and reliability that is hard to beat. With its balanced flavor profile, it’s a comforting addition to any celebration, ensuring that it fits seamlessly into everyday life. The great thing about this bridal shower treat is that it combines ease and practicality, making it a go-to option for both special occasions and everyday enjoyment.
Kitchen Tools You’ll Need
- Mixing bowl
- Whisk
- Baking pan
- Measuring cups
- Baking sheets
Ingredients
- Flour (structure)
- Sugar (sweetness)
- Butter (moisture)
- Eggs (binding)
- Baking powder (leavening)
- Vanilla extract (flavor)
- Milk (moisture)
- Salt (enhances flavor)
How to Make bridal shower desserts
Step 1. Begin by preheating your oven to the required temperature. This step is crucial as it ensures even baking. A properly preheated oven allows the treat to rise and develop its texture correctly. If your oven isn’t preheated, the baking process will be slower, leading to uneven results.
Step 2. In a mixing bowl, combine the flour, sugar, baking powder, and salt. Ensure these dry ingredients are well incorporated. Mixing them before adding wet ingredients helps to distribute the leavening and flavors evenly throughout the batter. The mixture should be free of lumps for the best texture.
Step 3. In a separate bowl, cream the butter until smooth. This step incorporates air into the butter, making the final product light. You can watch for it to become fluffy and pale in color. Properly creamed butter is key for achieving a tender and moist texture in your treat.
Step 4. Add in the eggs one at a time, mixing thoroughly after each addition. This step helps to emulsify the fat and liquid, resulting in a homogenous batter. Ensure each egg is fully incorporated before adding the next; this step is crucial for a stable structure.
Step 5. Stir in the vanilla extract, which adds depth of flavor to the batter. Be gentle as you mix to avoid deflating the air bubbles created during the creaming process. The batter should maintain a light texture while showcasing that warm aroma from the vanilla.
Step 6. Gradually add the dry mixture to the wet ingredients, alternating with the milk. Start and end with the dry ingredients, mixing just until combined. Avoid over-mixing at this stage to maintain the tender crumb of the finished treat. The batter will be thick and smooth when done.
Step 7. Pour the batter into the prepared baking pan. Use a spatula to spread it evenly to ensure uniform baking. Watch for any air bubbles, as these can create uneven texture in the finished treat. The batter should be level within the pan before placing it in the oven.
Step 8. Bake until golden brown, and a toothpick inserted in the center comes out clean. The edges should begin to pull away from the sides of the pan, indicating that it’s done. Keep an eye on the baking time, as ovens can vary. It’s best to check a few minutes before the suggested time.
Step 9. Once baked, allow it to cool in the pan for a short period before transferring it to a wire rack. This cooling process helps set the texture and makes removing it easier without breaking. The warm aroma will fill your space, inviting everyone to enjoy it once it’s fully set.
Step 10. Slice the cooled treat into portions and serve. This final touch allows guests to enjoy it easily, whether as a snack or part of a dessert spread. Consider pairing it with fresh fruit or a light glaze for an extra layer of flavor when serving.
Serving Suggestions
This treat shines as a versatile option for various occasions. It makes for a delightful breakfast option alongside coffee or tea. During lunch or afternoon snacks, it pairs wonderfully with fresh fruit or a dollop of yogurt. Wrapped up well, leftovers can be a convenient grab-and-go option for busy days. It’s ideal for family meals, too, where it can be enjoyed by both kids and adults alike.
Pro Tips for Best Results
- Use room temperature ingredients for a smoother batter.
- Avoid over-mixing to keep the texture light.
- Don’t skip the resting period before serving to enhance flavors.
- Ensure accurate oven temperature by using an oven thermometer.
- Cool completely before storing to prevent sogginess.
Common Mistakes to Avoid
- Not Preheating the Oven
- Failing to preheat can cause uneven baking. The treat may not rise properly or could take longer, resulting in dry edges. Always preheat to the recommended temperature before starting.
- Over-Mixing the Batter
- Over-mixing can lead to a dense texture. The gluten will develop too much, making the end product tough rather than light and fluffy. Mix just until combined for best results.
- Using Cold Ingredients
- Cold butter or eggs can hinder proper mixing. Cold ingredients don’t incorporate as well, leading to uneven texture and flavor. Always use room temperature ingredients for the best outcome.
- Not Measuring Ingredients Accurately
- Imprecise measurements can throw off the balance of the recipe. Too much flour may make it dry, while too little sugar will impact sweetness. Use proper measuring tools for consistency.
- Not Checking for Doneness
- Relying solely on time without checking can lead to underbaking or overbaking. Make sure to use a toothpick to test doneness. If it comes out clean, it’s ready to come out of the oven.
- Cooling Too Quickly
- Removing the treat from the pan while it’s still very hot may cause it to break apart. Allow it to cool briefly in the pan first to help maintain its structure before transferring it to a rack.
Variations & Substitutions
Consider adding nuts or chocolate chips for extra texture and flavor. You can also include citrus zest for a refreshing twist. If you’re feeling adventurous, incorporating spices like cinnamon can add warmth to the flavor profile.
Storage & Reheating
For room-temperature storage, place the treat in an airtight container. It remains fresh for a couple of days. In the refrigerator, it can last about a week, so keep it covered to avoid drying out. For longer storage, freezing is an option; wrap it tightly in plastic wrap and foil. To reheat, simply warm it gently in the oven to restore its original texture.
Nutrition Information
Nutrition values are estimates and may vary based on ingredients used.
Frequently Asked Questions
Can I make this recipe ahead of time?
Yes, you can prepare this recipe a day in advance. Bake and let it cool completely before covering it and storing it at room temperature. This allows the flavors to develop further.
How long does it last in the fridge?
Stored in the refrigerator, this treat will last about a week. Make sure to keep it in an airtight container to maintain its moisture and prevent it from drying out.
Can I freeze this recipe?
Freezing is a great option! Wrap the baked treat tightly in plastic wrap and aluminum foil. It can be frozen for up to three months. Thaw it in the refrigerator before enjoying it.
What can I substitute for one ingredient?
If you need a substitution, you could replace milk with a non-dairy alternative, like almond or oat milk, to fit dietary preferences without compromising texture.
Why didn’t my recipe turn out as expected?
There are a few possible reasons, such as incorrect measurements, not preheating the oven, or not using room temperature ingredients. Check these aspects if your treat doesn’t turn out as planned.
Final Thoughts
Making this bridal shower treat is a fulfilling experience that can bring smiles to gatherings. The simple process allows anyone to enjoy creating something delicious and inviting. Whether served warm or at room temperature, it has a timeless charm that resonates at any event. Remember, every bake is a lesson learned, and with practice, you’ll continue to improve and enjoy this comforting recipe.

Bridal Shower Treat
Ingredients
Dry Ingredients
- 2 cups Flour Provides structure to the treat.
- 1 cup Sugar Adds sweetness.
- 2 teaspoons Baking powder Acts as a leavening agent.
- 1 teaspoon Salt Enhances flavor.
Wet Ingredients
- 1/2 cup Butter Provides moisture; use at room temperature.
- 2 large Eggs Acts as a binding agent.
- 1 teaspoon Vanilla extract Adds flavor.
- 1/2 cup Milk Provides moisture; can substitute with non-dairy.
Instructions
Preparation
- Preheat your oven to the required temperature.
- In a mixing bowl, combine the flour, sugar, baking powder, and salt.
- In a separate bowl, cream the butter until smooth.
- Add in the eggs one at a time, mixing thoroughly after each addition.
- Stir in the vanilla extract.
Mixing
- Gradually add the dry mixture to the wet ingredients, alternating with the milk.
- Mix just until combined, avoiding over-mixing.
Baking
- Pour the batter into the prepared baking pan, leveling it with a spatula.
- Bake until golden brown and a toothpick inserted in the center comes out clean.
- Allow to cool in the pan for a short time before transferring to a wire rack.
Serving
- Slice the cooled treat into portions and serve.


