There’s something comforting about a simple dessert that can bring a bit of sweetness to any moment. Cherry pie bars are a delightful way to enjoy the familiar flavors of cherry pie in a more approachable form. They fit perfectly into a weekday dessert lineup or can be a lovely addition to gatherings with friends and family. Their straightforward preparation makes them a reliable choice for both quiet evenings and busy weekends. Let’s dive into making these easy treats that offer a touch of nostalgia.
Why You’ll Love This Cherry Pie Bars
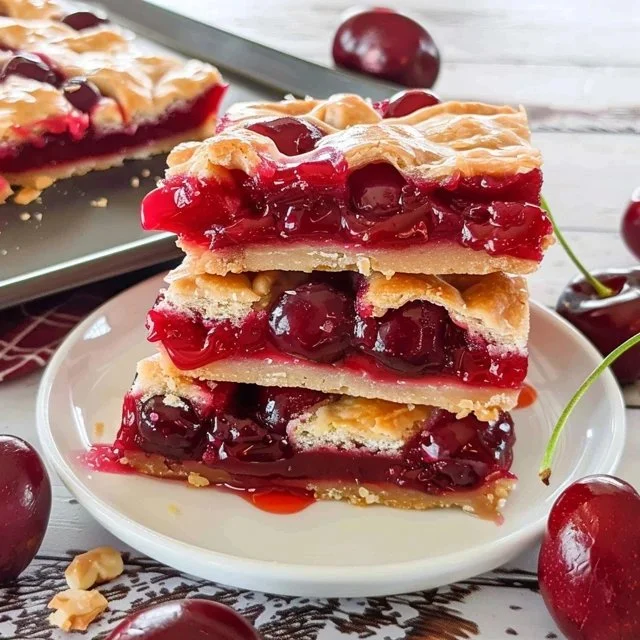
These cherry pie bars are not only easy to prepare, but they also deliver comfort through their balanced flavors and satisfying texture. The buttery crust complements the tart cherry filling beautifully, making them a delightful addition to any occasion. With their practicality and simple ingredients, they’ll quickly become a favorite in your dessert rotation.
Kitchen Tools You’ll Need
- Mixing bowl
- Baking pan (9×13 inch)
- Measuring cups
- Measuring spoons
- Whisk or spatula
Ingredients
- 1 cup unsalted butter, barely softened (provides moisture and richness)
- ¾ cup granulated sugar (adds sweetness and structure)
- 1 teaspoon vanilla extract (enhances flavor)
- ½ teaspoon almond extract (adds a subtle nutty flavor)
- 2 cups all-purpose flour (forms the base structure)
- ½ teaspoon baking powder (helps with rising)
- ¾ teaspoon fine sea salt or table salt (balances sweetness)
- 21 ounces cherry pie filling (1 can) (offers moisture and flavor)
- ½ cup powdered sugar (used for icing, adds sweetness)
- ¼ teaspoon almond extract or vanilla extract (light flavor note in the icing)
- 1 tablespoon milk or cream (adjusts the icing consistency)

How to Make Cherry Pie Bars
Step 1. In a mixing bowl, cream together the softened butter and granulated sugar until the mixture is smooth and slightly fluffy. This process is vital for incorporating air into your batter, which contributes to a tender crust. You’re looking for a pale, creamy texture that has lightened in color, indicating it’s ready for the next step.
Step 2. Add the vanilla extract and almond extract to the butter-sugar mixture, mixing well until fully combined. Both extracts contribute to the overall flavor of the bars, creating a warm and inviting aroma. Make sure there are no streaks of vanilla or almond remaining in the mixture, ensuring an even flavor throughout.
Step 3. In a separate bowl, whisk together the all-purpose flour, baking powder, and salt. This step helps distribute the baking powder and salt evenly within the flour, which is essential for proper leavening. The mixture should be well combined with no visible clumps of baking powder or salt before you add it to the wet ingredients.
Step 4. Gradually add the dry ingredients to the butter-sugar mixture. Stir with a spatula or wooden spoon until the flour is just incorporated, and the dough starts to come together. You want to stop mixing when you can still see a bit of flour, as over-mixing can lead to a tougher texture in the final product.
Step 5. Reserve about one cup of the dough for the topping, then press the remaining dough evenly into the bottom of a greased 9×13-inch baking pan. This forms the base of your bars, and it should be pressed firmly to create an even layer. Aim for a smooth surface that extends to the edges of the pan.
Step 6. Spread the cherry pie filling evenly over the pressed dough. The filling not only adds flavor but also moisture, ensuring that the bars remain tender. You want to cover the entire surface of the dough without leaving any gaps, allowing the cherries to seep into the crust slightly as they bake.
Step 7. Crumble the reserved dough over the cherry filling evenly. This should create a rustic, topping effect that will bake up into a nice, golden layer. Make sure to leave some space between clumps to allow for even baking and to let the filling peek through.
Step 8. Place the baking pan in a preheated oven and bake until the topping is lightly golden and the filling is bubbling. A visual cue to watch for is the color of the topping. If it’s uniformly golden and you see the filling bubbling around the edges, your bars are likely done.
Step 9. Remove the pan from the oven and allow the bars to cool completely before cutting into squares. This rest period helps the bars firm up, making them easier to slice. The filling will set a bit more as it cools, which is important for maintaining the shape of each bar.
Step 10. In a small bowl, mix the powdered sugar, almond or vanilla extract, and milk or cream to create a smooth icing. Drizzle this over the cooled bars for a sweet finish. The icing should be thick yet pourable, adding a lovely touch of sweetness that complements the tartness of the cherries.

Serving Suggestions
These cherry pie bars are versatile and can easily fit into your daily routine. Serve them as a delightful breakfast treat alongside coffee, or offer them as an after-school snack for the kids. They’re also perfect for family gatherings and potlucks, where they can serve as a comforting dessert. If you have any leftovers, they store well for a few days, maintaining their flavor and texture for a grab-and-go treat later on.
Pro Tips for Best Results
- Ensure your butter is only barely softened to avoid a greasy crust.
- Mix the dry and wet ingredients separately before combining for a more even texture.
- Allow the bars to cool completely for cleaner cuts.
- Drizzle the icing just before serving for a fresher look.
- Store bars in an airtight container to maintain freshness.
Common Mistakes to Avoid
- Using too soft butter: This can lead to a greasy texture. Use butter that’s just softened, not melted.
- Overmixing the dough: This can result in a tough crust. Mix until just combined for the best texture.
- Skipping the cooling step: Trying to cut warm bars will result in messiness. Cooling helps them set properly.
- Ignoring visual cues: Baking time can vary; always look for golden topping and bubbling filling for doneness.
- Not reserving enough dough for topping: If you crumble too much dough into the base, there won’t be enough for a good topping.
- Not checking for flavor balance: Be cautious with extracts; too much can overpower the cherries. Stick to the recommended amounts.
Variations & Substitutions
If you want to mix things up, consider swapping the cherry filling for another fruit filling like blueberry or peach. You can also adjust the extracts slightly for a different flavor profile, balancing between almond and vanilla. Lastly, adding a sprinkle of chopped nuts on top can add a nice crunch if you’re looking for an extra texture.
Storage & Reheating
Store cherry pie bars at room temperature in an airtight container for up to three days. If you’d like them to last longer, refrigerate them for up to a week. To enjoy them warm again, simply pop them in the microwave for a few seconds. This gentle reheating helps maintain their original texture and makes the filling pleasantly gooey again.
Nutrition Information
Per serving:
Calories: 320
Total Fat: 15g
Saturated Fat: 9g
Carbohydrates: 45g
Fiber: 1g
Sugar: 24g
Protein: 2g
Sodium: 200mg
Frequently Asked Questions
Can I make this recipe ahead of time?
Yes, these cherry pie bars can be made ahead and stored in an airtight container. They taste great after a day or two as the flavors meld together.
How long does it last in the fridge?
In the refrigerator, your cherry pie bars can last for up to a week. Just make sure they’re well-covered to keep them fresh.
Can I freeze this recipe?
Yes, you can freeze the baked and cooled bars. Wrap them tightly in plastic wrap and then in aluminum foil. They will keep for up to three months.
What can I substitute for one ingredient?
If you need to replace the almond extract, you can use additional vanilla extract for a slightly different flavor.
Why didn’t my recipe turn out as expected?
Common issues include using overly soft butter, overmixing the dough, or not letting the bars cool completely before cutting. Following the recipe closely will help ensure better results.
Final Thoughts
Making cherry pie bars can be a delightful and straightforward experience. They’re perfect for sharing or enjoying in a quiet moment at home with a cup of tea. With essence of cherry in every bite and a tender, crumbly crust, these bars are sure to be a comforting addition to your dessert repertoire. Relax, allow yourself to savor the process, and enjoy the delicious outcome.

Cherry Pie Bars
Ingredients
For the crust and topping
- 1 cup unsalted butter, barely softened provides moisture and richness
- ¾ cup granulated sugar adds sweetness and structure
- 1 teaspoon vanilla extract enhances flavor
- ½ teaspoon almond extract adds a subtle nutty flavor
- 2 cups all-purpose flour forms the base structure
- ½ teaspoon baking powder helps with rising
- ¾ teaspoon fine sea salt or table salt balances sweetness
- 1 can (21 ounces) cherry pie filling offers moisture and flavor
- ½ cup powdered sugar used for icing, adds sweetness
- ¼ teaspoon almond extract or vanilla extract light flavor note in the icing
- 1 tablespoon milk or cream adjusts the icing consistency
Instructions
Preparation
- In a mixing bowl, cream together the softened butter and granulated sugar until smooth and slightly fluffy.
- Add the vanilla extract and almond extract, mixing well until fully combined.
- In a separate bowl, whisk together the all-purpose flour, baking powder, and salt.
- Gradually add the dry ingredients to the butter-sugar mixture and stir until just incorporated.
- Reserve about one cup of the dough for the topping, then press the remaining dough evenly into the bottom of a greased 9×13-inch baking pan.
- Spread the cherry pie filling evenly over the pressed dough.
- Crumble the reserved dough over the cherry filling evenly.
- Place the baking pan in a preheated oven and bake until the topping is lightly golden and the filling is bubbling.
- Remove the pan from the oven and allow the bars to cool completely before cutting into squares.
- In a small bowl, mix powdered sugar, almond or vanilla extract, and milk or cream to create icing. Drizzle over the cooled bars.


