I watched this Christmas Cake Pops recipe on YouTube and decided to try it the next morning. My kitchen filled with the sweet scent of vanilla, and I felt so festive. I did make one mistake — I dipped the pops before they were fully chilled, and a few fell apart! But that’s how we learn. The next batch turned out perfect. Don’t stress if yours aren’t flawless — every try makes you better. Keep practicing and enjoy the sweetness of the process!
Why You’ll Love This Recipe
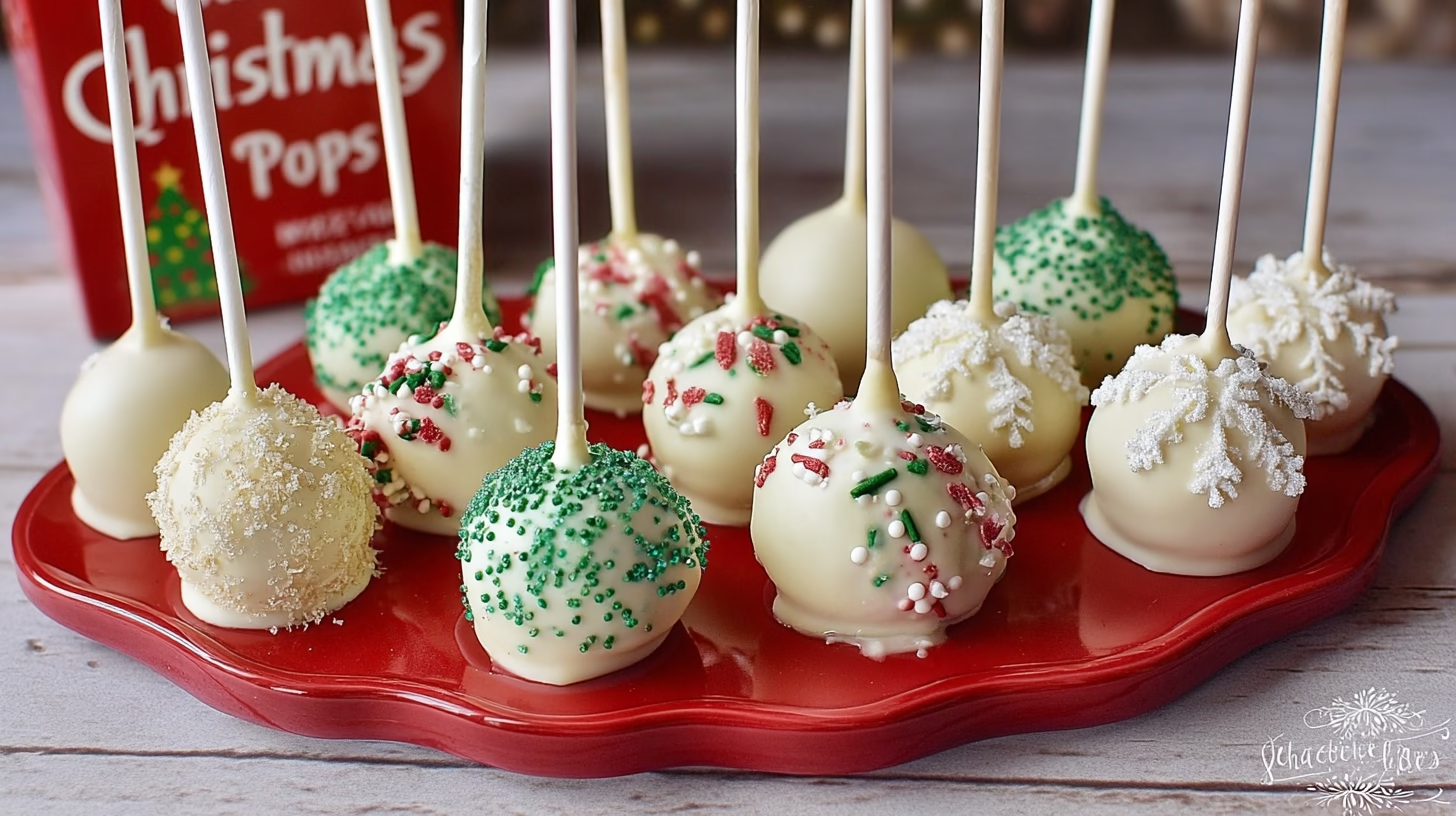
You’ll love this recipe because it’s pure holiday fun — simple, nostalgic, and made for sharing. With just a few ingredients, you can transform store-bought treats into adorable Xmas-themed desserts that look and taste like they came straight from Santa’s workshop. They’re also a hit with both kids and adults, especially when you need a last-minute winter party dessert that looks impressive but takes minimal effort.
Ingredients (Detailed & Humanized)
- 5 Little Debbie Christmas Tree Cakes – these nostalgic little cakes are the heart of the recipe. Their soft, fluffy texture and buttery sweetness make the perfect base for cake pops, with a hint of festive frosting that melts into the mixture beautifully.
- 10 oz white chocolate melting wafers – smooth, creamy, and easy to work with, these wafers create that signature glossy shell that gives each pop its irresistible crunch.
- Green sprinkles – bright and cheerful, they add a playful sparkle that instantly makes these pops feel like Christmas. The pop of color brings your holiday dessert table to life.
- Red icing (optional) – a fun nod to the classic Little Debbie tree design, this adds the final touch of whimsy and festive color. It’s optional but makes your cake pops truly sparkle with holiday charm.
Directions (Step-by-Step Cooking Guide)
1. Break down the cakes: Unwrap the Little Debbie Christmas Tree Cakes and place them into a large mixing bowl. Using a spatula or the back of a spoon, cut and press them until the mixture becomes soft and crumbly. The frosting inside will help everything blend together.
2. Form the base: Once the cakes are crushed, use your hands to knead the mixture. It should start to feel sticky and cohesive, almost like cookie dough. This is when the magic starts — everything coming together into one sweet, festive dough.
3. Shape the cake pops: Pinch off small portions of the dough and roll them between your palms until smooth and round. Aim for uniform sizes so they chill evenly. Place each ball onto parchment paper to prevent sticking and to keep your counter mess-free.
4. Add the sticks: Melt just a few wafers of white chocolate in the microwave or over low heat. Dip the tip of each lollipop stick into the melted chocolate, then gently insert it halfway into the cake ball. This little step acts like glue, helping your pops stay put when you dip them later.
5. Chill and set: Transfer the tray of cake pops to the refrigerator for about 30 minutes. This helps them firm up, making the dipping process smoother and keeping them from falling apart.
6. Coat in chocolate: Melt the rest of your white chocolate in a tall, narrow cup or measuring glass. This shape makes it easier to fully submerge each pop. Dip one cake pop at a time, swirling it gently to coat it evenly. Let the extra chocolate drip off — patience here gives you that perfectly smooth, shiny finish.
7. Decorate: Before the coating sets, sprinkle green sugar or add small lines of red icing across the surface to mimic the festive stripes of the original Little Debbie cakes. You can let them dry upright by placing the sticks into a block of Styrofoam, or lay them carefully on parchment paper for a flat-backed look.
8. Final chill: Once decorated, pop the cake pops back into the fridge for another 30 minutes to set completely. When the coating hardens and your sprinkles shimmer, they’re ready to serve. These Christmas Cake Pops are sweet, playful, and sure to bring smiles to any winter celebration — a bite-sized reminder of holiday joy!
Cultural or Technique Note
Cake pops became popular thanks to their playful presentation and no-fuss charm — a perfect example of modern American holiday creativity. This version, inspired by Little Debbie’s nostalgic Christmas Tree Cakes, captures that cozy blend of convenience and tradition. They’re a delightful cross between classic home baking and festive, store-bought joy.
Serving Suggestions
- Display on a holiday dessert board for a fun, festive touch
- Wrap individually in cellophane and tie with a ribbon for gifts
- Serve with hot cocoa or peppermint coffee at winter gatherings
- Arrange upright in a jar filled with sugar for a snowy, decorative effect
Pro Tips for Success
- Chill before dipping: Cold cake pops hold their shape and coat more evenly.
- Use a tall glass for dipping: It helps achieve a smooth, even chocolate coating.
- Don’t rush the chilling: Allow the coating to set completely for best results.
- Decorate quickly: Add sprinkles before the chocolate hardens.
- Work in batches: Keep some pops refrigerated while you dip the others.
- Be gentle: When inserting sticks, twist slightly instead of pushing straight down to avoid cracking.
Common Mistakes to Avoid
Overmixing the cake: When breaking down the Little Debbie cakes, it’s easy to go too far and end up with a mushy texture. You want the mixture to be soft and sticky — not wet or runny. Stop mixing as soon as it holds together when pressed.
Skipping the chilling step: This is one of the biggest mistakes beginners make! Warm cake pops are fragile and will fall apart when dipped into melted chocolate. Always chill for at least 30 minutes before coating.
Using thick chocolate: If your chocolate feels too heavy or clumpy, it won’t give you that smooth, glossy finish. Add a teaspoon of shortening or coconut oil to thin it out — it makes dipping effortless and results in a perfect shell.
Handling too soon: The chocolate coating might look set, but it can still be soft underneath. Give your cake pops enough time to harden completely before moving or packaging them. This keeps the surface shiny and prevents fingerprints or smudges.
Over-decorating: More isn’t always better! Piling on too many sprinkles, icing lines, or toppings can make your coating uneven or cause the pops to feel heavy. Stick to simple, festive touches — a few green sprinkles or neat red stripes are all you need for a polished, classic look.
Storage & Reheating
Fridge: Store the cake pops in an airtight container for 3–4 days. You can line the container with parchment paper to keep them from sticking or smudging.
Freezer: For longer storage, freeze in a sealed container or freezer bag for up to 2 months. Thaw them in the fridge overnight before serving — they’ll taste freshly made!
Reheat: No need to reheat — these are best enjoyed chilled or at room temperature. The coating stays crisp, and the centers remain soft and fudgy.
Frequently Asked Questions (FAQ)
Q1: Can I use different flavors of Little Debbie cakes?
Definitely! Swap the Christmas Tree Cakes for Birthday Cakes, Valentine’s Hearts, or Zebra Cakes — each gives a fun, new twist to the recipe.
Q2: Can I make these without sticks?
Yes! You can roll the mixture into small balls and dip them with a fork for cake truffles. They’re just as delicious and even easier to store.
Q3: What if my cake pops fall apart while dipping?
That usually means they’re too warm. Pop them back in the fridge or even the freezer for a few minutes until they firm up again — then try dipping.
Q4: How far ahead can I make these for a party?
These cake pops are perfect for prepping in advance. You can make them 1–2 days ahead and keep them chilled. If you’re decorating, do it closer to serving time so the colors stay bright and fresh.
Q5: Can I color the white chocolate coating?
Yes, but make sure to use oil-based or candy coloring, not water-based food dye. Regular food coloring can cause the chocolate to seize. A soft pastel blue or frosty mint green also makes these pops perfect for Frozen-inspired or winter wonderland themes!
Closing Paragraph
These Christmas Cake Pops are the kind of treat that instantly brings back childhood memories — cheerful, easy, and brimming with holiday spirit. Whether you’re making them with your kids, gifting them to friends, or adding them to your winter dessert spread, they’ll bring a smile to everyone who tries them. Feel free to play with sprinkles, icing, or colors to make them your own version of holiday magic.
Final Thoughts
I love how these cake pops combine nostalgia with creativity — a quick, festive project that looks beautiful on any Christmas table. They’re proof that sometimes the simplest recipes create the happiest moments. So put on your favorite holiday playlist, melt that chocolate, and start dipping.

Christmas Cake Pops
Equipment
- Microwave-safe bowl
- Mixing Bowl
- Lollipop sticks
- Parchment Paper
- Styrofoam block (optional)
Ingredients
Main Ingredients
- 5 Little Debbie Christmas Tree Cakes
- 10 oz white chocolate melting wafers plus a few extra for sticks
- green sprinkles for decoration
- red icing optional, for drizzling
Instructions
- Unwrap the cakes and place them in a large bowl. Break them down with a spoon until soft and combined.
- Knead the mixture with your hands until it holds together like dough.
- Roll into uniform balls and place on parchment paper.
- Melt a few chocolate wafers. Dip lollipop sticks in chocolate and insert halfway into each ball.
- Chill cake pops in the fridge for 30 minutes until firm.
- Melt remaining white chocolate in a tall cup. Dip each chilled pop to coat, letting excess drip off.
- Quickly decorate with green sprinkles and red icing. Place upright in Styrofoam or lay on parchment to set.
- Chill again for 30 minutes until fully set. Serve and enjoy!


