
There’s something calming about preparing a dessert that feels familiar yet simple. These mini cheesecakes are perfect for unwinding after a long day or for adding a sweet touch to a weekend gathering. They offer a flexible option for both quiet moments alone and cheerful family meals. With their comforting texture and ease of preparation, you can feel at home while making them. Let’s step into the kitchen together and create something enjoyable.
Why You’ll Love This Gluten-Free Mini Cheesecakes
These gluten-free mini cheesecakes strike a wonderful balance of rich creaminess and a hint of sweetness. They are easy to make and are a reliable dessert option for a variety of occasions. Their comforting flavor makes them ideal for those looking for a satisfying treat without much fuss. This recipe will earn its place in your collection, offering practical everyday value.
Kitchen Tools You’ll Need
- Muffin pan
- Mixing bowls
- Electric mixer (or whisk)
- Measuring cups and spoons
- Silicone spatula
Ingredients
- 1¼ cup gluten-free graham cracker crumbs (adds structure and crunch)
- 2 tbsp light brown sugar (enhances sweetness and flavor)
- 5 tbsp butter, melted (provides moisture and richness)
- 16 oz. cream cheese, room temperature (gives creamy texture)
- ½ cup sour cream, room temperature (adds tanginess and creaminess)
- 2 large eggs, room temperature (binds ingredients for structure)
- ½ cup granulated sugar (sweetens and balances flavors)
- 2 tsp pure vanilla extract (imparts fragrance and depth)
- 1 tsp lemon juice (adds brightness and balances richness)

How to Make Gluten-Free Mini Cheesecakes
Step 1. Begin by preheating your oven to 325°F. This ensures that the mini cheesecakes will bake evenly, creating a creamy texture throughout. While the oven warms up, you can prepare the crust.
Step 2. In a mixing bowl, combine 1¼ cup of gluten-free graham cracker crumbs with 2 tablespoons of light brown sugar. The brown sugar adds a pleasant hint of caramel flavor. Mix them together well until evenly blended.
Step 3. Pour in 5 tablespoons of melted butter into the crumb mixture. This addition will help the crust hold together when it’s baked. Stir until all the crumbs are thoroughly coated and the mixture is moist.
Step 4. Press the crumb mixture into the bottom of a muffin pan to create a firm layer. It helps to use the bottom of a measuring cup to ensure an even and compact crust. This step helps to form a sturdy base for your mini cheesecakes.
Step 5. Bake the crust in the preheated oven for about 8-10 minutes or until slightly golden. This will help set the crust and give it a slightly crispy texture, which balances the creaminess of the filling.
Step 6. Meanwhile, in a separate bowl, beat together 16 oz. of cream cheese and ½ cup of granulated sugar until smooth. The cream cheese should be at room temperature, ensuring a lump-free filling. Wait until it is creamy and no longer grainy.
Step 7. Add in ½ cup of sour cream, 2 large eggs, 2 teaspoons of pure vanilla extract, and 1 teaspoon of lemon juice. Incorporating these ingredients will further enhance the flavor and create a smooth filling. Mix well until everything is fully combined and creamy.
Step 8. Pour the filling evenly over the baked crust in the muffin pan. Spreading it gently will keep the filling smooth and prevent the crust from breaking apart. Ensure the filling is evenly distributed for consistent baking.
Step 9. Return the cheesecake to the oven and bake for another 18-20 minutes. You’ll know they’re ready when the edges are set but the centers still have a slight jiggle. This will create the right creamy texture once cooled.
Step 10. Once baked, remove the mini cheesecakes from the oven and allow them to cool at room temperature before chilling in the refrigerator. Cooling them gradually will help maintain their structure and prevent them from cracking as they set.

Serving Suggestions
These mini cheesecakes are delightful for multiple occasions. They make a perfect dessert for breakfast gatherings, providing a sweet yet light option to start the day. Enjoy them as a snack with a cup of coffee or for family dinners, offering a touch of indulgence. If you find yourself with leftovers, they can easily be stored for a later pick-me-up treat.
Pro Tips for Best Results
- Ensure all ingredients are at room temperature, which helps the mixture come together smoothly.
- Avoid overmixing the cream cheese to prevent incorporating too much air, which can lead to cracks.
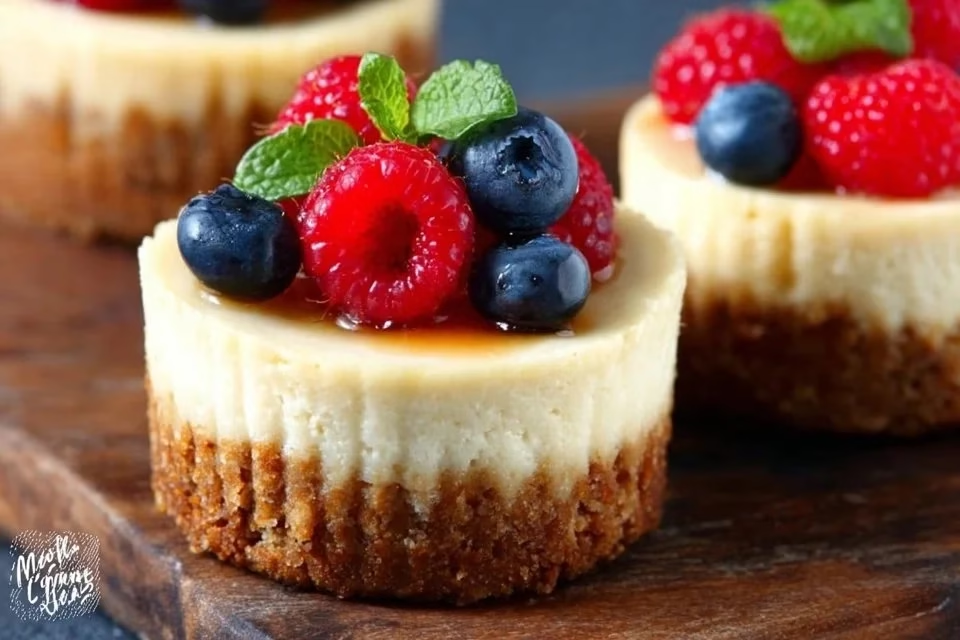
- For a decorative finish, consider topping with fresh fruit or a light drizzle of chocolate sauce before serving.
- Let the cheesecakes cool completely before refrigerating to maintain their texture.
- When removing the mini cheesecakes from the muffin pan, run a knife along the edges for easy release.
Common Mistakes to Avoid
- Not using room temperature ingredients: Cold ingredients can lead to a lumpy filling. Always let your cream cheese, sour cream, and eggs come to room temperature before mixing.
- Overmixing: Be careful not to overmix the filling. This can put too much air into the batter, resulting in cracked tops while baking. Mix just until combined.
- Baking at too high of a temperature: Baking at high temperatures can cause the cheesecakes to puff up and crack. Stick to the recommended temperature for a gentle bake.
- Not cooling properly: Cooling your cheesecakes gradually helps prevent cracking. Let them cool at room temperature before chilling.
- Skipping the crust preparation: If the crust is not well-prepared or pressed firmly, it may crumble when you try to serve. Press it down firmly for a sturdy base.
- Not monitoring baking time: Every oven bakes differently. Check for doneness based on the visual cues for a perfect creamy center and golden edges.
Variations & Substitutions
For a different flavor profile, consider adding a fruit puree to the filling. You can also incorporate chocolate chips for a richer taste. Feel free to experiment with toppings such as crushed nuts or shredded coconut for added texture. Remember to stay within the basic structure for the best results.
Storage & Reheating
Store your mini cheesecakes at room temperature for a short time, but they are best kept in the refrigerator if you’ll enjoy them later. Place them in an airtight container to maintain freshness. If you want to keep them longer, they can be frozen for several weeks. To reheat, allow them to thaw in the refrigerator, avoiding the microwave to maintain their creamy texture.
Frequently Asked Questions
Can I make this recipe ahead of time?
Yes, these mini cheesecakes can be made a day in advance. Just keep them refrigerated until you’re ready to serve for the best flavor and texture.
How long does it last in the fridge?
These mini cheesecakes can be stored in the refrigerator for about 4-5 days. Make sure to keep them in an airtight container to maintain freshness.
Can I freeze this recipe?
Yes, you can freeze the mini cheesecakes for up to two months. Wrap them tightly in plastic wrap before placing them in a freezer-safe container.
What can I substitute for one ingredient?
If you’re looking to substitute an ingredient, consider using Greek yogurt instead of sour cream for a tangy twist while maintaining the same creamy texture.
Why didn’t my recipe turn out as expected?
If your cheesecake didn’t set properly or cracked, it might be due to overmixing or not using room temperature ingredients. Both factors can lead to texture issues.
Final Thoughts
Making these gluten-free mini cheesecakes is a rewarding experience that combines simplicity with satisfying flavors. The ease of preparation makes them a great choice for both everyday enjoyment and special occasions. Each bite offers rich creaminess while remaining approachable for any home cook. You’ll find comfort in creating and sharing these delightful treats.

Gluten-Free Mini Cheesecakes
Ingredients
For the crust
- 1.25 cups gluten-free graham cracker crumbs adds structure and crunch
- 2 tablespoons light brown sugar enhances sweetness and flavor
- 5 tablespoons butter, melted provides moisture and richness
For the filling
- 16 oz cream cheese, room temperature gives creamy texture
- 0.5 cups sour cream, room temperature adds tanginess and creaminess
- 2 large eggs, room temperature binds ingredients for structure
- 0.5 cups granulated sugar sweetens and balances flavors
- 2 teaspoons pure vanilla extract imparts fragrance and depth
- 1 teaspoon lemon juice adds brightness and balances richness
Instructions
Preparation
- Preheat your oven to 325°F.
- In a mixing bowl, combine gluten-free graham cracker crumbs with light brown sugar. Mix well until evenly blended.
- Pour in melted butter into the crumb mixture and stir until all crumbs are coated.
- Press the crumb mixture into the bottom of a muffin pan to create a firm layer.
- Bake the crust in the preheated oven for about 8-10 minutes or until slightly golden.
Filling
- In a separate bowl, beat together cream cheese and granulated sugar until smooth.
- Add in sour cream, eggs, vanilla extract, and lemon juice. Mix well until fully combined.
- Pour the filling evenly over the baked crust in the muffin pan.
- Return to the oven and bake for another 18-20 minutes.
- Remove from the oven and allow to cool at room temperature before chilling in the refrigerator.


