
There’s something comforting about baking, especially when it comes to classic treats like cookies. This recipe offers a delightful twist—a cake bar that embodies the essence of a sugar cookie, topped with a creamy frosting. Ideal for weeknights, weekends, gatherings, or those quiet moments when you simply want to enjoy something sweet, these bars are both simple to make and satisfyingly delicious. They bring a sense of familiarity and warmth to any occasion. Let’s dive into how to create these comforting cake bars together.
Why You’ll Love This The Best Frosted Sugar Cookie Cake Bars
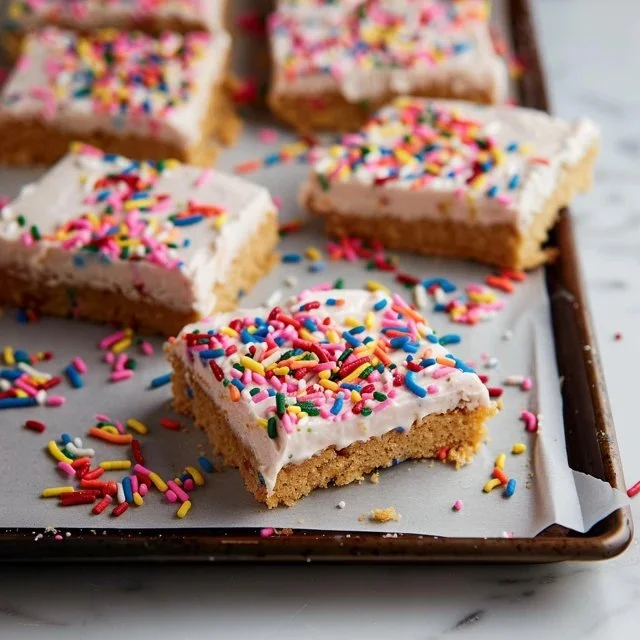
These frosted sugar cookie cake bars are not only easy to make, but their balanced flavors provide a comforting treat that’s perfect for any day. With a soft, chewy texture and a hint of sweetness from the frosting, they make a wonderful addition to everyday desserts or special occasions. Their reliable nature means you can count on them to bring joy and satisfaction to your family and friends.
Kitchen Tools You’ll Need
- Mixing bowls
- Measuring cups
- Measuring spoons
- Baking pan
- Spatula
- Whisk or electric mixer
Ingredients
- 1 ½ cups gluten free flour blend (for structure and moisture)
- 1 ½ teaspoons baking powder (for leavening)
- ¼ teaspoon salt (to balance sweetness)
- ½ cup unsalted butter, room temperature (for richness and texture)
- ½ cup granulated sugar (for sweetness)
- ½ cup light brown sugar, packed (for additional moisture and flavor)
- 1 tablespoon Bob’s Red Mill Egg Replacer mixed with 2 tablespoons water (to help bind)
- 1 teaspoon vanilla extract (for flavor)
- ½ cup unsalted butter, room temperature (for frosting, adds creaminess)
- 1 ½ cups powdered sugar (for sweetness and smooth frosting)
- 1-2 tablespoons whole milk (to adjust frosting consistency)
- Food coloring (optional, for decorative touch)

How to Make The Best Frosted Sugar Cookie Cake Bars
Step 1. Begin by preheating your oven and preparing a baking pan—this will set the stage for a smooth baking process. Grease the pan lightly to ensure that the bars can be removed easily once baked.
Step 2. In a mixing bowl, combine the gluten free flour blend, baking powder, and salt. Whisk them together until evenly mixed, ensuring that the leavening agent is well distributed. This will help your bars rise properly and develop the right texture.
Step 3. In another bowl, beat the unsalted butter with the granulated and brown sugars until the mixture becomes light and fluffy. This step is important as it incorporates air into the butter, contributing to a tender texture in the finished bars.
Step 4. Next, mix in the egg replacer and vanilla extract until they are fully integrated into the buttery mixture. This will provide the necessary binding and add a familiar sweetness and flavor to the cake bars.
Step 5. Gradually incorporate the dry ingredients into the wet mixture. Stir gently until just combined—observe the batter as it comes together smoothly, ensuring not to overmix, which could affect the final texture.
Step 6. Spread the batter evenly into the prepared baking pan. Use a spatula to smooth the top, which helps create an even baking surface. Watch for any lumps or pockets to ensure a consistent bake.
Step 7. Bake until the edges are lightly golden and a toothpick inserted in the center comes out clean. The bars should feel set, but still soft. Allowing them to cool in the pan afterward will help them maintain their shape.
Step 8. While the bars cool, prepare the frosting by beating together the unsalted butter and powdered sugar until fluffy. Gradually add in the milk until you achieve a smooth and spreadable consistency, adjusting as needed for your preferred thickness.
Step 9. Once the bars have cooled, gently frost the top with the creamy mixture. Use a spatula to spread it evenly across the surface, adding additional swirls or designs if desired.
Step 10. If desired, add a few drops of food coloring to the frosting and gently swirl it in to create a marbled effect. This can add a fun visual element to your frosted bars.
Step 11. Cut into squares or rectangles before serving for easy enjoyment. Enjoy these cake bars with your family, as they are sure to become a favorite treat.

Serving Suggestions
These frosted sugar cookie cake bars are versatile enough for various occasions and times of day. They make a delightful breakfast treat alongside coffee or tea. Enjoy them as an after-school snack for kids, or serve them at family gatherings and celebrations. Leftover bars can easily be packed for lunch or enjoyed as a sweet pick-me-up any time of day. Their cheerful appearance and delicious flavor make them perfect for sharing.
Pro Tips for Best Results
- Ensure your butter is truly at room temperature for easier blending with sugars.
- When mixing the dry ingredients, whisk well to avoid clumping, especially with gluten-free flour.
- Allow the bars to cool completely before frosting to prevent melting the frosting.
- Adjust the milk in the frosting gradually to achieve your desired consistency.
- Use an offset spatula for easier spreading of the frosting.
Common Mistakes to Avoid
- Using cold butter: If the butter isn’t at room temperature, it won’t cream properly, leading to dense bars. Allow the butter to sit out for about 30 minutes before using it.
- Overmixing the batter: When dry ingredients are added to the wet mixture, mixing excessively can create tough bars. Mix just until combined to keep them tender.
- Not letting the bars cool: Frosting warm bars can cause the frosting to melt and slide off. Be sure they are fully cooled for a nice finish.
- Incorrect measuring of flour: Gluten-free flour can vary, leading to too much or too little flour in your mix. Use a spoon to fill the measuring cup and level it off for accuracy.
- Neglecting the frosting consistency: If the frosting is too thick, it won’t spread well, while too thin frosting can run off the bars. Adjust with milk carefully until it’s just right.
- Skipping the baking powder: This is essential for the rise and texture of the bars. Double-check that your baking powder is fresh to ensure proper leavening.
Variations & Substitutions
Consider adding chocolate chips or sprinkles to the batter for a fun twist. For a citrusy touch, a bit of lemon or orange zest can brighten the flavor profile of the cake bars. If you prefer a different frosting flavor, experiment with almond or lemon extract in place of vanilla for a unique taste experience.
Storage & Reheating
Store the frosted bars at room temperature in an airtight container for up to 3 days. If you need to keep them longer, they can be refrigerated for about a week. For freezing, wrap the bars tightly in plastic wrap, followed by foil, and they can last for up to a month. To reheat, simply let them sit at room temperature or microwave for a few seconds to soften the texture.
Frequently Asked Questions
Can I make this recipe ahead of time?
Yes, you can prepare the bars a day in advance. They store well at room temperature for a few days once frosted.
How long does it last in the fridge?
When stored properly in an airtight container, the frosted sugar cookie cake bars can last about a week in the refrigerator.
Can I freeze this recipe?
Absolutely! These cake bars freeze well. Wrap them tightly and freeze for up to a month. Thaw in the fridge before serving.
What can I substitute for one ingredient?
If you don’t have an egg replacer, you can use 1/4 cup of unsweetened applesauce or mashed banana, which also helps to bind the ingredients.
Why didn’t my recipe turn out as expected?
This could be due to several factors including measuring errors, incorrect temperatures of ingredients, or not following the mixing instructions closely. Attention to detail is key.
Final Thoughts
Making these frosted sugar cookie cake bars invites a sense of comfort and relaxation into the kitchen. Their approachable recipe allows for creativity while remaining straightforward. Once they’re ready, sharing this treat with family and friends adds to the experience, bringing a moment of joy to any gathering. Enjoy the process and the delicious results.

Frosted Sugar Cookie Cake Bars
Ingredients
For the Cake Bars
- 1 ½ cups gluten free flour blend for structure and moisture
- 1 ½ teaspoons baking powder for leavening
- ¼ teaspoon salt to balance sweetness
- ½ cup unsalted butter, room temperature for richness and texture
- ½ cup granulated sugar for sweetness
- ½ cup light brown sugar, packed for additional moisture and flavor
- 1 tablespoon Bob's Red Mill Egg Replacer mixed with 2 tablespoons water to help bind
- 1 teaspoon vanilla extract for flavor
For the Frosting
- ½ cup unsalted butter, room temperature adds creaminess
- 1 ½ cups powdered sugar for sweetness and smooth frosting
- 1-2 tablespoons whole milk to adjust frosting consistency
- to taste food coloring optional, for decorative touch
Instructions
Preparation
- Begin by preheating your oven and preparing a baking pan—grease it lightly.
- In a mixing bowl, combine the gluten free flour blend, baking powder, and salt, whisking together until evenly mixed.
- In another bowl, beat the unsalted butter with the granulated and brown sugars until the mixture is light and fluffy.
- Mix in the egg replacer and vanilla extract until they are fully integrated.
Baking
- Gradually incorporate the dry ingredients into the wet mixture, stirring gently until just combined.
- Spread the batter evenly into the prepared baking pan and smooth the top with a spatula.
- Bake until the edges are lightly golden and a toothpick inserted in the center comes out clean. Allow to cool in the pan.
Frosting and Serving
- Prepare the frosting by beating together the unsalted butter and powdered sugar until fluffy. Add in milk to achieve desired consistency.
- Once the bars have cooled, gently frost the top with the creamy mixture.
- If desired, add food coloring and gently swirl it into the frosting.
- Cut into squares or rectangles before serving.


