
Why You’ll Love This Recipe
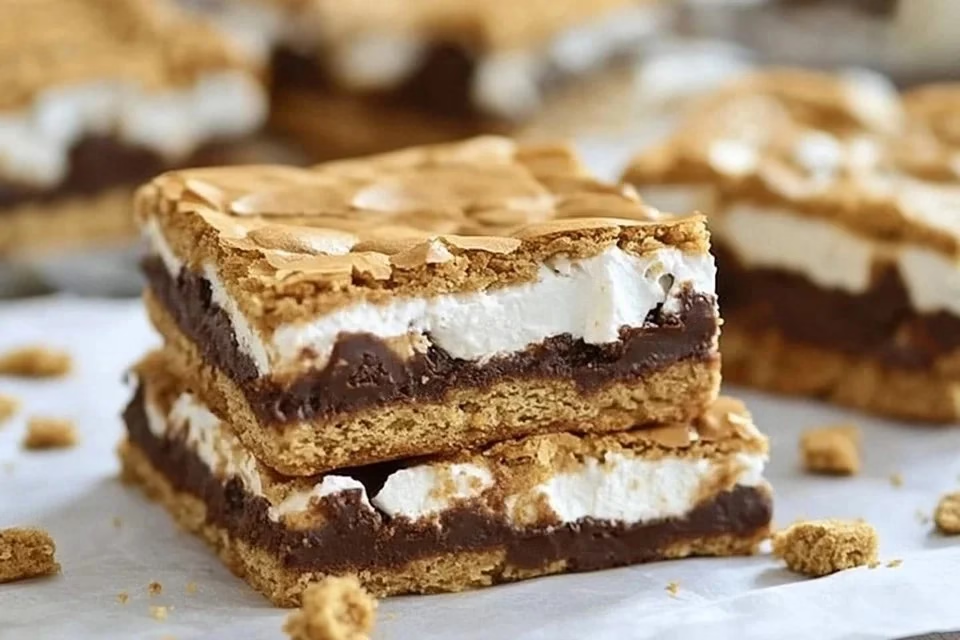
These Gluten-Free S’mores Bars are incredibly easy to make, offering reliable results that anyone can achieve. The combination of crunchy and chewy textures creates a comforting balance of flavors that’s hard to resist. Perfect for everyday enjoyment, this recipe makes it simple to create a satisfying dessert that everyone will appreciate, whether for a quick treat or a family dessert.
Kitchen Tools You’ll Need
- Mixing bowl
- 8×8 baking dish
- Parchment paper (optional for easy removal)
- Whisk or spoon
Ingredients
- 1 1/2 cups gluten-free graham cracker crumbs (for structure)
- 1/2 cup unsalted butter, melted (adds moisture)
- 1/4 cup brown sugar (provides sweetness)
- 1/4 teaspoon salt (enhances flavor)
- 1 cup mini marshmallows (adds chewiness)
- 1 cup chocolate chips (contributes rich flavor)
How to Make Gluten-Free S’mores Bars
Step 1. Start by preheating your oven to 350°F. This ensures that the bars will bake evenly and have the right texture when they come out of the oven. Make sure to give your oven ample time to reach the desired temperature to avoid underbaking or overbaking your s’mores bars.
Step 2. In a mixing bowl, combine the gluten-free graham cracker crumbs, melted unsalted butter, brown sugar, and salt. Stir the mixture together until all the crumbs are evenly moistened and everything is well incorporated. The mixture should resemble wet sand and hold together slightly when compressed.
Step 3. Press the graham cracker mixture firmly into the bottom of an 8×8 baking dish. Use a spatula or the back of a measuring cup to create an even layer. Make sure it fits snugly and is evenly distributed to form a solid base that will hold the bars together once baked.
Step 4. Bake the crust in the preheated oven for about 10 minutes, or until it is slightly golden. Keep an eye on it to prevent burning, as every oven may cook slightly differently. It’s ready when you see a little color, indicating it’s firming up for the next layer.
Step 5. Once the crust is baked, remove it from the oven and sprinkle the mini marshmallows evenly over the top. The marshmallows will soften as they melt, creating that classic s’mores texture. Make sure to cover the crust thoroughly for the best flavor and texture in every bite.
Step 6. Next, sprinkle the chocolate chips evenly over the marshmallows, allowing them to fill in the gaps. The chocolate will layer nicely on top of the marshmallows, providing a gooey texture when baked. It’s essential to spread them out as evenly as possible to enhance the flavors in each bar.
Step 7. Return the dish to the oven and bake for an additional 8 to 10 minutes, until the marshmallows are puffy and lightly golden, and the chocolate is melted. Keep a close eye, as they can go from perfect to overly browned quickly. Once done, remove from the oven and let it cool slightly.
Step 8. Allow the baked bars to cool in the pan for about 10-15 minutes before cutting. This helps them set up properly and makes slicing easier. Lifting the parchment paper (if used) can be helpful, but give them a little time to firm up for cleaner cuts.
Step 9. After the cooling period, slice the bars into squares or rectangles, depending on your preference. A sharp knife will help achieve neat edges. You can serve them warm for melted chocolate and marshmallow goodness, or at room temperature for a more set texture.
Serving Suggestions
These Gluten-Free S’mores Bars are versatile for many occasions. They make an excellent after-school snack, a quick dessert for family dinners, or a sweet addition to potlucks. They’re perfect for breakfast on the go or a delightful treat to accompany your coffee. You can also store them for later, enjoying them as a quick pick-me-up or a late-night indulgence.
Pro Tips for Best Results
- Ensure the butter is fully melted, which helps achieve a cohesive crust.
- Don’t skip the cooling step; allowing the bars to set makes cutting easier and improves texture.
- Experiment with layer thickness for a chewier or crunchier bar.
- Use quality chocolate chips for the best flavor.
- Keep an eye on marshmallows to prevent burning while baking.
- Store bars in an airtight container for freshness.
Common Mistakes to Avoid
- Not Preheating the Oven: Skipping this step may lead to uneven baking, as your bars won’t set correctly. Always preheat to the specified temperature for even results.
- Using Softened Butter Instead of Melted: If the butter isn’t fully melted, the crust won’t hold together well, causing crumbling. Melt the butter completely for the best consistency.
- Overbaking: Leaving the bars in too long can result in hard or dry crust. Stay attentive during the baking process to achieve that perfect golden color.
- Not Pressing the Crust Firmly: Failing to pack the crust can lead to loose bars that fall apart when cut. Make sure to press it down tight for a sturdy base.
- Poor Quality Chocolate: Using low-quality chocolate chips can affect the flavor significantly. Opt for a brand that you know you enjoy for the best results.
- Skipping the Cooling Time: Cutting into the bars while they are still hot can result in mushy pieces. Allow them to cool properly for more beautiful, uniform slices.
Variations & Substitutions
To switch things up, consider adding crushed nuts or coconut flakes to the crust for added texture. For a twist, try using peanut butter chips alongside or instead of chocolate chips. You can also incorporate flavored marshmallows, such as chocolate or strawberry, to bring a new dimension to your bars. Adjusting the sweetness with different sugars, like coconut sugar, can also change the flavor profile.
Storage & Reheating
For room-temperature storage, keep the bars in an airtight container for up to three days. In the refrigerator, they last about a week without losing their texture. If you’d like to freeze them, wrap individual pieces tightly in plastic wrap and place them in a freezer bag. For reheating, pop them in the microwave for 10-15 seconds to achieve that gooey texture without drying them out.
Nutrition Information
Nutrition values are estimates and may vary based on ingredients used.
Frequently Asked Questions
Can I make this recipe ahead of time?
Yes, you can prepare the bars a day in advance. After baking and cooling, store them in an airtight container at room temperature or in the fridge for optimal freshness.
How long does it last in the fridge?
Stored properly, these s’mores bars can last up to a week in the refrigerator. Just be sure to keep them in an airtight container to maintain their texture.
Can I freeze this recipe?
Absolutely! You can freeze the bars for up to three months. Wrap them tightly to prevent freezer burn, and allow them to thaw at room temperature before enjoying.
What can I substitute for one ingredient?
If you don’t have gluten-free graham cracker crumbs, you can use almond flour mixed with a bit of sugar and melted butter for a similar crust.
Why didn’t my recipe turn out as expected?
Common issues may stem from incorrect measurements, such as not using the right amounts of ingredients. Always double-check your measurements and ensure your oven is correctly calibrated for the best results.
Final Thoughts
Making Gluten-Free S’mores Bars is a simple and rewarding experience. The process brings together familiar flavors in an easy, accessible format that anyone can enjoy. Whether you’re treating yourself or sharing with friends and family, these bars are comforting and satisfying. Don’t worry if things don’t turn out perfectly; the joy of baking lies in the experience itself, and these bars are bound to bring smiles all around.
Gluten-Free S'mores Bars
Ingredients
For the crust
- 1.5 cups gluten-free graham cracker crumbs for structure
- 0.5 cups unsalted butter, melted adds moisture
- 0.25 cups brown sugar provides sweetness
- 0.25 teaspoon salt enhances flavor
For the topping
- 1 cup mini marshmallows adds chewiness
- 1 cup chocolate chips contributes rich flavor
Instructions
Preparation
- Preheat your oven to 350°F.
- In a mixing bowl, combine the gluten-free graham cracker crumbs, melted unsalted butter, brown sugar, and salt.
- Press the graham cracker mixture firmly into the bottom of an 8×8 baking dish.
Baking the Crust
- Bake the crust in the preheated oven for about 10 minutes, or until slightly golden.
Adding Toppings
- Remove the crust from the oven and sprinkle the mini marshmallows evenly over the top.
- Sprinkle the chocolate chips evenly over the marshmallows.
Final Bake
- Return the dish to the oven and bake for an additional 8 to 10 minutes until marshmallows are puffy and lightly golden.
Cooling and Slicing
- Allow the baked bars to cool in the pan for about 10-15 minutes before cutting.
- Slice the bars into squares or rectangles.


