Why You’ll Love This Recipe
This recipe for Homemade Red Velvet Cake Pops is easy and reliable, making it ideal for bakers of all skill levels. The balanced flavors of chocolate and cream cheese frosting provide comforting satisfaction in every bite. With simple ingredients and straightforward steps, it’s a practical choice for everyday celebrations or just a sweet snack at home.
Kitchen Tools You’ll Need
- Mixing bowl
- Baking pan
- Lollipop sticks
- Microwave-safe bowl
- Baking sheet
Ingredients
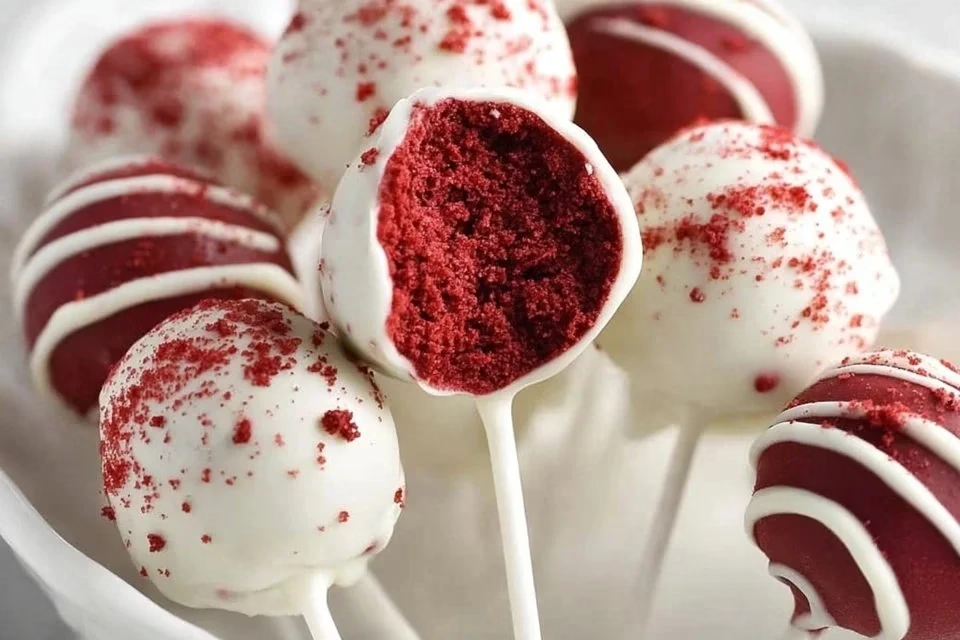
- 1 box red velvet cake mix (base flavor and structure)
- Ingredients required for cake (as per box instructions) (moisture and texture)
- 1 cup cream cheese frosting (richness and moisture)
- 4 oz chocolate or candy melts (coating and sweetness)
- Lollipop sticks (for serving)
- Sprinkles (optional) (for decoration)
How to Make Homemade Red Velvet Cake Pops
Step 1. Start by preparing the red velvet cake mix according to the instructions provided on the box. Follow the guidelines closely, measuring out the required ingredients and mixing them in a bowl until fully combined. This ensures that your cake will have the right texture and flavor once baked. Pour the batter into a greased baking pan, making sure it’s evenly distributed, and bake it until a toothpick inserted in the center comes out clean.
Step 2. Once the cake is baked, allow it to cool completely in the pan for a few minutes before transferring it to a wire rack. Cooling is essential because it helps maintain the cake’s moisture and prevents the pops from falling apart later. Afterward, let the cake sit at room temperature until it’s cool to the touch, which typically takes about 30 minutes.
Step 3. Crumble the cooled red velvet cake into a large bowl. Use your hands or the back of a fork to break the cake into fine crumbs, ensuring there are no large chunks remaining. This step is crucial for the cake pops’ uniformity and helps them hold their shape when formed into balls. Take your time to achieve the right texture, as this will affect how well the pops come together later.
Step 4. Add the cream cheese frosting to the crumbled cake, mixing it well with your hands or a spatula until fully combined. The frosting is what binds the cake crumbs together, so make sure every piece is well coated. The mixture should be moist but not overly sticky or wet. You want it to hold together when rolled into balls without crumbling apart.
Step 5. Once your cake and frosting mixture is ready, begin shaping it into 1-inch balls. This size is perfect for cake pops and allows them to fit nicely on the lollipop sticks. Roll the mixture between your palms to create a smooth surface, ensuring there are no cracks or inconsistencies. Place the formed balls on a baking sheet lined with parchment paper to keep them from sticking.
Step 6. After shaping all the cake pops, refrigerate them for about 30 minutes to help them firm up. Chilling the pops is important as it makes them easier to dip in chocolate or candy melts later on. This step also ensures that they hold their shape when dipped. Keep an eye on them to make sure they are firm enough to handle.
Step 7. In the meantime, melt the chocolate or candy melts in a microwave-safe bowl. Heat in short intervals, stirring between each, until fully melted and smooth. Be cautious not to overheat, as this can cause the chocolate to seize up. You want a nice, fluid consistency for coating the cake pops, so ensure it’s warm but not scorched.
Step 8. Once the chocolate is melted, take the chilled cake pops out of the refrigerator. Dip the end of each lollipop stick into the melted chocolate before inserting it into a cake ball. This helps the stick adhere better to the cake pop. Insert the stick about halfway into the ball, then dip the entire pop into the melted chocolate, rotating it to coat evenly.
Step 9. After dipping, allow the excess chocolate to drip off before placing the cake pops back on the parchment-lined baking sheet. If you’d like to add sprinkles, do so immediately while the chocolate is still wet. This way, they’ll stick nicely to the surface of the cake pops without falling off later.
Step 10. Let the coated cake pops stand at room temperature until the chocolate is completely set. This might take a bit of time, so be patient. Alternatively, you can place them in the refrigerator to speed up the setting process. Once the chocolate has hardened, your Homemade Red Velvet Cake Pops are ready to enjoy!
Serving Suggestions
Homemade Red Velvet Cake Pops are a versatile treat perfect for various occasions. Serve them at breakfast alongside coffee or enjoy them as an indulgent afternoon snack. They also make delightful toppings for family meals or desserts. If you have any leftovers, they can be stored in the fridge for future enjoyment. Their portable format allows for sharing at parties or giving as thoughtful presents.
Pro Tips for Best Results
- Make sure the cake cools completely before crumbling to prevent a soggy mixture.
- If the mixture feels too dry, a little extra frosting can help bind it better.
- Ensure your chocolate coating is at the right consistency before dipping the cake pops.
- For easier rolling, keep your hands lightly greased with non-stick spray.
- Don’t rush the chilling process as it’s key for maintaining shape during dipping.
Common Mistakes to Avoid
- Not cooling the cake properly: If the cake is still warm when crumbled, it can create a sticky mixture that won’t hold its shape. Always ensure the cake is completely cool before crumbling to avoid this problem.
- Using too much frosting: Adding excessive frosting can make the mixture too wet and difficult to shape. The right balance is necessary; start with less and add just enough to bind the cake crumbs together without making it soggy.
- Skipping the refrigeration step: If you don’t chill the shaped cake balls, they may fall apart when you dip them in chocolate. Allowing them to firm up is crucial for maintaining their shape while getting coated.
- Dipping too quickly: Rushing the chocolate dipping process can lead to uneven coatings or a mess. Take your time to dip each cake pop carefully, ensuring an even coverage and letting excess chocolate drip off properly.
- Not using enough coating: If you don’t coat the cake pops generously, you’ll risk them being too dry in places. Ensure every part is well covered for optimum flavor and moisture.
- Storing improperly: If cake pops are stored without proper airtight containers, they can dry out or become stale. Always keep them in sealed containers, and consider refrigeration when not enjoyed right away.
Variations & Substitutions
For a twist on the classic, try adding different flavor extracts to the cake mix, such as almond or vanilla. You can also experiment with various types of chocolate in the coating, such as white or dark chocolate, for varied flavor profiles. Consider using different types of sprinkles or toppings to customize the appearance of your cake pops.
Storage & Reheating
To keep your Homemade Red Velvet Cake Pops fresh, store them at room temperature in an airtight container for up to 3 days. For longer storage, you can refrigerate them for up to a week. If you choose to freeze them, wrap each pop individually and place them in a freezer-safe container for up to 3 months. When ready to enjoy, let them thaw at room temperature for the best texture.
Nutrition Information
Nutrition values are estimates and may vary based on ingredients used.
Frequently Asked Questions
Can I make this recipe ahead of time?
Yes, you can prepare the cake pops up to a few days in advance. Shape them into balls and store them in the refrigerator until you’re ready to dip and decorate, which keeps them fresh and easy to handle.
How long does it last in the fridge?
Homemade Red Velvet Cake Pops will last in the refrigerator for about one week if stored properly in an airtight container. This allows you to enjoy them leisurely without worrying about spoilage.
Can I freeze this recipe?
Absolutely! You can freeze the cake pops for up to three months. Make sure to wrap each one securely to avoid freezer burn. Thaw them in the refrigerator or at room temperature when you’re ready to enjoy.
What can I substitute for one ingredient?
If you don’t have cream cheese frosting, you can use regular buttercream frosting for similar results. It will alter the flavor slightly but will still provide the required moisture for the mixture.
Why didn’t my recipe turn out as expected?
Several factors can affect the outcome, including the temperature of ingredients, how well the cake was crumbled, and if it was cooled properly. Ensuring correct technique and adherence to steps will help achieve the best results.
Final Thoughts
Making Homemade Red Velvet Cake Pops can be a delightful experience that brings warmth and sweetness to your kitchen. From baking to enjoying, these pops offer a satisfying way to celebrate simple moments. With their rich flavor and fun presentation, they’re sure to be a hit with everyone. Remember, even a few minor tweaks can ensure a lovely treat each time. Enjoy creating and sharing these sweet snacks!
Homemade Red Velvet Cake Pops
Ingredients
For the Cake Base
- 1 box red velvet cake mix Base flavor and structure.
- as per box instructions Ingredients required for cake For moisture and texture.
For the Filling and Coating
- 1 cup cream cheese frosting Richness and moisture.
- 4 oz chocolate or candy melts Coating and sweetness.
- 20 pieces lollipop sticks For serving.
- as desired sprinkles (optional) For decoration.
Instructions
Preparation
- Prepare the red velvet cake mix according to the instructions provided on the box.
- Pour the batter into a greased baking pan and bake until a toothpick inserted in the center comes out clean.
- Allow the cake to cool completely in the pan, then transfer to a wire rack until cool to the touch (about 30 minutes).
Crumbling and Mixing
- Crumble the cooled red velvet cake into a large bowl into fine crumbs.
- Add the cream cheese frosting and mix until fully combined.
Shaping
- Roll the mixture into 1-inch balls and place them on a baking sheet lined with parchment paper.
- Refrigerate the shaped cake pops for about 30 minutes.
Coating
- Melt the chocolate or candy melts in a microwave-safe bowl, stirring until smooth.
- Dip the end of the lollipop stick into melted chocolate, then insert it into each cake ball.
- Dip the entire pop into the melted chocolate and allow excess chocolate to drip off.
- Sprinkle toppings onto the wet chocolate if desired.
- Let the coated cake pops stand at room temperature or refrigerate until the chocolate sets.


