Hello, I’m Asma. These Little Debbie Christmas Tree Cake Pops take me right back to the kitchen with my mother, where we’d turn even the simplest snacks into something magical. She always said, “A little sweetness can fix almost anything,” and I’ve carried that wisdom into every dessert I make. Whenever I roll these cake pops, I can almost hear her laughter and feel the warmth of those cozy December afternoons.
Why You’ll Love This Recipe
You’ll love how easy and mess-free these cake pops are — no baking, no complicated steps, and no stress. They taste just like the original Little Debbie treat but in a cute, party-ready form. These are perfect for classroom parties, cookie exchanges, or cozy nights decorating the tree with family. Best of all, they look like you spent hours making them, but they come together in minutes.
Ingredients (Detailed & Humanized)
Little Debbie Christmas Tree Cakes (17.04 oz)
Sweet, nostalgic, and the star of the show — these snack cakes bring instant holiday cheer.
Cream Cheese (8 oz, softened)
Adds rich creaminess and helps the crumbled cakes hold together perfectly.
White Candy Melts (16 oz)
Melt into a smooth, glossy coating that gives each pop a bakery-style finish.
Red Candy Melts (¼ cup, melted)
A drizzle of cheerful color that gives every pop a festive sparkle.
Red and Green Sanding Sugar
Adds crunch, color, and a holiday twinkle to each bite.
Directions (Step-by-Step Cooking Guide)
Step 1: Prepare Your Workspace
Line a baking sheet with wax or parchment paper. This simple step keeps the cake pops from sticking and makes cleanup a breeze.
Step 2: Combine the Cake and Cream Cheese
In a large mixing bowl, crumble the Little Debbie Christmas Tree Cakes into fine pieces. Add the softened cream cheese and mix with a spoon or electric mixer until the texture becomes thick, soft, and dough-like. You’ll notice it smells just like a bakery at Christmas — sweet, cozy, and full of nostalgia.
Step 3: Shape the Cake Balls
Use a small cookie scoop to portion the mixture evenly. Roll each portion between your palms to form smooth, round balls, and place them on the prepared baking sheet.
Step 4: Chill to Set
Freeze the rolled cake balls for about 15 minutes, or just until they’re firm. This makes them easier to handle when dipping into the melted coating.
Step 5: Melt the Coating
While the balls are chilling, melt the white candy melts in the microwave. Heat in 15-second intervals, stirring between each until smooth and glossy. If the texture feels too thick, stir in a little shortening or coconut oil to thin it out for easier dipping.
Step 6: Dip and Decorate
Insert a cake pop stick into each chilled cake ball, then dip into the melted white coating. Tap gently to remove excess chocolate and place each pop back onto the lined baking sheet.
Step 7: Add the Finishing Touches
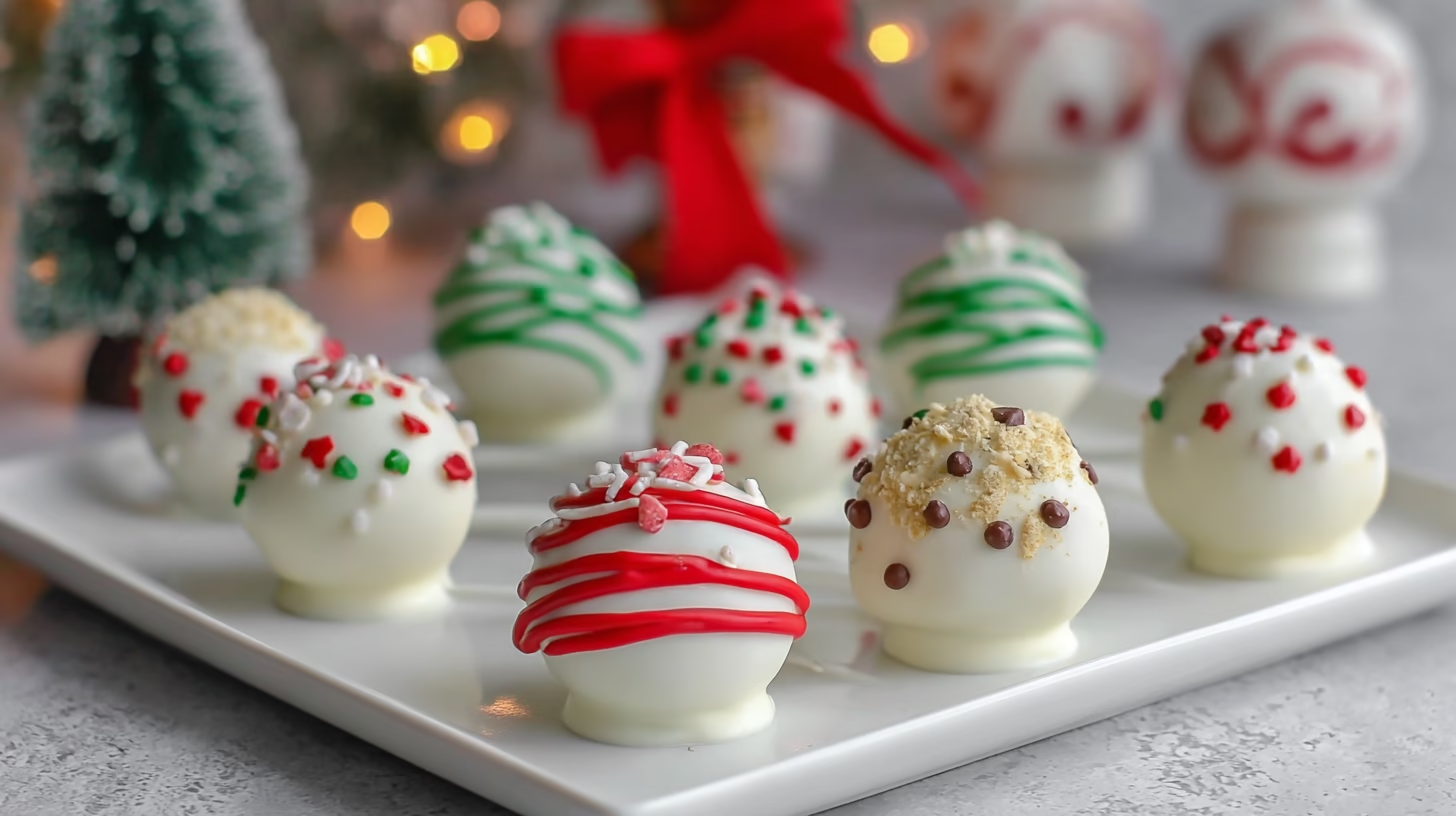
Before the coating hardens, sprinkle with red and green sanding sugar or drizzle with melted red candy melts for that festive, candy-cane look. This is where you can have fun — no two pops need to look the same!
Step 8: Chill and Serve
Place the decorated cake pops in the refrigerator for about an hour, or until they’re firm and beautifully glossy. Once set, they’re ready to serve — creamy on the inside, crisp on the outside, and full of holiday sweetness.5️⃣ Cultural or Technique Note
Little Debbie Christmas Tree Cake Pops are a fun twist on the classic American cake pop — but with a shortcut that feels brilliantly nostalgic. Using pre-made snack cakes saves time while keeping all the flavor and joy of a homemade treat. It’s a simple, no-fuss way to bring that warm, cozy holiday spirit into your kitchen without any baking required.
Serving Suggestions
• Arrange them upright in a holiday mug or decorative jar.
• Wrap individually in cellophane for gifts or stocking stuffers.
• Serve on a dessert platter beside cocoa or coffee.
• Display them on a festive tray for your holiday party.
Pro Tips for Success
• Use softened cream cheese so it blends smoothly with the cakes.
• Chill the mixture before dipping — it helps the coating stick better.
• Add a small bit of shortening to candy melts for a thinner, shinier finish.
• Dip and decorate one pop at a time so the coating doesn’t harden too soon.
• If using smaller snack cakes, two boxes will give the same yield.
• Use a fork or toothpick to help slide dipped pops off smoothly without smudging.
Common Mistakes to Avoid
Skipping the Chill Time
Don’t rush this step! If you skip chilling, the cake balls will be too soft and fall apart when you try to dip them. Giving them time to firm up in the freezer makes all the difference for smooth, even coating.
Overheating the Candy Melts
It’s easy to get impatient, but overheating causes the coating to seize and become clumpy. Always melt the candy melts in short bursts, stirring in between until just smooth — patience truly pays off here.
Using Cold Cream Cheese
Cold cream cheese doesn’t mix well and can leave lumps in your batter. Make sure it’s softened to room temperature before blending so the texture turns out silky and uniform.
Rushing the Setting Time
Let the finished cake pops rest in the fridge until they’re completely hardened. This keeps the outer shell crisp and prevents smudging or cracking later.
Overdecorating While Wet
It’s tempting to pile on the sprinkles, but too many toppings while the coating is still wet can make it slide right off. A light hand gives a cleaner, prettier finish.
Storage & Reheating
Fridge
Store your Little Debbie Christmas Tree Cake Pops in an airtight container for 3–4 days. They’ll stay moist, creamy, and perfectly festive.
Freezer
Need to make them ahead? Freeze them in an airtight container for up to 2 months. Just thaw in the fridge before serving — they’ll taste freshly made.
Reheat
No reheating required! These cake pops are best enjoyed chilled or at room temperature for the ideal creamy-meets-crunchy bite.
Frequently Asked Questions (FAQ)
Q1: Can I make these with other Little Debbie snack cakes?
A1: Yes! Any soft cake with a creamy filling works perfectly — think Cosmic Brownies, Zebra Cakes, or even Oatmeal Creme Pies. Just adjust the cream cheese amount until you get that dough-like texture.
Q2: Can I make them ahead of time?
A2: Absolutely. You can roll and dip them a day or two in advance and store them in the fridge. They hold their flavor and texture beautifully for gatherings or gift trays.
Q3: Can this recipe be doubled?
A3: Yes! This is a great recipe to double if you’re feeding a crowd. Mix and dip in batches to keep the coating smooth and easy to work with — it’s perfect for parties, bake sales, or cookie swaps.
Closing Paragraph
These Little Debbie Christmas Tree Cake Pops are a sweet little gift of nostalgia — creamy, crunchy, and full of holiday cheer. Whether you’re making them for a Christmas party, gifting them to neighbors, or simply treating yourself, they’re guaranteed to bring smiles. Enjoy decorating them with family, experimenting with colors, and making each pop uniquely yours.
Final Thoughts
I love recipes that make the holidays feel effortless and fun — and these cake pops do exactly that. They remind me that joy often comes from the simplest treats shared with people we love. I hope these become a new favorite at your celebrations, just like they have at mine.

Little Debbie Christmas Tree Cake Pops
Equipment
- Mixing Bowl
- Electric Mixer or Spoon
- Small Cookie Scoop
- Cake Pop Sticks
- Parchment Paper
Ingredients
Main Ingredients
- 17.04 oz Little Debbie Christmas Tree Cakes crumbled
- 8 oz cream cheese softened
- 16 oz white candy melts melted for coating
Optional Decorations
- 0.25 cup red candy melts melted for drizzling
- red and green sanding sugar for decoration
Instructions
- Line a baking sheet with wax or parchment paper.
- In a large bowl, crumble the Little Debbie cakes. Add softened cream cheese and mix until a soft dough forms.
- Use a cookie scoop to form even portions. Roll into balls and place on the prepared sheet.
- Freeze the cake balls for 15 minutes until firm.
- Melt white candy melts in the microwave, stirring every 15 seconds until smooth. Thin with shortening or coconut oil if needed.
- Insert a cake pop stick into each chilled ball. Dip in white coating, tap off excess, and return to sheet.
- Decorate with sanding sugar or drizzle with melted red candy melts before the coating sets.
- Chill cake pops in the fridge for 1 hour or until fully set. Serve chilled or at room temperature.


