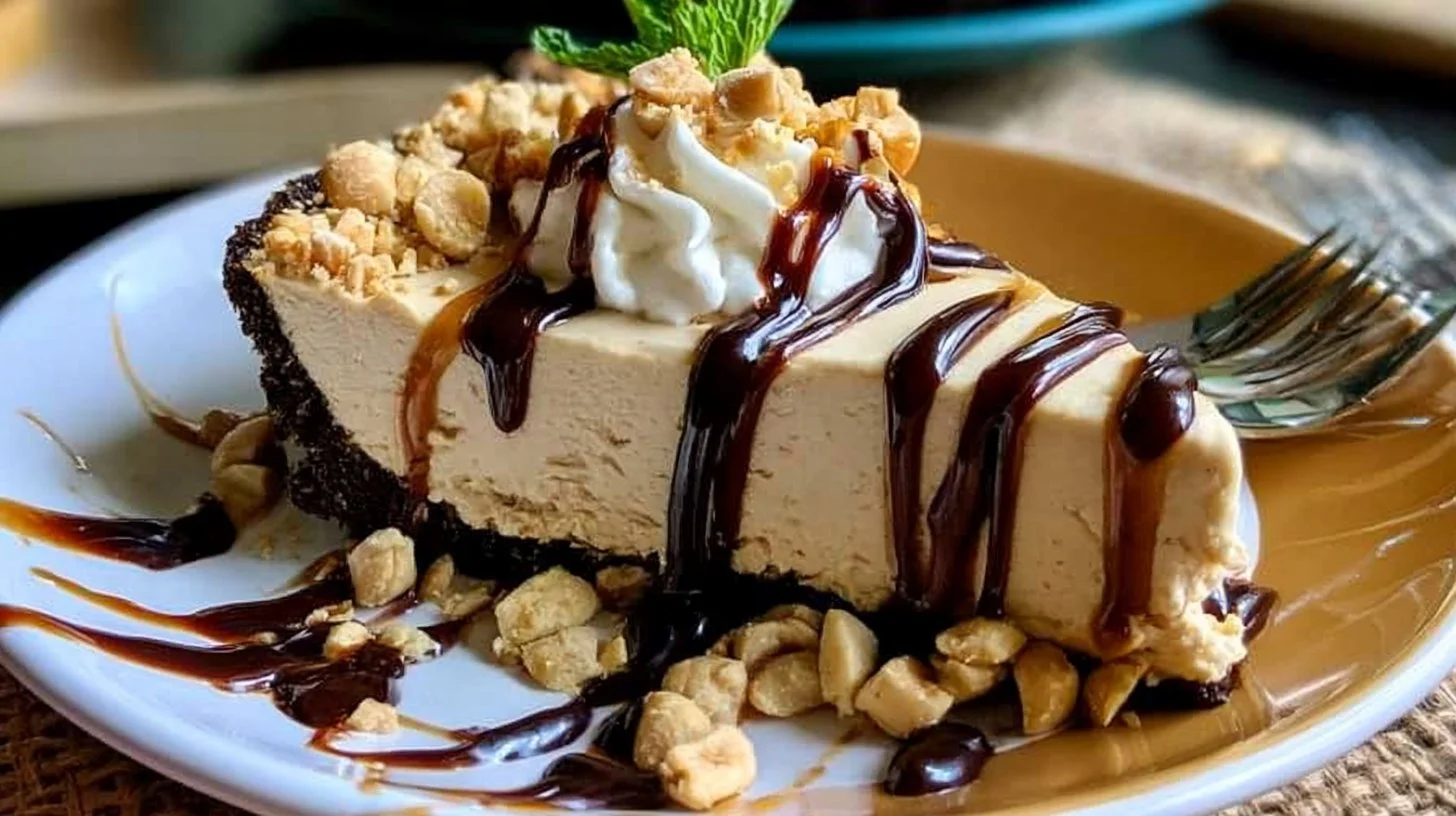
Enjoying a slice of pie can turn an ordinary moment into something special. This no-bake peanut butter pie is a wonderfully simple dessert that fits perfectly into weeknight meals or weekend gatherings. With its creamy filling and chocolatey crust, it brings a comforting sweetness that appeals to both friends and family alike. It’s an easy recipe to whip up when you want to satisfy your sweet tooth without heating up the kitchen. Let’s dive into the steps to create this delightful treat.
Why You’ll Love This No-Bake Peanut Butter Pie
This recipe offers ease and reliability, perfect for those who value comfort food without the hassle of baking. The creamy peanut butter filling, paired with a chocolate cookie crust, brings a well-balanced flavor that appeals to all ages. No-bake peanut butter pie is practical for any occasion, making it a go-to dessert for everyday settings.
Kitchen Tools You’ll Need
- Mixing bowls
- Electric mixer or whisk
- Pie dish
- Rubber spatula
Ingredients
- 1 1/2 cups chocolate cookie crumbs (for crust texture)
- 1/2 cup unsalted butter, melted (acts as a binder for the crust)
- 1 cup creamy peanut butter (adds rich, nutty flavor)
- 1 cup powdered sugar (sweetness and smooth consistency)
- 8 oz cream cheese, softened (provides creaminess and stability)
- 1 cup heavy whipping cream (creates a light, airy texture)
- 1 teaspoon vanilla extract (enhances flavor)
How to Make No-Bake Peanut Butter Pie
Step 1. Begin by combining the chocolate cookie crumbs and melted butter in a mixing bowl. Use a spatula to ensure they are well mixed, creating a sandy texture that holds together when pressed. Once combined, transfer the mixture into a pie dish and firmly press it into the bottom to form the crust. You’ll know it’s done when the crust is compact and even in thickness.
Step 2. In another bowl, beat together the creamy peanut butter, powdered sugar, and softened cream cheese. An electric mixer works well here, but you can also use a whisk. Mix until the mixture becomes smooth and homogenous, ensuring there are no lumps. This filling will be rich and creamy, providing the base for your pie.
Step 3. In a separate bowl, whip the heavy cream along with the vanilla extract until stiff peaks begin to form. This might take a few minutes. The whipped cream will become airy and light, which is essential for giving the pie a gentle texture. It’s ready when you can lift the whisk out and the peaks hold their shape without collapsing.
Step 4. Gently fold the whipped cream into the peanut butter mixture. Use a rubber spatula to combine them slowly, ensuring you maintain the airy texture of the whipped cream. You want the filling to be uniform in color without overmixing, which can knock out the air you’ve just whipped in.
Step 5. Pour the peanut butter filling into the prepared crust. Use a spatula to smooth the top, creating an even surface. The filling should look creamy and well-distributed across the crust. This step helps in making the pie visually appealing and ensures that each slice will hold together nicely.
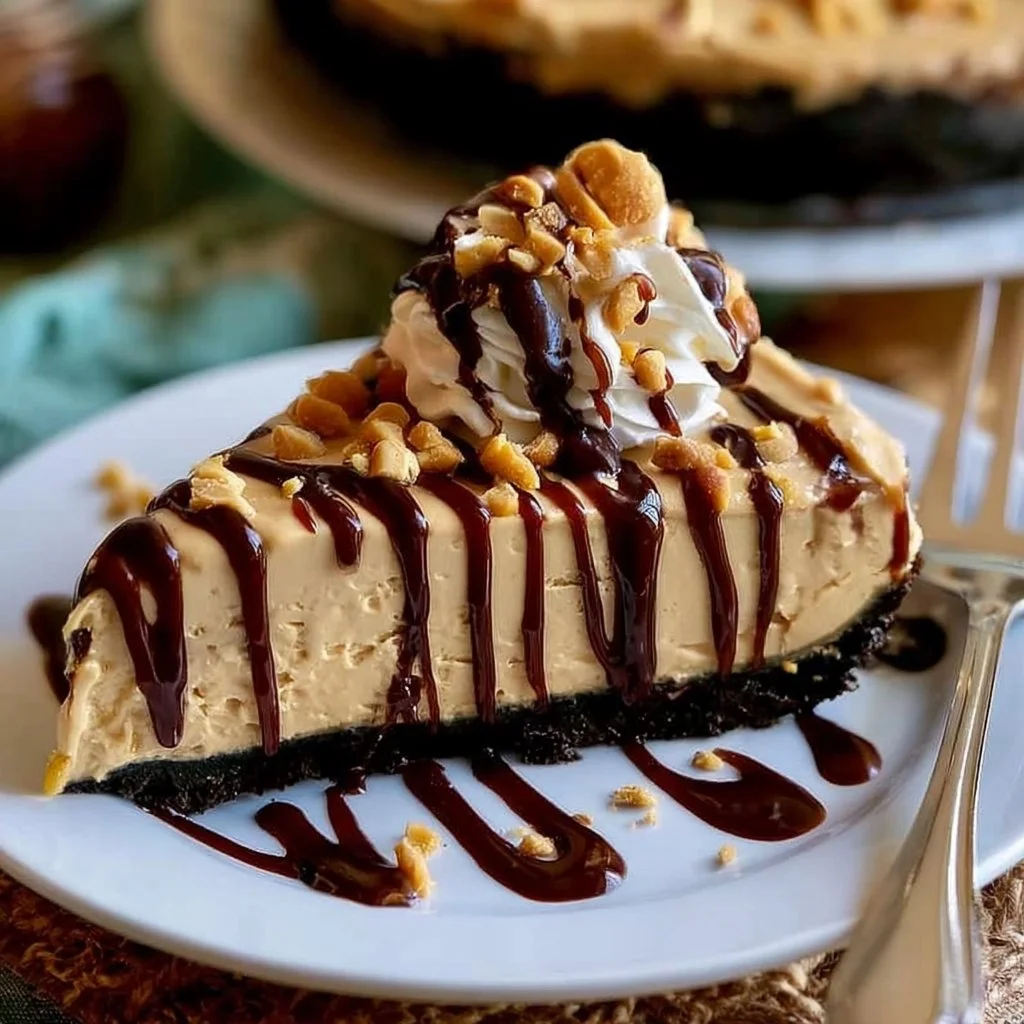
Step 6. Refrigerate the pie for at least 4 hours, or until set. This waiting period allows the filling to firm up properly. You’ll know it’s ready when it feels solid to the touch and retains its shape when sliced.
Serving Suggestions
This no-bake peanut butter pie can be enjoyed in various settings. It’s delightful for a leisurely breakfast treat paired with coffee, or as an indulgent snack during the afternoon. Serve it for family meals or at gatherings where dessert is a must-have. If you have leftovers, it makes for a sweet finish to dinner. The chilled pie can be easily sliced and plated for any occasion.
Pro Tips for Best Results
- Ensure the cream cheese is at room temperature before mixing; this helps it blend smoothly with the other ingredients.
- When folding in the whipped cream, be gentle to avoid deflating it.
- Let the pie chill longer if you prefer a firmer texture for serving.
- Use high-quality chocolate cookies for a more flavorful crust.
- Cover the pie with plastic wrap if refrigerating for an extended time to prevent it from absorbing other smells.
Common Mistakes to Avoid
- Not allowing cream cheese to soften: This can lead to a lumpy filling, making it harder to achieve a smooth texture. Make sure it’s softened at room temperature before mixing.
- Overmixing the whipped cream: This may cause the cream to turn grainy and less aerated. Stop whipping once you see stiff peaks; you want it to be light and fluffy.
- Not pressing the crust firmly enough: If the crust isn’t compacted, it may crumble when slicing. Press down evenly and firmly to create a solid base.
- Skipping refrigeration time: Rushing this step may result in a filling that doesn’t set properly. Be patient; it’s crucial for the pie to hold its shape.
- Using a warm pie dish after baking: If your dish retains heat, it could affect the filling’s ability to set. Ensure the dish is cool before adding the filling.
- Ignoring visual cues: If your pie isn’t firm after the suggested chill time, give it more time in the refrigerator. Visual firmness is key for a successful slice.
Variations & Substitutions
For a different flavor experience, you might try adding a layer of chocolate ganache on top before serving. Alternatively, you could sprinkle crushed peanuts or chocolate shavings for added texture and presentation. If you enjoy a bit of tanginess, consider mixing in a touch of lemon zest to the filling.
Storage & Reheating
Store the no-bake peanut butter pie in the refrigerator, covered, for up to five days. For longer storage, freeze it for up to three months. To prevent freezer burn, wrap it tightly in plastic wrap or aluminum foil. If you need to thaw a slice, simply place it in the refrigerator for a few hours or let it sit at room temperature for about 30 minutes before serving. The texture should remain intact if done properly.
Frequently Asked Questions
Can I make this recipe ahead of time?
Yes, the pie can be made up to a day in advance and stored in the refrigerator until you’re ready to serve. This allows the flavors to deepen while it chills.
How long does it last in the fridge?
The pie will stay fresh in the fridge for about five days when properly covered. Just be sure to keep it airtight to maintain its flavor.
Can I freeze this recipe?
Absolutely! The pie can be frozen for up to three months. Slice it before freezing for easy serving later.
What can I substitute for one ingredient?
If you need to adjust the filling, can consider using a different nut butter, like almond or cashew butter, for a unique flavor twist.
Why didn’t my recipe turn out as expected?
Often, if the pie didn’t set, it could be a result of insufficient chilling time or not properly mixing the ingredients. Make sure to follow the steps and allow adequate time for refrigeration.
Final Thoughts
Making no-bake peanut butter pie is a straight-forward process that results in a satisfying dessert. Each bite combines the rich flavors of peanut butter and chocolate with a delightful texture, creating a treat that’s perfect for any occasion. The simplicity of preparation encourages you to enjoy the moment, and I’m sure you’ll find it a comforting addition to your dessert repertoire.
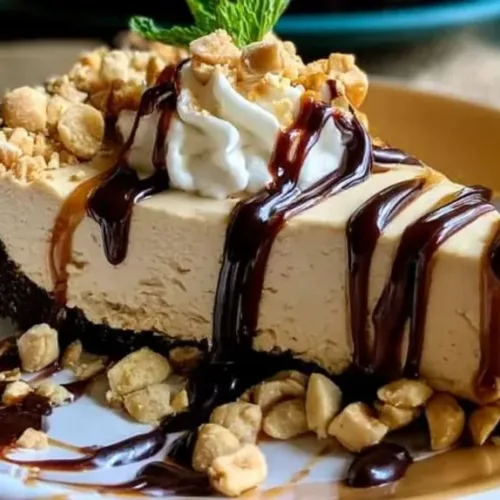
No-Bake Peanut Butter Pie
Ingredients
For the crust
- 1 1/2 cups chocolate cookie crumbs For crust texture
- 1/2 cup unsalted butter, melted Acts as a binder for the crust
For the filling
- 1 cup creamy peanut butter Adds rich, nutty flavor
- 1 cup powdered sugar Sweetness and smooth consistency
- 8 oz cream cheese, softened Provides creaminess and stability
- 1 cup heavy whipping cream Creates a light, airy texture
- 1 teaspoon vanilla extract Enhances flavor
Instructions
Preparation of the crust
- Combine the chocolate cookie crumbs and melted butter in a mixing bowl, ensuring they are well mixed to create a sandy texture.
- Transfer the mixture into a pie dish and firmly press it into the bottom to form the crust.
Making the filling
- In another bowl, beat together creamy peanut butter, powdered sugar, and softened cream cheese until smooth and homogenous.
- In a separate bowl, whip the heavy cream along with vanilla extract until stiff peaks form.
- Gently fold the whipped cream into the peanut butter mixture using a spatula.
Assembling the pie
- Pour the peanut butter filling into the prepared crust and smooth the top.
Chilling
- Refrigerate the pie for at least 4 hours or until set.