
Why You’ll Love This Recipe
This Red Velvet Pound Cake is simple and reliable, making it an excellent choice for any home cook looking to add a comforting dessert to their repertoire. The balance of flavors ensures a satisfying treat that appeals to everyone. Its practicality means you can enjoy it anytime, whether it’s a special occasion or a quiet evening at home. With this recipe, you’ll find ease in preparation and delight in the rewarding results.
Kitchen Tools You’ll Need
- 9×5-inch loaf pan
- Mixing bowls
- Electric mixer
- Rubber spatula
- Measuring cups and spoons
Ingredients
- 1 1/2 cups all-purpose flour (structure)
- 1 cup granulated sugar (sweetness, moisture)
- 1/2 cup unsalted butter, softened (moisture, richness)
- 2 large eggs (structure, moisture)
- 1/4 cup buttermilk (moisture, acidity)
- 1/4 cup cocoa powder (flavor, color)
- 1/2 teaspoon baking soda (leavening)
- 1 teaspoon vanilla extract (flavor)
- 1 teaspoon red food coloring (color)
- 1/2 teaspoon salt (enhances flavor)
- 8 oz cream cheese, softened (richness, creaminess)
- 1 cup powdered sugar (sweetness, texture)
- 1 teaspoon vanilla extract (for frosting) (flavor)
How to Make Red Velvet Pound Cake
Step 1. Start by preheating your oven to 325°F. This ensures that the cake bakes evenly from the very beginning. Also, prepare your loaf pan by greasing it well or lining it with parchment paper. This will help the cake release easily once it’s baked, preventing any sticking or crumbling when serving.
Step 2. In a mixing bowl, combine the softened unsalted butter and granulated sugar. Use an electric mixer to cream them together on medium speed until the mixture appears light and fluffy. This process should take about 3-5 minutes. This step is crucial as it incorporates air into the batter, ensuring a light texture in your pound cake.
Step 3. Add in the eggs, one at a time, beating well after each addition. This helps to fully incorporate the eggs into the batter, creating a smooth emulsion. Look for the batter to become a consistent, creamy mixture. Once both eggs are added and well mixed, you’re ready for the next step.
Step 4. Now, mix in the buttermilk and vanilla extract. Continue to beat the mixture on low speed until everything is combined. This will add moisture and flavor to your cake. Be cautious not to overmix at this stage; just ensure it’s well incorporated.
Step 5. In a separate bowl, sift together the all-purpose flour, cocoa powder, baking soda, and salt. Sifting helps remove any lumps and ensures even distribution of dry ingredients. Gradually add this dry mixture to the wet ingredients, mixing on low speed until just combined. Take care here not to overmix, as it can lead to a dense cake.
Step 6. Add the red food coloring to the batter. This gives the cake its signature color. Use a rubber spatula to fold it in gently, ensuring the color is evenly distributed throughout the batter. The mixture should be a vibrant red, so make sure there are no streaks left.
Step 7. Pour the batter into your prepared loaf pan, using a spatula to smooth the top for even baking. Give the pan a gentle shake to settle the batter. This will help create a beautiful, even shape as it bakes. Now, it’s time to bake the cake.
Step 8. Place the loaf pan in your preheated oven and bake for about 60-70 minutes. It’s done when a toothpick inserted into the center comes out clean or with a few moist crumbs. Keep an eye on it towards the end of the baking time; every oven is a little different.
Step 9. Once baked, remove the cake from the oven and let it cool in the pan for about 10-15 minutes. This rest time allows the cake to firm up slightly, making it easier to remove from the pan without breaking.
Step 10. Carefully turn the cake out onto a wire rack to cool completely. As it cools, you can prepare the cream cheese frosting. In a mixing bowl, beat the softened cream cheese and powdered sugar together with the remaining vanilla extract. Mix until smooth and creamy.
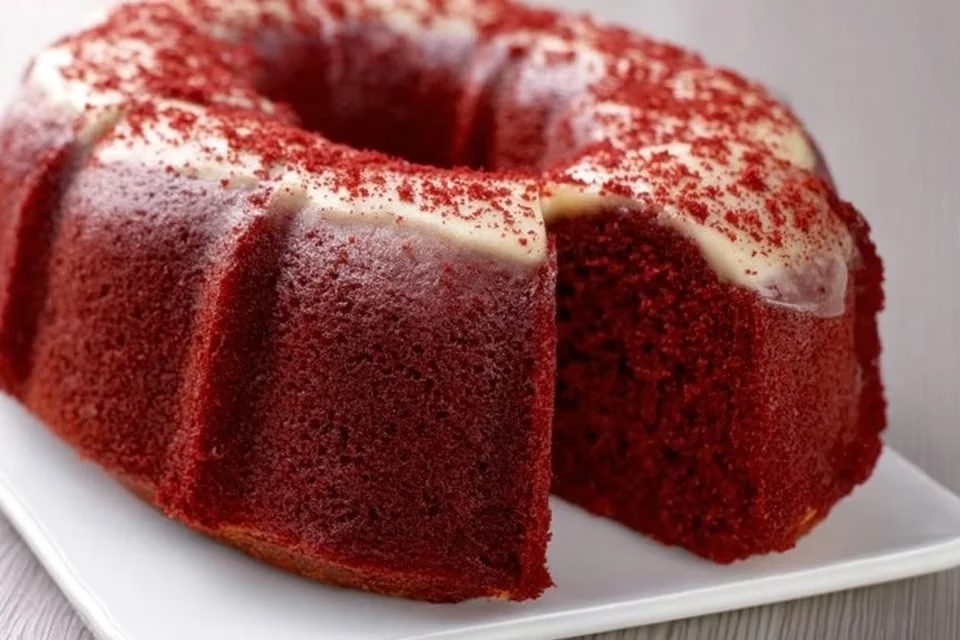
Step 11. Once the cake has completely cooled, spread the cream cheese frosting generously over the top. Use a spatula to create smooth swirls for a decorative finish. You can also slice the cake and add frosting on individual pieces if you prefer.
Serving Suggestions
Red Velvet Pound Cake is versatile and can be enjoyed in various ways. Serve it as a comforting breakfast alongside coffee or tea, or it can easily become a satisfying afternoon snack for both kids and adults. It’s perfect for family meals or shared during gatherings with friends. Leftovers can be slice and enjoyed throughout the week, either plain or dressed up with frosting for dessert.
Pro Tips for Best Results
- Ensure all ingredients are at room temperature for a smooth batter.
- Do not overmix the batter after adding flour; this can lead to a tough texture.
- Use high-quality cocoa powder for a richer flavor.
- Cool the cake completely before frosting to prevent melting.
- Store in an airtight container to maintain moisture.
Common Mistakes to Avoid
- Not measuring ingredients accurately: Using incorrect amounts can lead to a cake that’s too dry or too dense. Always use measuring cups and spoons for precise amounts.
- Overmixing the batter: Mixing too much after adding flour can develop gluten, resulting in a dense cake. Mix gently until just combined.
- Using cold ingredients: Cold butter or eggs can lead to a lumpy batter. Allow them to come to room temperature before starting.
- Skipping the parchment paper: If you skip greasing or lining the pan, the cake may stick and break when you try to remove it. Always take this step to ensure easy removal.
- Not allowing the cake to cool properly: Cutting into the cake too soon can lead to a crumbled texture. Let it rest before slicing for the best results.
- Not checking for doneness: Baking times can vary. Always check with a toothpick; if it comes out clean or with a few crumbs, the cake is ready.
Variations & Substitutions
For a twist on this recipe, consider adding chocolate chips or nuts for added texture. You could also swap the cream cheese frosting for a simple buttercream if you prefer a sweeter finish. If you’re looking for a lighter option, try a dusting of powdered sugar instead of frosting.
Storage & Reheating
Store the cake at room temperature in an airtight container for up to three days for best flavor. If you want to keep it longer, refrigerate for up to a week. For longer storage, you can freeze the cake wrapped securely in plastic wrap and aluminum foil for up to three months. To reheat, place slices in a microwave for 10-15 seconds or until warmed through, keeping the texture soft and moist.
Nutrition Information
Nutrition values are estimates and may vary based on ingredients used.
Frequently Asked Questions
Can I make this recipe ahead of time?
Yes, you can prepare the cake a day in advance. Store it in an airtight container at room temperature. Frost it just before serving for the best texture.
How long does it last in the fridge?
The cake will stay fresh in the refrigerator for about one week. Make sure it’s covered to prevent it from drying out.
Can I freeze this recipe?
Absolutely! This cake freezes well. Wrap it tightly in plastic wrap and then in aluminum foil. It will last for up to three months in the freezer.
What can I substitute for one ingredient?
If you don’t have buttermilk, you can make a quick substitute by mixing regular milk with a tablespoon of vinegar or lemon juice and letting it sit for a few minutes.
Why didn’t my recipe turn out as expected?
Check that you measured your ingredients correctly and kept an eye on the baking time. Ingredients at incorrect temperatures can also affect the outcome.
Final Thoughts
Making Red Velvet Pound Cake is a rewarding experience that combines comfort with the allure of a special treat. Each step helps develop its unique flavor and inviting texture. Enjoying it with family and friends will surely create memorable moments at your table. It’s an approachable recipe that yields delicious results, giving you confidence in your baking.
Red Velvet Pound Cake
Ingredients
Cake Ingredients
- 1.5 cups all-purpose flour Provides structure
- 1 cup granulated sugar Adds sweetness and moisture
- 0.5 cups unsalted butter, softened For moisture and richness
- 2 large eggs Contributes structure and moisture
- 0.25 cups buttermilk Adds moisture and acidity
- 0.25 cups cocoa powder For flavor and color
- 0.5 teaspoons baking soda Acts as a leavening agent
- 1 teaspoon vanilla extract Enhances flavor
- 1 teaspoon red food coloring For signature color
- 0.5 teaspoons salt Enhances flavor
Frosting Ingredients
- 8 oz cream cheese, softened For richness and creaminess
- 1 cup powdered sugar Adds sweetness and texture
- 1 teaspoon vanilla extract For frosting flavor
Instructions
Preparation
- Preheat the oven to 325°F and prepare a 9x5 inch loaf pan by greasing it or lining it with parchment paper.
- In a mixing bowl, cream together butter and granulated sugar using an electric mixer on medium speed until light and fluffy (about 3-5 minutes).
- Add eggs one at a time, beating well after each addition until fully incorporated.
- Mix in buttermilk and vanilla extract on low speed until combined.
- In a separate bowl, sift together flour, cocoa powder, baking soda, and salt. Gradually add to the wet mixture, mixing on low speed until just combined.
- Fold in the red food coloring until fully distributed.
Baking
- Pour the batter into the prepared loaf pan and smooth the top.
- Bake in the preheated oven for 60-70 minutes, or until a toothpick inserted in the center comes out clean.
- Let the cake cool in the pan for 10-15 minutes, then transfer to a wire rack to cool completely.
Frosting
- Beat the softened cream cheese and powdered sugar together with the remaining vanilla extract in a mixing bowl until smooth and creamy.
- Spread the cream cheese frosting generously over the cooled cake, creating smooth swirls if desired.


