
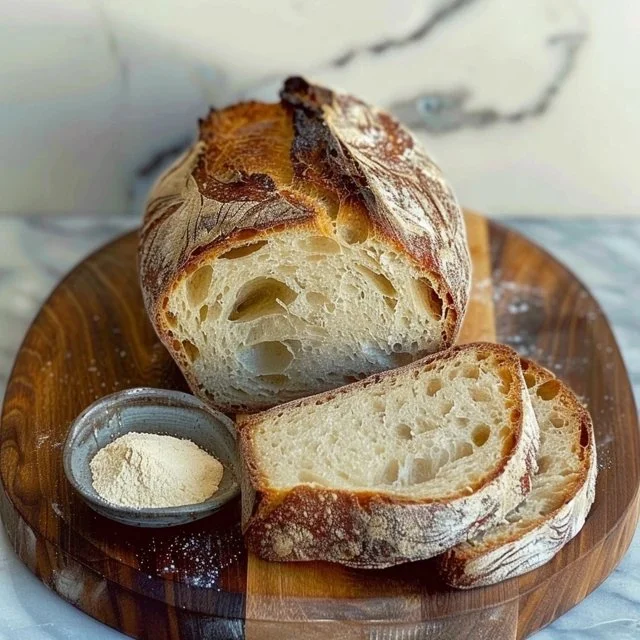
There’s something genuinely satisfying about crafting a loaf of sourdough bread in just a single day. As you mix the ingredients, let the dough rise, and eventually shape it into a warm, crusty loaf, you’ll feel a connection to tradition and the beauty of homemade bread. Enjoy it during weeknights with dinner, as a weekend brunch treat, or even for a cozy snack in quiet moments. This recipe balances simplicity with the rewarding process of bread-making, making it perfect for both novice and experienced bakers. Let’s step into the kitchen and create something wonderful together.
Why You’ll Love This Recipe Same Day Sourdough Bread
This recipe stands out for its ease and reliability, making sourdough accessible on any busy day. The comforting flavors come together harmoniously, allowing you to enjoy fresh bread without the long wait often associated with sourdough. You’ll find it to be practical and satisfying, fitting seamlessly into your everyday routine as a delightful accompaniment to meals or even enjoyed on its own.
Kitchen Tools You’ll Need
- Mixing bowl
- Bench scraper
- Kitchen scale
- Clean cloth or plastic wrap
- Baking vessel (Dutch oven or similar)
Ingredients
- 50 grams active sourdough starter (provides fermentation and flavor)
- 50 grams warm water (aids in hydration)
- 50 grams all-purpose or bread flour (offers structure)
- 150 grams active sourdough starter (enhances flavor and helps rise)
- 500 grams bread flour (provides the main structure)
- 350 grams water (ensures dough consistency)
- 10 grams salt (enhances flavor and strengthens gluten)

How to Make Same Day Sourdough Bread
Step 1. In a mixing bowl, combine 50 grams of your active sourdough starter with 50 grams of warm water and 50 grams of all-purpose or bread flour. Use a spoon or your hands to mix until there are no dry bits of flour left. This initial mixture is the base of your sourdough, so ensure it’s fully combined and uniform in texture. Set this mixture aside for about 30 minutes. You’ll see small bubbles forming as it starts to activate.
Step 2. After the resting period, add 150 grams of active sourdough starter to the mixture along with 500 grams of bread flour, 350 grams of water, and 10 grams of salt. Mix everything together until it forms a rough dough. At this stage, it’s fine if the dough feels sticky. Make sure to blend well, monitoring the consistency and ensuring that all the flour picks up moisture.
Step 3. Once mixed, turn the dough onto a clean countertop and knead it for about 10 minutes. As you knead, use your hands to stretch and fold the dough, allowing it to become smoother and more elastic. You can tell when it’s done when your dough feels cohesive and springs back slightly when you press it.
Step 4. Place the kneaded dough back into the mixing bowl and cover it with a clean cloth or plastic wrap. Let it rise in a warm, draft-free spot for about three hours, or until it has roughly doubled in size. Keep an eye out for the dough’s volume increase and a slightly domed top, signaling that it’s ready for the next step.
Step 5. Once the dough has risen, gently turn it out onto the countertop. Shape the dough into a round or oval loaf by tucking the edges into the center. This shaping helps create surface tension, which is essential for a good rise. Aim for a smooth top and a rounded bottom as you form it.
Step 6. Place the shaped loaf onto a piece of parchment paper or directly into your baking vessel. Cover it again and let it rise for another 30 to 60 minutes until it looks puffy. This second rise will prepare the dough for baking, so watch for it to swell and firm up, indicating readiness.
Step 7. Preheat your oven to a high temperature, often around 450°F, about 30 minutes before the loaf is ready to go in. The heat will help create a good crust. Before baking, if you want, score the top of the loaf with a sharp knife, which allows for controlled expansion as it bakes.
Step 8. Bake the bread in the preheated oven. Depending on your baking vessel, it might take around 30 to 40 minutes until the crust is a deep golden brown and the loaf sounds hollow when tapped on the bottom. This auditory cue signals that the bread is fully baked.
Step 9. Once baked, remove the bread from the oven and let it cool on a wire rack. Allowing it to cool properly is important for setting the texture, so resist the urge to slice into it immediately. After about an hour, you can enjoy your freshly baked sourdough bread, appreciating its crusty exterior and soft, airy inside.

Serving Suggestions
This sourdough bread can be enjoyed in numerous ways. It makes for a delightful breakfast when paired with butter and jam or chocolate spread. Sliced thick for sandwiches, it’s perfect for family meals, whether made into a classic grilled cheese or a hearty turkey club. Leftovers can easily be used for toast or croutons in salads, always maintaining its charm. Its versatility makes it a satisfying addition to any meal or snack time.
Pro Tips for Best Results
- Ensure your sourdough starter is active and bubbly for better fermentation.
- Hydrating the dough adequately is key; adjust water slightly based on flour absorbency.
- If your kitchen is cooler, extend the rise time to give the dough enough warmth to develop.
- Use a sharp knife or lame for scoring to create beautiful patterns and control the bread’s expansion.
- Keep the shaped dough covered during the second rise to maintain moisture.
Common Mistakes to Avoid
- Not using an active starter: If your starter isn’t bubbly, the bread won’t rise well. Always ensure it’s properly fed before starting.
- Skipping the kneading step: Not kneading enough can result in dense bread. Aim for a smooth, elastic dough.
- Insufficient rise time: Rushing through rising times leads to dense bread. Monitor the dough for size and proper texture.
- Baking in a cold oven: Starting in a cold oven can affect the crust. Preheat thoroughly for a good bake.
- Scoring too shallow: Scoring inadequately can lead to uncontrolled expansion. Make deliberate cuts to guide the rise.
- Cutting before cooling: Slicing bread too soon makes it gummy. Allow it to cool fully for optimal texture.
Variations & Substitutions
You can experiment with different flours, such as whole wheat or rye, to add depth to flavor. If you prefer a softer crust, try covering the loaf with a lid while baking to retain steam. For a more flavorful bread, consider adding herbs or spices to the dough as it mixes.
Storage & Reheating
Store the bread at room temperature in a paper bag or wrapped in a clean cloth to maintain the crust’s crispness. If you need to refrigerate it, wrap it tightly to prevent it from drying out. While freezing is an option, slice the loaf first for convenient portions. To reheat, pop it in a toaster for a few minutes or warm it in the oven at a low temperature to revive its crust.
Frequently Asked Questions
Can I make this recipe ahead of time?
While this recipe is designed for same-day preparation, you can make the starter in advance and keep it active. The actual dough should be made and enjoyed within the same day for the best results.
How long does it last in the fridge?
If stored properly, the bread can last a few days in the refrigerator. However, it may lose some freshness and texture, so it’s best enjoyed within two days.
Can I freeze this recipe?
Yes, you can freeze the bread. Slice it before freezing for easy access later. Wrap it tightly in plastic or aluminum foil to prevent freezer burn.
What can I substitute for one ingredient?
If you don’t have all-purpose flour, you could use bread flour for the entire recipe, which may enhance the bread’s structure but may slightly change the texture.
Why didn’t my recipe turn out as expected?
Common issues can arise from using an inactive starter, not kneading enough, or misjudging the dough’s rise time. Pay close attention to each step for the best outcome.
Final Thoughts
Making sourdough bread can be a simple yet rewarding endeavor that elevates your cooking experience. The aroma of freshly baked bread filling your kitchen is a comforting reminder of the joy of home cooking. As you slice into your creation, enjoy the satisfying texture and flavors that come from your efforts. Trust the process, and know that each loaf will bring you closer to mastering this delightful craft. Enjoy your time in the kitchen and the wonderful bread that results from it.

Same Day Sourdough Bread
Ingredients
For the dough
- 50 grams active sourdough starter Provides fermentation and flavor
- 50 grams warm water Aids in hydration
- 50 grams all-purpose or bread flour Offers structure
- 150 grams active sourdough starter Enhances flavor and helps rise
- 500 grams bread flour Provides the main structure
- 350 grams water Ensures dough consistency
- 10 grams salt Enhances flavor and strengthens gluten
Instructions
Preparation
- In a mixing bowl, combine 50 grams of your active sourdough starter with 50 grams of warm water and 50 grams of all-purpose or bread flour. Mix until there are no dry bits of flour left.
- Set this mixture aside for about 30 minutes to activate.
- After the resting period, add 150 grams of active sourdough starter, 500 grams of bread flour, 350 grams of water, and 10 grams of salt to the mixture. Mix until it forms a rough dough.
- Turn the dough onto a clean countertop and knead for about 10 minutes until the dough is smooth and elastic.
- Place the kneaded dough back into the mixing bowl and cover with a cloth. Let it rise in a warm spot for about three hours or until doubled in size.
Shaping
- Turn the risen dough onto the countertop. Shape it into a round or oval loaf by tucking the edges into the center.
- Place the shaped loaf onto parchment paper or directly into a baking vessel. Cover and let rise for another 30 to 60 minutes.
Baking
- Preheat your oven to 450°F about 30 minutes before the loaf is ready to bake.
- Score the top of the loaf with a sharp knife if desired.
- Bake the bread for 30 to 40 minutes until the crust is golden brown and sounds hollow when tapped.
- Remove the bread from the oven and let it cool on a wire rack for about an hour.


