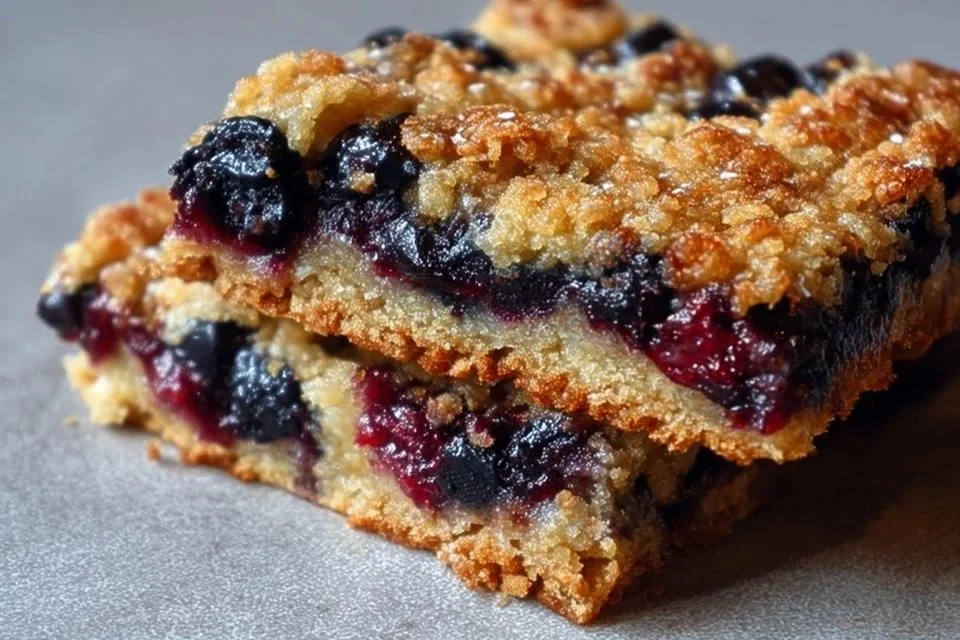
There’s something comforting about a homemade breakfast bar, especially one filled with the natural sweetness of blueberries. Perfect for busy weeknights or leisurely weekends, these bars are a simple and practical choice for gatherings or quiet moments at home. With the use of your sourdough starter, they bring together familiar flavors and satisfying textures. The blend of oats and whole wheat flour offers a hearty foundation that pairs wonderfully with the fresh blueberries. Let’s dive into this recipe that’s as enjoyable to make as it is to share.
Why You’ll Love This Recipe Sourdough Blueberry Breakfast Bars
These bars offer ease and reliability, making them a go-to for breakfast or snacks. Their comforting flavors balance the sweetness from the blueberries and honey or maple syrup, resulting in a satisfying treat that fits into any daily routine. With a practical approach to using sourdough starter, this recipe provides a deliciously simple way to include wholesome ingredients in your day.
Kitchen Tools You’ll Need
- Mixing bowls
- Whisk
- Baking dish
- Parchment paper (optional)
- Spatula
Ingredients
- 1 cup sourdough starter (discard or active)
- 1 1/2 cups fresh blueberries
- 1/2 cup honey or maple syrup (sweetener)
- 2 large eggs (binding agent)
- 1/3 cup melted coconut oil or butter (fat for moisture)
- 1 teaspoon vanilla extract (flavor enhancer)
- 1 1/2 cups rolled oats (texture and heartiness)
- 1 cup whole wheat flour (structure)
- 1 teaspoon baking powder (leavening agent)
- 1/2 teaspoon baking soda (leavening agent)
- 1/4 teaspoon salt (flavor balance)
- 1 teaspoon ground cinnamon (warm flavor)
How to Make Sourdough Blueberry Breakfast Bars
Step 1. Start by preheating your oven to 350°F. Preparing your oven first allows for a steady temperature when you bake, ensuring even cooking throughout the bars. This step sets the stage for the baking process and helps to develop the texture you’re looking for.
Step 2. In a large mixing bowl, combine the sourdough starter, honey or maple syrup, eggs, melted coconut oil or butter, and vanilla extract. Whisk these ingredients together until well blended. Aim for a smooth consistency, which will help integrate the flavors and ensure that the bars rise properly.
Step 3. In a separate bowl, mix together the rolled oats, whole wheat flour, baking powder, baking soda, salt, and ground cinnamon. This dry mixture should be combined thoroughly, allowing the dry leavening agents and spices to be evenly distributed. You’ll want to see a uniform texture to ensure consistent flavor in every bite.
Step 4. Gradually add the dry mixture to the wet mixture, stirring gently until just combined. It’s important to avoid overmixing at this stage, as this can lead to denser bars. The batter should be thick but still slightly sticky, indicating that it’s ready for the blueberries.
Step 5. Carefully fold in the fresh blueberries, taking care not to break them up too much. This step helps maintain the integrity of the berries, which will add delightful bursts of flavor and moisture to each bar. Once combined, you should see blueberries evenly distributed throughout the batter.
Step 6. Line a baking dish with parchment paper for easy removal or lightly grease it if you prefer not to use paper. Pour the batter into the prepared dish, spreading it evenly to ensure uniform baking. A well-distributed batter will bake more evenly.
Step 7. Place the baking dish in the preheated oven. Bake for about 25 to 30 minutes, or until the edges are golden brown and a toothpick inserted in the center comes out clean. Watch for these cues to ensure your bars don’t become overbaked, which can alter their texture.
Step 8. Once done, remove the baking dish from the oven and let it cool in the pan for approximately 10 minutes. This cooling time makes it easier to slice the bars without them falling apart. You’ll notice the bars firm up slightly as they cool.
Step 9. Cut the cooled bars into squares or rectangles, depending on your preference. Arrange them on a wire rack to cool completely if you have the time. This helps to maintain their texture and prevents them from becoming too moist from residual heat.
Step 10. Enjoy the bars fresh, or store them for later. They make a perfect snack or breakfast option throughout the week, bringing you comforting flavors whenever you need a little boost.

Serving Suggestions
These Sourdough Blueberry Breakfast Bars are versatile and practical for any meal of the day. They shine as a quick breakfast option, providing both nourishment and energy to start your morning. Consider them as an afternoon snack, paired with a cup of tea or coffee for a comforting treat. They’re also wonderful for family meals, as they can be enjoyed by both adults and kids alike. If you have leftovers, simply store them properly for later enjoyment, as they hold up well over time.
Pro Tips for Best Results
- Ensure your sourdough starter is either active or well-mixed if using discard, as this contributes to the bars’ lift and flavor.
- Allow blueberries to dry slightly after rinsing to prevent excess moisture from affecting the batter’s consistency.
- Use fresh blueberries for the best flavor; frozen berries may yield more moisture.
- Consider letting the bars cool completely before cutting to enhance their structure.
- Store in an airtight container to maintain freshness and prevent them from drying out.
Common Mistakes to Avoid
- Using an inactive sourdough starter: This can lead to flat or dense bars without the desired rise. Always check that your starter is bubbly and active before using it.
- Overmixing the batter: Doing so can create dense bars instead of light and fluffy ones. Mix just until the ingredients are combined for the best texture.
- Skipping the cooling time: Cutting the bars too soon can lead to crumbling. Allow them to cool for a bit to set up properly.
- Not greasing the baking dish: This can make it difficult to remove the bars. Use parchment paper or grease the dish to ensure easy removal after baking.
- Using too many or too few blueberries: Measure to keep a balanced flavor. Too many can cause sogginess, while too few can leave the bars dry.
- Not checking for doneness: Baking times may vary, so check for a toothpick inserted in the center coming out clean to avoid overbaking.
Variations & Substitutions
- Consider adding chopped nuts like walnuts or pecans for added crunch and nutrients.
- If you prefer, swap the honey or maple syrup for a different sweetener like agave syrup.
- For an almond flavor, substitute the vanilla extract with almond extract.
- Incorporate spices like nutmeg for a warmer spice profile alongside the cinnamon.
- If blueberries aren’t available, try using other fruits such as chopped apples or peaches, adjusting the moisture as needed.
Storage & Reheating
These breakfast bars can be stored at room temperature for about 3 days if kept in an airtight container, which helps maintain their moisture. For longer storage, keep them in the refrigerator for up to a week. Alternatively, you can freeze them for up to 3 months; just wrap them tightly to prevent freezer burn. When ready to enjoy, reheat in the microwave for a few seconds, which will soften them pleasantly while preserving their texture.
Frequently Asked Questions
Can I make this recipe ahead of time?
Absolutely! You can prepare these bars a day or two in advance. Just store them in an airtight container to maintain freshness, making them a convenient option for busy mornings.
How long does it last in the fridge?
These breakfast bars can last up to a week in the refrigerator when stored properly in an airtight container. This makes them great for meal prepping or making ahead for easy breakfast options.
Can I freeze this recipe?
Yes, you can freeze these bars. Wrap them tightly in plastic wrap or aluminum foil and place them in a freezer-safe container. They should last for about 3 months in the freezer.
What can I substitute for one ingredient?
If you want to substitute honey or maple syrup, consider using agave syrup or a liquid sweetener of choice that provides similar moisture and sweetness.
Why didn’t my recipe turn out as expected?
Several factors could influence the outcome, including the activity of your sourdough starter or the mixing technique. Ensure to measure your ingredients accurately and follow the instructions closely for the best results.
Final Thoughts
Making Sourdough Blueberry Breakfast Bars is a straightforward and rewarding experience. The process allows you to use your sourdough starter in a delicious way, resulting in a satisfying treat that can be enjoyed any time of day. With their wholesome ingredients and comforting flavors, these bars are sure to become a cherished part of your breakfast routine. Enjoy the simplicity of making them, and savor the joy they bring to your table.

Sourdough Blueberry Breakfast Bars
Ingredients
Main Ingredients
- 1 cup sourdough starter (discard or active) Make sure to use an active starter for best results.
- 1 1/2 cups fresh blueberries Allow to dry slightly after rinsing.
- 1/2 cup honey or maple syrup Choose based on preference.
- 2 large eggs Acts as a binding agent.
- 1/3 cup melted coconut oil or butter Provides moisture.
- 1 teaspoon vanilla extract Enhances flavor.
- 1 1/2 cups rolled oats Adds texture.
- 1 cup whole wheat flour Provides structure.
- 1 teaspoon baking powder Leavening agent.
- 1/2 teaspoon baking soda Leavening agent.
- 1/4 teaspoon salt Balances flavor.
- 1 teaspoon ground cinnamon Adds warmth.
Instructions
Preparation
- Preheat your oven to 350°F (175°C).
- In a large mixing bowl, combine the sourdough starter, honey or maple syrup, eggs, melted coconut oil or butter, and vanilla extract. Whisk until well blended and smooth.
- In a separate bowl, mix together the rolled oats, whole wheat flour, baking powder, baking soda, salt, and ground cinnamon until well combined.
- Gradually add the dry mixture to the wet mixture, stirring gently until just combined. Avoid overmixing.
- Fold in the fresh blueberries, being careful not to break them.
- Line a baking dish with parchment paper or grease it, then pour the batter into the dish and spread it evenly.
Baking
- Bake for about 25 to 30 minutes, or until the edges are golden brown and a toothpick inserted in the center comes out clean.
- Remove from the oven and let it cool in the pan for approximately 10 minutes.
- Cut into squares or rectangles and arrange on a wire rack to cool completely.
- Enjoy fresh or store for later.