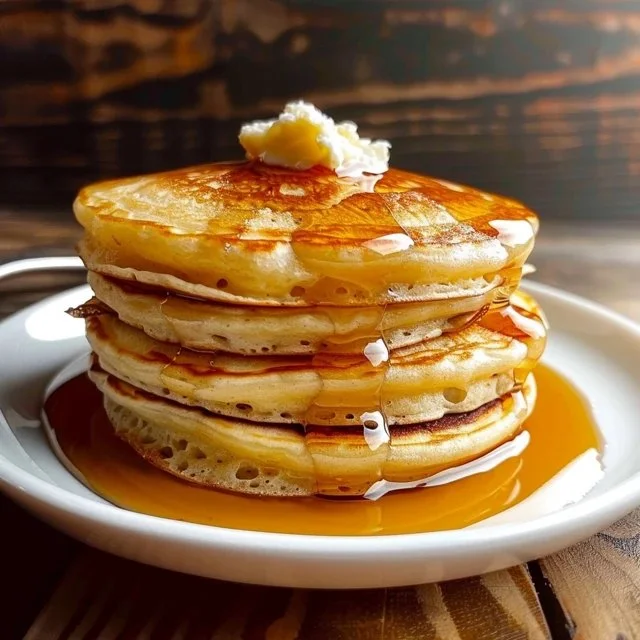
There’s something truly comforting about whipping up a stack of pancakes, especially when they come together with such ease. These pancakes are a wonderful way to use up your sourdough discard, transforming it into a delicious breakfast treat. They can be enjoyed on lazy weekends, quick weekday mornings, or even for a cozy family gathering. This recipe’s straightforward nature invites you to enjoy cooking without fuss, offering moments of warmth and satisfaction in each bite. Let’s dive into this comforting recipe.
Why You’ll Love This Recipe Sourdough Discard Pancakes
These pancakes stand out for their ease and reliability, making them a perfect choice when you want something simple yet satisfying. The use of sourdough discard adds depth of flavor, while the buttermilk contributes to a tender, fluffy texture. The balanced flavors make them enjoyable for a variety of occasions, creating a wholesome experience that feels both practical and comforting.
Kitchen Tools You’ll Need
- Mixing bowls
- Whisk or fork
- Griddle or frying pan
- Ladle or measuring cup
- Spatula
Ingredients
- 1 cup (120g) all-purpose flour (provides structure)
- 2 tablespoons (25g) granulated sugar (adds sweetness)
- 2 teaspoons baking powder (helps with rising)
- ½ teaspoon baking soda (enhances browning)
- ½ teaspoon salt (balances flavors)
- 1 cup (240g) sourdough discard, unfed (adds tanginess)
- 1 cup (240ml) buttermilk (creates moisture)
- 1 large egg (binds ingredients)
- 2 tablespoons unsalted butter, melted (adds richness)

How to Make Sourdough Discard Pancakes
Step 1. In a mixing bowl, combine the all-purpose flour, granulated sugar, baking powder, baking soda, and salt. Use a whisk or fork to blend these dry ingredients evenly, ensuring there are no lumps. This step is essential as it establishes the base of your pancake batter, allowing for an even rise and balanced flavor throughout.
Step 2. In a separate bowl, mix together the sourdough discard, buttermilk, and egg until well combined. The sourdough will add a pleasant tanginess to the overall flavor, while buttermilk contributes to a creamy consistency. Whisk until you achieve a smooth mixture, as any lumps can affect the final texture of the pancakes.
Step 3. Gradually pour the wet mixture into the bowl with the dry ingredients. Using a spatula or whisk, gently fold the two mixtures together until just combined. It’s important not to overmix; some lumps are completely fine. This helps maintain a light and fluffy texture in your finished pancakes.
Step 4. Once your batter is ready, heat a griddle or frying pan over medium heat until it’s evenly warmed. Lightly grease the surface with a little butter to prevent sticking, creating a nice golden crust on the pancakes as they cook.
Step 5. Using a ladle or measuring cup, pour about ¼ cup of batter onto the hot surface for each pancake. As they cook, you’ll start to see bubbles forming on the surface. This is a good indicator that it’s time to flip them.
Step 6. Carefully flip the pancakes when the edges appear set and bubbles on the surface have burst, allowing them to cook through on the other side. Look for a golden-brown color as a cue that they are done.

Serving Suggestions
These pancakes are perfect for breakfast, served warm with maple syrup or fresh fruit. They also make for a satisfying snack during the day with a dollop of yogurt or some jam. If you have leftovers, they’re wonderful for quick family meals later in the week. Just reheat them for a cozy treat any time you want something comforting.
Pro Tips for Best Results
- Ensure your baking powder and baking soda are fresh for optimal fluffiness in your pancakes.
- Don’t overmix your batter; a few lumps are okay and will help maintain softness.
- Adjust the heat of your cooking surface if the pancakes are browning too quickly.
- Let the batter sit for a few minutes before cooking; this helps with rising.
- Experiment with cooking in small batches to find your ideal size and thickness.
Common Mistakes to Avoid
- Overmixing the batter: This can lead to tough pancakes. Be gentle and fold the ingredients until just combined.
- Not preheating the pan: Cooking on a cold surface can result in uneven pancakes. Make sure your pan is hot before adding the batter.
- Skipping the rest period: Allowing the batter to sit briefly before cooking can enhance fluffiness. Don’t rush this step.
- Ignoring appearance cues: Waiting for bubbles to form before flipping is crucial for proper cooking. Don’t flip too early!
- Using expired leavening agents: This can prevent your pancakes from rising properly. Always check the freshness of your baking powder and soda.
- Not customizing serving options: Sticking solely to syrup can overlook the joy of adding fresh fruits or yogurt. Mix it up for varied flavors.
Variations & Substitutions
While this recipe is wonderful as is, you can add your own twist by incorporating ingredients like chocolate chips or blueberries directly into the batter for added flavor. If you prefer a touch of spice, consider adding a pinch of cinnamon or vanilla extract for extra warmth.
Storage & Reheating
Store leftover pancakes at room temperature for a few hours if you plan to eat them soon. For longer storage, place them in an airtight container in the refrigerator for up to three days. You can also freeze them for up to two months. To reheat, simply warm them in a skillet or microwave until heated through, taking care to preserve their fluffy texture.
Frequently Asked Questions
Can I make this recipe ahead of time?
Yes, you can prepare the batter in advance and store it in the refrigerator for a few hours. Just give it a gentle stir before cooking, as it may thicken slightly.
How long does it last in the fridge?
When stored properly in an airtight container, pancakes can last in the fridge for about three days.
Can I freeze this recipe?
Absolutely! These pancakes freeze well. Place them in a single layer on a baking sheet to freeze them individually, then transfer to a freezer-safe bag for up to two months.
What can I substitute for one ingredient?
If you don’t have buttermilk, you can create a substitute by mixing regular milk with a splash of lemon juice or vinegar, letting it sit for a few minutes.
Why didn’t my recipe turn out as expected?
Several factors could be at play, including expired leavening agents or overmixing the batter. Ensure all ingredients are fresh and treat the batter gently for the best results.
Final Thoughts
Making sourdough discard pancakes can be a delightful experience, turning a regular morning into something cozy and fulfilling. The combination of ingredients, especially the sourdough discard, brings a unique flavor to the table, and the process is straightforward enough for any skill level. Enjoy the simplicity of this recipe, and take comfort in the straightforward steps while creating a little joy in your day with delicious pancakes.

Sourdough Discard Pancakes
Ingredients
Dry Ingredients
- 1 cup all-purpose flour provides structure
- 2 tablespoons granulated sugar adds sweetness
- 2 teaspoons baking powder helps with rising
- 1/2 teaspoon baking soda enhances browning
- 1/2 teaspoon salt balances flavors
Wet Ingredients
- 1 cup sourdough discard, unfed adds tanginess
- 1 cup buttermilk creates moisture
- 1 large egg binds ingredients
- 2 tablespoons unsalted butter, melted adds richness
Instructions
Preparation
- In a mixing bowl, combine the all-purpose flour, granulated sugar, baking powder, baking soda, and salt. Use a whisk or fork to blend these dry ingredients evenly.
- In a separate bowl, mix together the sourdough discard, buttermilk, and egg until well combined.
- Gradually pour the wet mixture into the bowl with the dry ingredients and gently fold the two mixtures together until just combined.
- Heat a griddle or frying pan over medium heat until warmed and lightly grease with butter.
Cooking
- Pour about ¼ cup of batter onto the hot surface for each pancake, and watch for bubbles forming on the surface.
- Carefully flip the pancakes when the edges appear set and bubbles have burst. Cook until golden-brown.