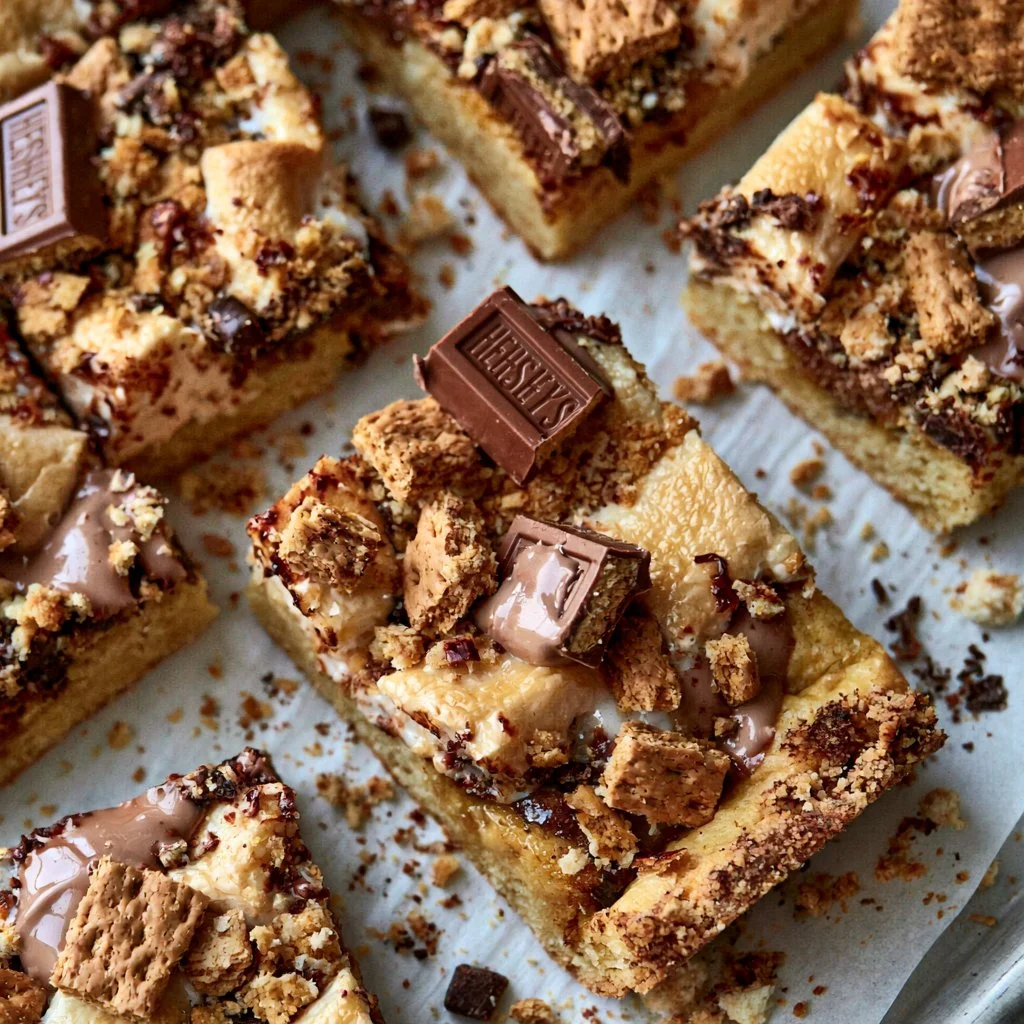
After a long day, the kitchen can be a comforting refuge. Whipping up a batch of these dessert bars brings the familiar warmth of s’mores right into your home, making them perfect for weeknights, family gatherings, or any quiet moment that calls for a sweet treat. With straightforward ingredients and simple steps, these bars are both satisfying and easy to prepare. The balance of flavors and textures can truly bring a sense of calm as you enjoy them, warm from the oven or at room temperature.
Why You’ll Love This Sourdough S’mores Dessert Bars
These Sourdough S’mores Dessert Bars offer a delightful combination of ease and reliability, making them a wonderful choice for any occasion. The comforting mix of melted chocolate and gooey marshmallows provides a familiar flavor profile, while the sourdough starter adds a subtle tang that enhances the overall taste. They are a practical option for your everyday dessert needs, perfect for sharing or indulging on your own.
Kitchen Tools You’ll Need
- 8-inch square aluminum pan
- Parchment paper or cooking spray
- Medium bowl
- Large bowl
- Whisk
- Spatula
Ingredients
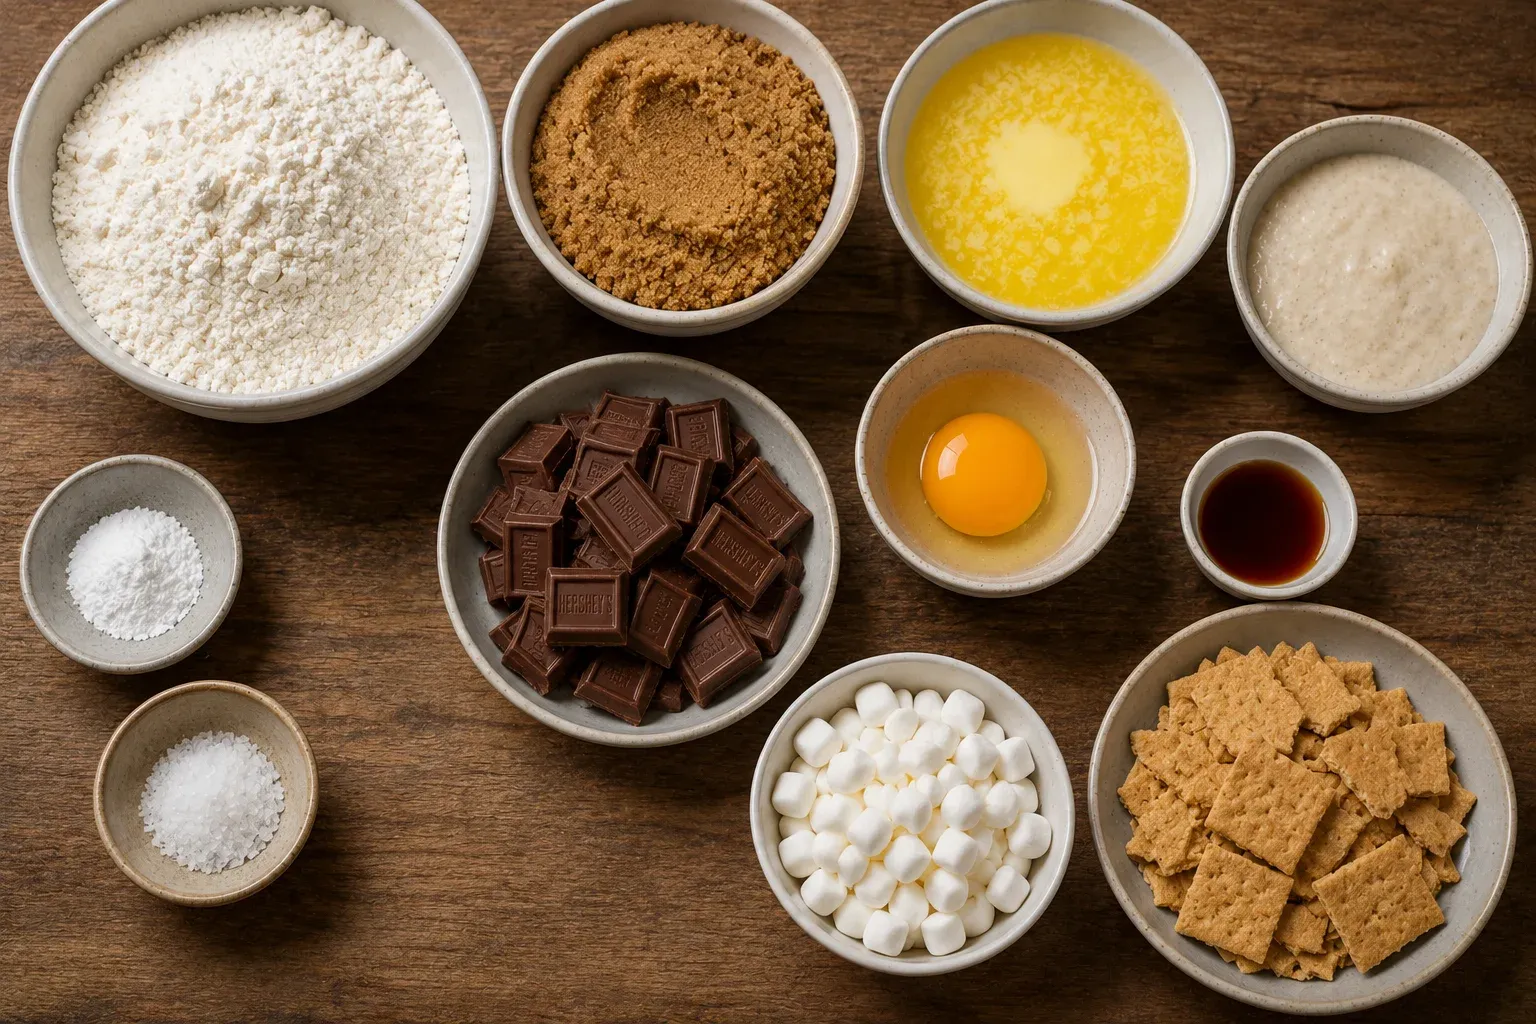
- 2 cups (240 grams) all-purpose flour (provides structure)
- ½ teaspoon baking powder (adds leavening)
- ½ teaspoon Diamond Crystal Kosher Salt (reduce to ¼ teaspoon if using Morton’s brand or table salt) (enhances flavor)
- ½ cup (113 grams; 1 stick) unsalted butter, melted (adds moisture and richness)
- 1 cup (200 grams) brown sugar, packed (sweetens and adds depth)
- 1 large egg, room temperature (binds ingredients)
- ½ cup (100 grams) sourdough starter discard, room temperature (adds moisture and flavor)
- 1 teaspoon vanilla extract (adds warmth and sweetness)
- 4 bars Hershey’s Milk Chocolate, broken into pieces (3 bars folded into the batter + 1 bar for topping) (provides sweetness and richness)
- ½ cup mini marshmallows or 4 large marshmallows cut into small pieces (adds gooey texture)
- ½ cup graham cracker pieces (about 2 full sheets) (offers crunch and classic s’more flavor)
How to Make Sourdough S’mores Dessert Bars
Step 1. Preheat your oven to 350°F. Prepare an 8-inch square aluminum pan by lining it with parchment paper, or grease it well with butter or cooking spray. This step ensures the dessert bars will easily release from the pan after baking.
Step 2. In a medium bowl, combine the flour, baking powder, and salt by whisking them together. This mixture is the dry base that will give structure to your dessert bars, so make sure everything is well combined.
Step 3. In a large bowl, whisk the melted butter and brown sugar together until the mixture is smooth. The melted butter helps dissolve the sugar, creating a rich base for the bars. This is a good time to ensure there are no lumps before moving to the next step.
Step 4. Incorporate the egg into the butter and sugar mixture, whisking until fully combined. Adding the egg at room temperature helps it blend in more easily, creating a cohesive batter that will rise nicely during baking.
Step 5. Mix in the sourdough starter and vanilla extract, stirring until you achieve a smooth consistency. The starter adds moisture and a unique flavor that pairs wonderfully with the sweet ingredients.
Step 6. Add the dry mixture to the wet mixture, folding them together gently until no dry flour remains. Be careful not to overmix here; the goal is a thick batter that is just combined, allowing for a tender crumb once baked.
Step 7. Fold in the pieces from three of the Hershey’s Milk Chocolate bars. This will infuse the batter with delightful pockets of melted chocolate, giving the bars a rich, sweet taste scattered throughout.
Step 8. Spread the batter evenly in the prepared pan. This ensures that the dessert bars bake uniformly, allowing all parts to reach the right consistency. A spatula can help smooth the batter out.
Step 9. To finish, top the batter with the remaining chocolate bar pieces, marshmallows, and graham cracker pieces, gently pressing them down. This step is important as it creates the classic s’mores topping, full of gooey marshmallow and sweet chocolate that will melt and combine during baking.
Step 10. Bake for 30 minutes, or until a toothpick inserted into the center comes out clean or with a few moist crumbs. Keep an eye on the bars toward the end of baking; they should have a slight golden hue and the marshmallows should appear puffy and lightly browned.
Serving Suggestions
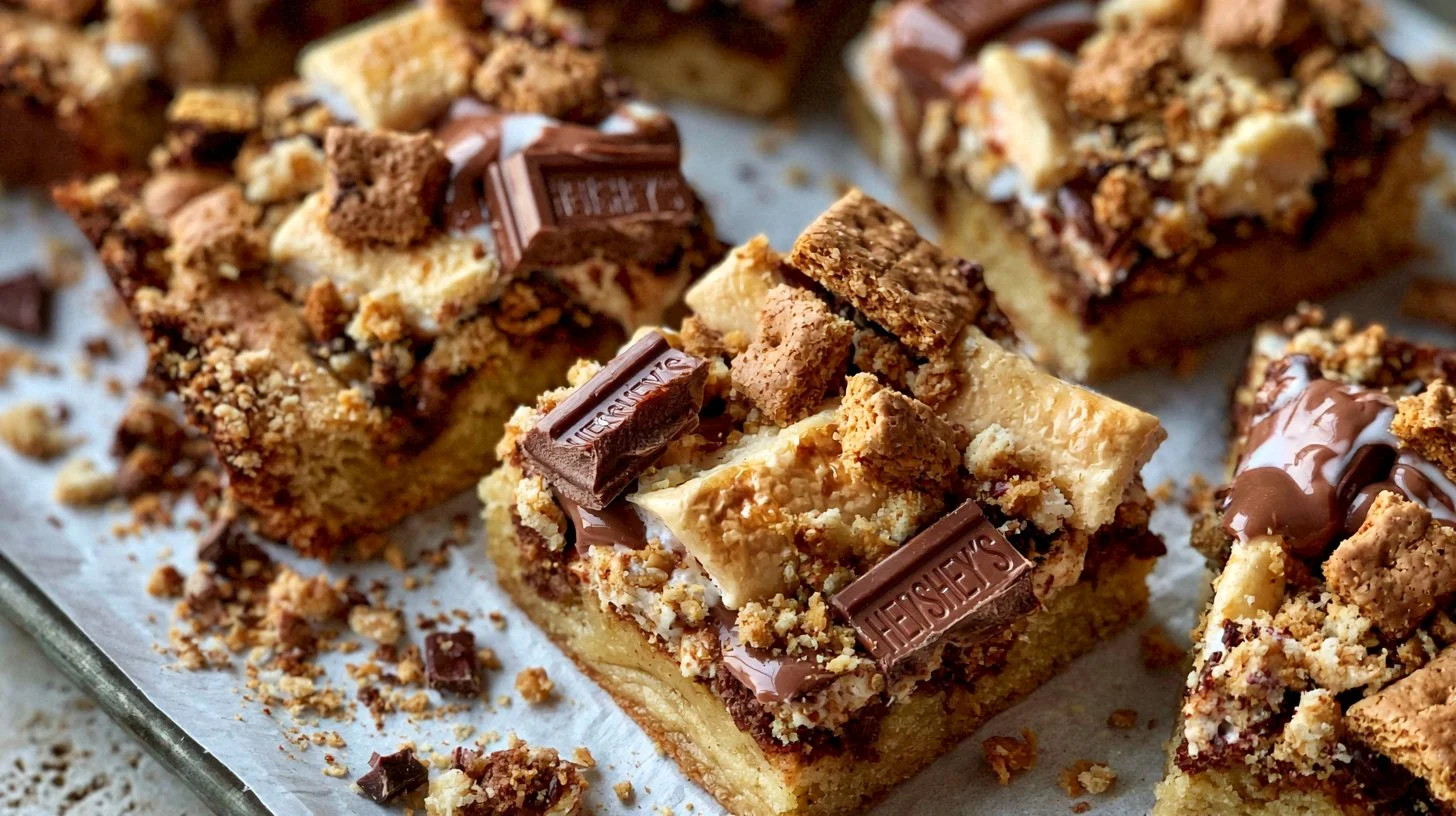
These dessert bars are versatile enough to enjoy in various settings. They can serve as a quick breakfast treat alongside coffee or tea, making mornings a little sweeter. They’re also great as a snack for the family, providing an easy way to satisfy sweet cravings. If you have leftovers, they hold up well for a couple of days, maintaining their flavor and texture. These bars can easily become a part of your go-to dessert rotation for casual meals or family gatherings.
Pro Tips for Best Results
- Ensure your butter is truly melted and not just softened; this helps create a smoother batter.
- Use room-temperature eggs and sourdough starter to facilitate better mixing.
- Be careful not to overmix once you combine the wet and dry ingredients; this will keep the bars tender.
- Press down on the toppings gently but firmly, allowing them to adhere better during baking.
- Allow the bars to cool completely in the pan before slicing for cleaner edges.
Common Mistakes to Avoid
- Using cold ingredients: Cold butter or eggs can lead to a lumpy batter; bring them to room temperature for better mixing.
- Overmixing the batter: Mixing too much after adding the flour can create dense bars; mix just until combined for a lighter texture.
- Not lining the pan: Skipping parchment paper or grease can cause the bars to stick; always ensure the pan is prepared to easily release the dessert.
- Skipping the toothpick test: Not checking doneness can lead to under-baking or over-baking; always perform the toothpick test for best results.
- Adding too much salt: Using the incorrect amount of salt can alter the flavor; measure carefully to keep balance.
- Not letting them cool: Cutting into them too early can lead to a mess; let them cool to set properly before slicing.
Variations & Substitutions
- For a different flavor, consider mixing in peanut butter or Nutella alongside the chocolate.
- You could use flavored chocolate bars like caramel or almond for added depth.
- Try adding crushed nuts for extra crunch and flavor contrast.
- Swap the mini marshmallows for flavored options, such as caramel or chocolate, for a twist on traditional s’mores.
- Use graham cracker crumbs instead of pieces for a slightly different texture in the topping.
Storage & Reheating
You can store these dessert bars at room temperature for up to 3 days, keeping them in an airtight container to maintain freshness. If you want to keep them longer, refrigerate them for about a week. For freezing, cut the bars into squares and wrap individual pieces in plastic wrap, placing them in a freezer-safe bag for up to 2 months. To reheat, simply warm them in the microwave for 10-15 seconds to enjoy the gooey texture without drying them out.
Nutrition Information
- Calories: 200
- Total Fat: 10g
- Saturated Fat: 6g
- Carbohydrates: 28g
- Fiber: 1g
- Sugar: 14g
- Protein: 2g
- Sodium: 150mg
Frequently Asked Questions
Can I make this recipe ahead of time?
Yes, these bars can be made ahead of time. They hold up well for a few days at room temperature or can be stored in the refrigerator.
How long does it last in the fridge?
When stored in an airtight container, these bars will usually last about one week in the refrigerator while maintaining their flavor and texture.
Can I freeze this recipe?
Yes, you can freeze the bars. Wrap them individually in plastic wrap and store them in a freezer-safe bag for up to two months.
What can I substitute for one ingredient?
If you’re short on sourdough starter, using plain yogurt or more eggs could work as a temporary substitute for moisture.
Why didn’t my recipe turn out as expected?
Common reasons include using cold ingredients, overmixing the batter, or not following the baking times carefully. Each of these can affect the texture and overall outcome of your dessert bars.
Final Thoughts
Making Sourdough S’mores Dessert Bars is a straightforward journey that offers both a delicious result and a cozy kitchen experience. With their inviting flavors and textures, these bars are bound to become a favorite. Whether you’re sharing them with family or savoring them alone, their comfort and simplicity can be a delightful addition to your culinary repertoire. Enjoying the first bite reminds you of the joy found in classic treats made from scratch.
Sourdough S'mores Dessert Bars
Ingredients
Dry Ingredients
- 2 cups all-purpose flour Provides structure
- ½ teaspoon baking powder Adds leavening
- ½ teaspoon Kosher salt Use ¼ teaspoon if using table salt
Wet Ingredients
- ½ cup unsalted butter, melted Adds moisture and richness
- 1 cup brown sugar, packed Sweetens and adds depth
- 1 large egg, room temperature Binds ingredients
- ½ cup sourdough starter discard, room temperature Adds moisture and flavor
- 1 teaspoon vanilla extract Adds warmth and sweetness
Mix-ins and Toppings
- 4 bars Hershey's Milk Chocolate, broken into pieces 3 bars folded into batter + 1 bar for topping
- ½ cup mini marshmallows Adds gooey texture
- ½ cup graham cracker pieces Offers crunch and classic s'more flavor
Instructions
Preparation
- Preheat your oven to 350°F (175°C). Prepare an 8-inch square aluminum pan by lining it with parchment paper or greasing it well.
- In a medium bowl, whisk together flour, baking powder, and salt.
- In a large bowl, whisk melted butter and brown sugar until smooth.
- Add the egg to the butter and sugar mixture, whisking until combined.
- Stir in sourdough starter and vanilla extract until smooth.
Baking
- Gently fold the dry mixture into the wet mixture until no dry flour remains.
- Fold in pieces from three Hershey’s Milk Chocolate bars.
- Spread the batter evenly in the prepared pan.
- Top with remaining chocolate bar pieces, marshmallows, and graham cracker pieces, gently pressing them down.
- Bake for 30 minutes or until a toothpick inserted into the center comes out clean or with a few moist crumbs.