Sometimes, the simplest recipes bring the most satisfaction. A warm, fruity dessert can brighten up a weeknight dinner or sweeten a family gathering. This dish is a great option for those who want to enjoy a comforting dessert without spending hours in the kitchen. The ease of preparation allows you to focus on connecting with those around you, whether you’re sharing it during quiet moments at home or enjoying it with friends and family. Let’s dive into this straightforward recipe.
Why You’ll Love This Recipe Frozen Strawberry Dump Cake with Yellow Cake Mix
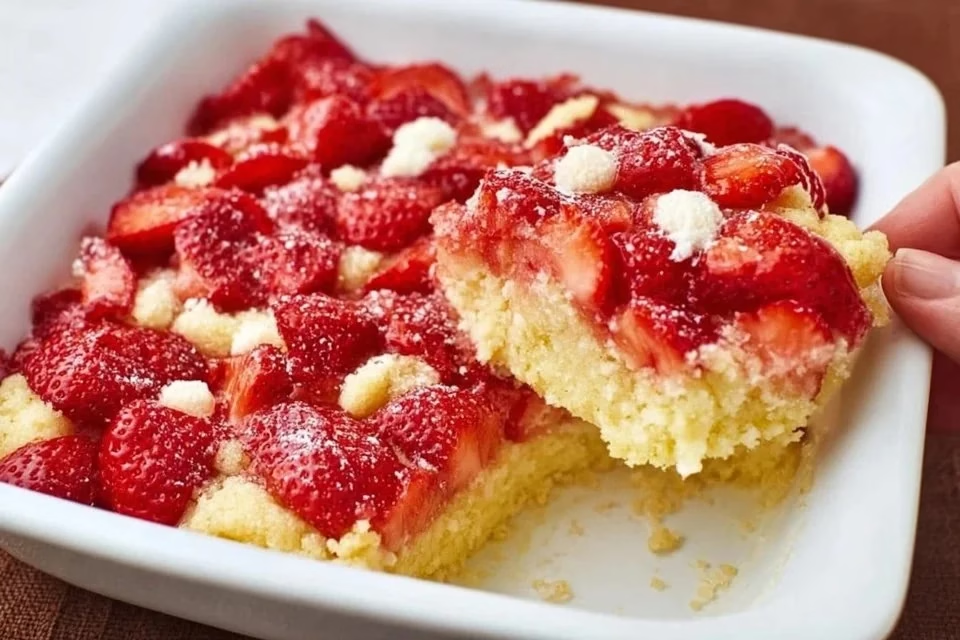
This recipe stands out for its ease and reliability, making it a go-to for busy days. The combination of strawberries and yellow cake mix creates a comforting dessert with a balanced flavor that appeals to many. With minimal effort and ingredients, you can provide something delicious any day of the week.
Kitchen Tools You’ll Need
- 9×13-inch baking dish
- Mixing bowl
- Measuring cups
- Measuring spoons
Ingredients
- 2 (16 oz. pkgs.) frozen strawberries or 4 heaping cups (for moisture and natural sweetness)
- 1 (15.25 oz. box) yellow cake mix (adds structure and texture)
- 1/2 cup butter (1 stick), melted (provides moisture and richness)

How to Make Frozen Strawberry Dump Cake with Yellow Cake Mix
Step 1. Begin by preheating your oven to the appropriate temperature. This ensures that your cake starts baking evenly from the moment it goes in, which is key for achieving a consistent texture throughout.
Step 2. In a 9×13-inch baking dish, pour in the two packages of frozen strawberries. If you’re using heaping cups, make sure they fill the dish nicely. This step provides a fruity base that will lend moisture to the recipe as it bakes.
Step 3. Next, sprinkle the yellow cake mix evenly over the layer of strawberries. It’s important to cover the fruit entirely for even cooking. The dry mix will form a lovely top layer and soak up the liquid released by the strawberries as it bakes.
Step 4. Now, pour the melted butter over the cake mix. Make sure to do this evenly across the surface to help the cake develop a golden crust. The butter not only adds flavor but also binds the ingredients together as it bakes.
Step 5. Carefully place the baking dish in the preheated oven. As it bakes, the mixture will bubble and create a delicious aroma, signaling that it’s coming together nicely. Watch for a golden topping as an indicator of doneness.
Step 6. After baking, take the dish out of the oven and allow it to cool slightly. This will help set the layers and make it easier to serve. You can tell it’s ready when the top is firm and has a nice golden color.

Serving Suggestions
This dump cake is versatile enough to serve at various times. It makes a delightful breakfast treat when paired with a dollop of yogurt or whipped cream. For snacks, enjoy it warm right out of the dish for cozy afternoons. It’s also a fantastic addition to family meals, offering a sweet finish to a hearty dish. If you have leftovers, enjoy them heated the next day, as the flavors continue to meld together beautifully.
Pro Tips for Best Results
- Ensure the butter is evenly distributed to achieve a cohesive texture.
- Allow the cake to cool for a few minutes before serving to help stabilize the layers.
- Serve this dessert with ice cream, whipped topping, or fresh fruit for added flavor and texture.
- Experiment with the baking time based on your oven’s quirks; ovens can vary, so keep an eye on it.
- Use a spatula to scoop out pieces to avoid disturbing the layers too much.
Common Mistakes to Avoid
- Not using frozen strawberries: Fresh strawberries can cause the mixture to become too watery, resulting in a soggy texture. Stick with frozen for the right amount of moisture.
- Skipping the butter: Omitting the melted butter can lead to a dry topping, which doesn’t bind the cake mix properly. Ensure you include the full amount for a desirable texture.
- Uneven cake mix distribution: Not spreading the cake mix evenly can cause uneven baking and results in some areas being dry while others are too moist. Aim for an even layer over the strawberries.
- Overbaking: Leaving the cake in the oven too long can lead to a tough crust. Keep an eye out for the golden top to know when it’s ready.
- Not letting it cool: Serving it immediately can lead to messy portions. Allowing a few minutes for cooling helps it set for better presentation.
- Using the wrong dish size: A smaller dish may lead to overflow while baking, while a larger dish can dry it out. Stick with a 9×13-inch to maintain balance.
Variations & Substitutions
While the classic version is delicious, you can also try using different flavored cake mixes like lemon or white to alter the taste. If you prefer a more tart flavor, adding a sprinkle of lemon juice to the strawberries can enhance the flavor profile. For a bit more texture, mix in some chopped nuts or coconut into the cake mix before baking.
Storage & Reheating
Leftovers can be stored at room temperature for about a day. For longer storage, keep it in the refrigerator, where it will last for about 3-5 days. If you want to freeze any remaining portions, place them in an airtight container, where they’ll maintain quality for about three months. To reheat, simply warm it in the oven or microwave until heated through, keeping an eye on it to preserve the texture.
Frequently Asked Questions
Can I make this recipe ahead of time?
Yes, you can prepare the dish ahead, but it’s best to bake it fresh to enjoy the ideal texture. However, you can layer the ingredients in the baking dish and refrigerate them until you are ready to bake.
How long does it last in the fridge?
The dump cake can be stored in the refrigerator for about 3-5 days. Make sure it’s covered to keep it fresh.
Can I freeze this recipe?
Yes, after baking, you can freeze the leftovers in an airtight container for up to three months. Thaw it in the refrigerator before reheating.
What can I substitute for one ingredient?
If you don’t have yellow cake mix, you can use white or lemon cake mix as a substitute for a slightly different flavor.
Why didn’t my recipe turn out as expected?
Common issues like using fresh strawberries instead of frozen or not allowing it to cool can impact the final result. Take care to follow the instructions closely for the best outcome.
Final Thoughts
Preparing this Frozen Strawberry Dump Cake is a wonderful way to create a comforting dessert without too much fuss. With just a few ingredients and steps, you can turn frozen strawberries into a warm, indulgent treat. Enjoying this cake is about savoring the flavors and sharing it with loved ones. It’s a reliable recipe that invites everyone to gather and share moments together, providing warmth and comfort with every bite.

Frozen Strawberry Dump Cake
Ingredients
Main Ingredients
- 2 packages 2 (16 oz. pkgs.) frozen strawberries Use frozen strawberries for moisture and natural sweetness.
- 1 box 1 (15.25 oz. box) yellow cake mix Adds structure and texture.
- 1/2 cup 1/2 cup butter, melted Provides moisture and richness.
Instructions
Preparation
- Preheat your oven to the appropriate temperature.
- In a 9×13-inch baking dish, pour in the two packages of frozen strawberries.
- Sprinkle the yellow cake mix evenly over the layer of strawberries.
- Pour the melted butter over the cake mix evenly.
Baking
- Place the baking dish in the preheated oven.
- Bake until the top is golden and bubbling.
- After baking, remove from the oven and allow to cool slightly.


